34 TM1700-SERIES ZP-BL16E BL1448GE
4 CABA LOCAL
If you want to rename it see the next section, “Edit
breaker ID”.
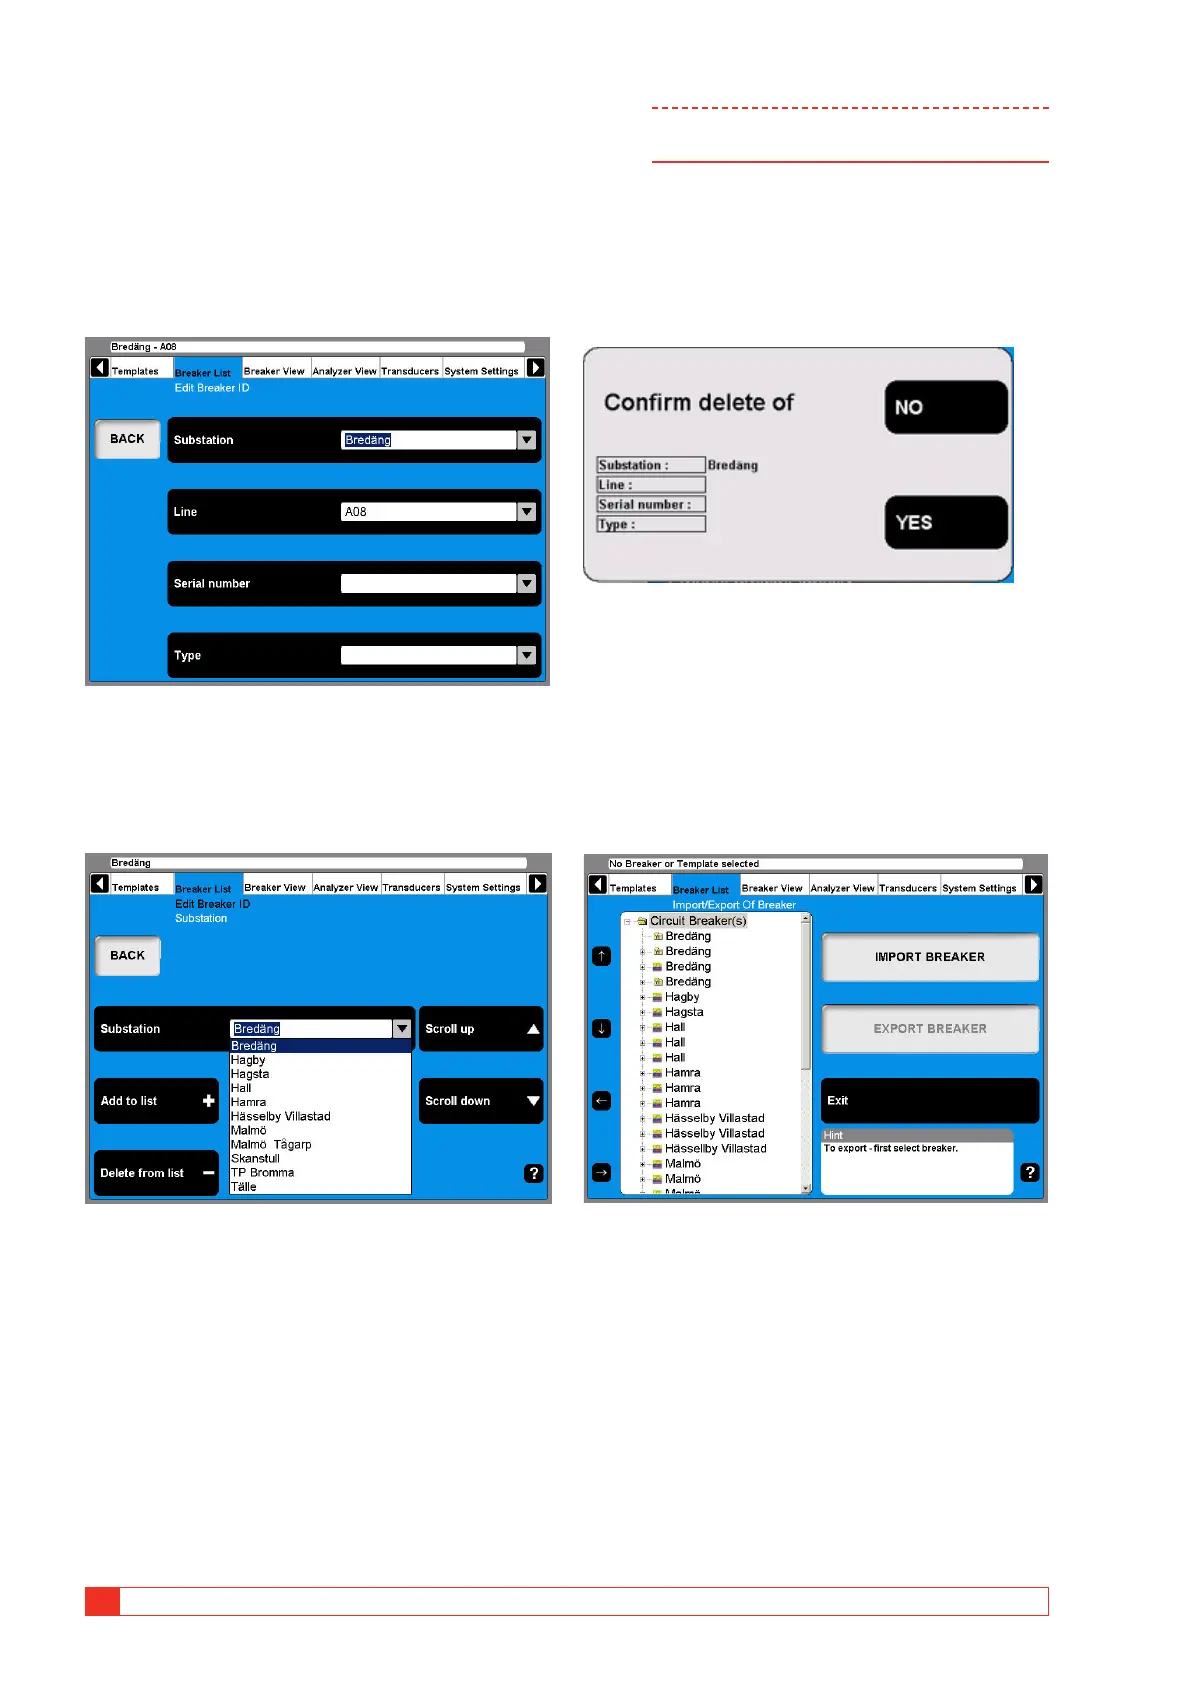
Edit Breaker ID
1] Navigate to the breaker that you wish to
edit.
2] Press the “EDIT BREAKER ID” button.
The default label for ID1 is Breaker ID1. In this example it
has been set to Substation. The four labels for the ID:s can
be user defined, see section “4.14 System Settings menu”
on page 32.
3] Press the “Substation” (Breaker ID1) button.
4] Use the “Scroll up” / “Scroll down” naviga-
tion buttons to choose from the user defined
drop down menu. Go to the next step if you
wish to add a breaker ID to the drop down
menu.
5] Fill in the text field with a new substation
name.
6] Press the “Add to List” button. (Use the De-
lete button to remove items from the list.)
7] Press the “BACK” button.
8] Repeat from step 3 to define the 3 additional
ID:s.
Note To change set-up of a breaker please refer to
chapter “6.5 Breaker view menu”.
Delete a breaker
1] Navigate to the Breaker that you wish to
delete.
2] Press the “DELETE BREAKER” button.
3] Confirm the deletion by pressing the “YES”
button.
Import a breaker
1] Navigate to the root level folder labeled
Circuit Breaker(s).
2] Press the “IMPORT/EXPORT OF BREAKER”
button.
3] Press the “IMPORT BREAKER” button.
 Loading...