BL1448GE ZP-BL16E TM1700-SERIES
41
4 CABA LOCAL
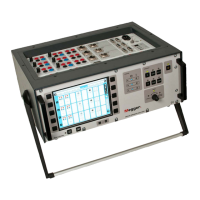
4.11 Breaker View menu
The Breaker View main menu is the starting point for
setting up the technical breaker and measurement
details. All settings done here will affect the breaker
individual that is marked in the breaker list.
The values can be set by using the numeric keys or by
using the display buttons.
Make settings for a breaker
Number of Phases
Here you enter whether the test object is a single or a
three-phase breaker.
Number of interrupters per phase
By repeatedly pressing the button you alter the value
to what is necessary for your test. The highest possible
value is two if number of phases is three and six if
number of phases is one.
Resistor contact
Here you select whether the test object is equipped
with resistor contacts (PIR, Pre-insertion resistor con-
tact) or not.
Operating mechanism
This button is used to select whether the test object
has a common or one separate operating mechanism
per phase.
Number of a-contacts per operating
mech.
By repeatedly pressing the button you alter the num-
ber of a-contacts per operating mech.
Number of b-contacts per operating mech.
By repeatedly pressing the button you alter the num-
ber of b-contacts per operating mech.
Breaker set up example
The setting shown above is done for a circuit breaker
with three phases and a separate operating mecha-
nism for each phase. Then it is recommended that the
instrument has two Control sections.
The circuit breaker has two breaks per phase. Resistor
contacts are also chosen. By this the resistor contact
timing and the resistor value (PIR contacts) will be
measured automatically by the same channel that
measures the main contact.
The Circuit breaker has one a- and one b-contact per
operating mechanism. By setting the instrument like
shown here it will automatically measure the contacts
in series with the operating coil. Totally six auxiliary
contacts will be measured when you have selected
separate and one a-contact and one b-contact. The
Control section will measure this and no extra cabling
is needed. If you have auxiliary contacts that are not in
the coil circuit you have to select more auxiliary con-
tacts i.e. if you want to measure one a-contact that is
not in series you have to select two a-contacts in the
instrument. For other auxiliary contacts you have to
connect them to an Auxiliary section.
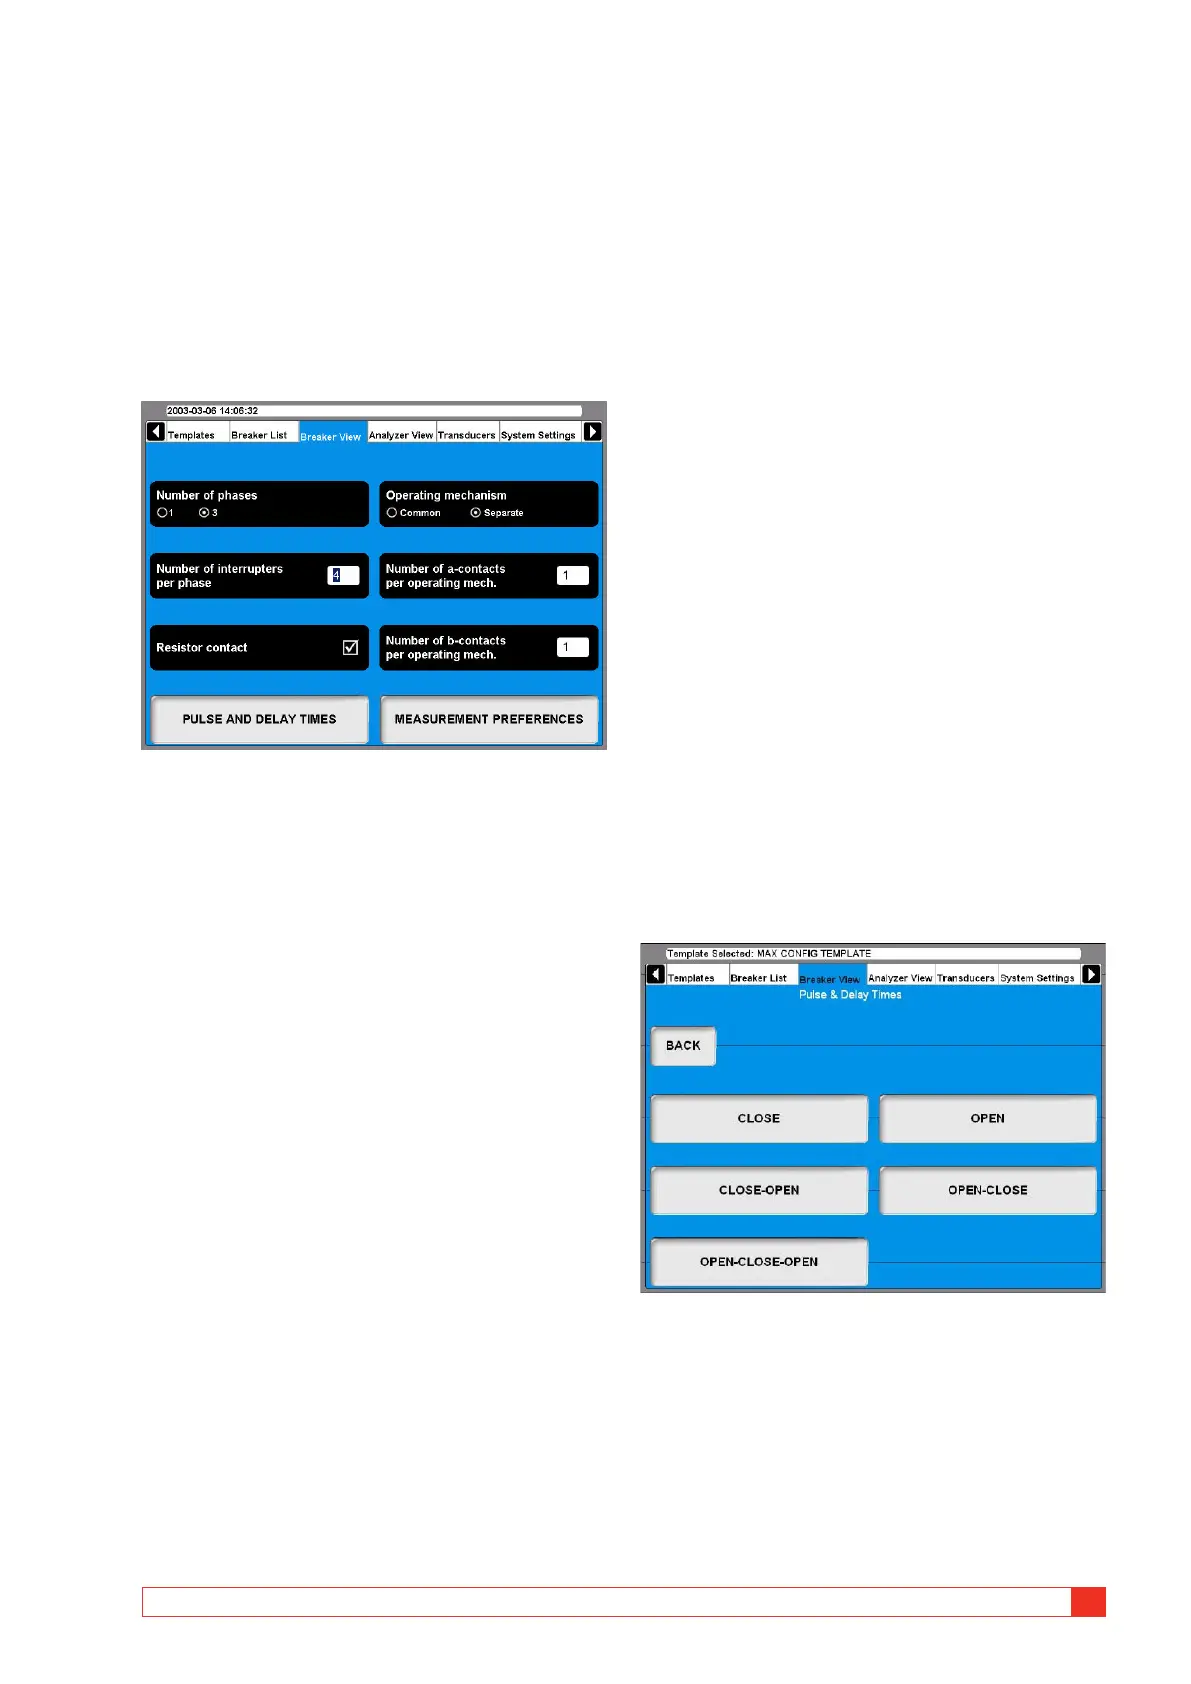
Setting the pulse and delay times
1] In Breaker View press the “PULSE AND DE-
LAY TIMES” button to make the settings. The
following submenu appears.
2] For each operation sequence the settings
are to be done separately. Press the desired
sequence button. For each sequence the set-
tings are done as follows.
 Loading...