POWERHEAD
Page 4A-44 90-855347R1 JANUARY 1999
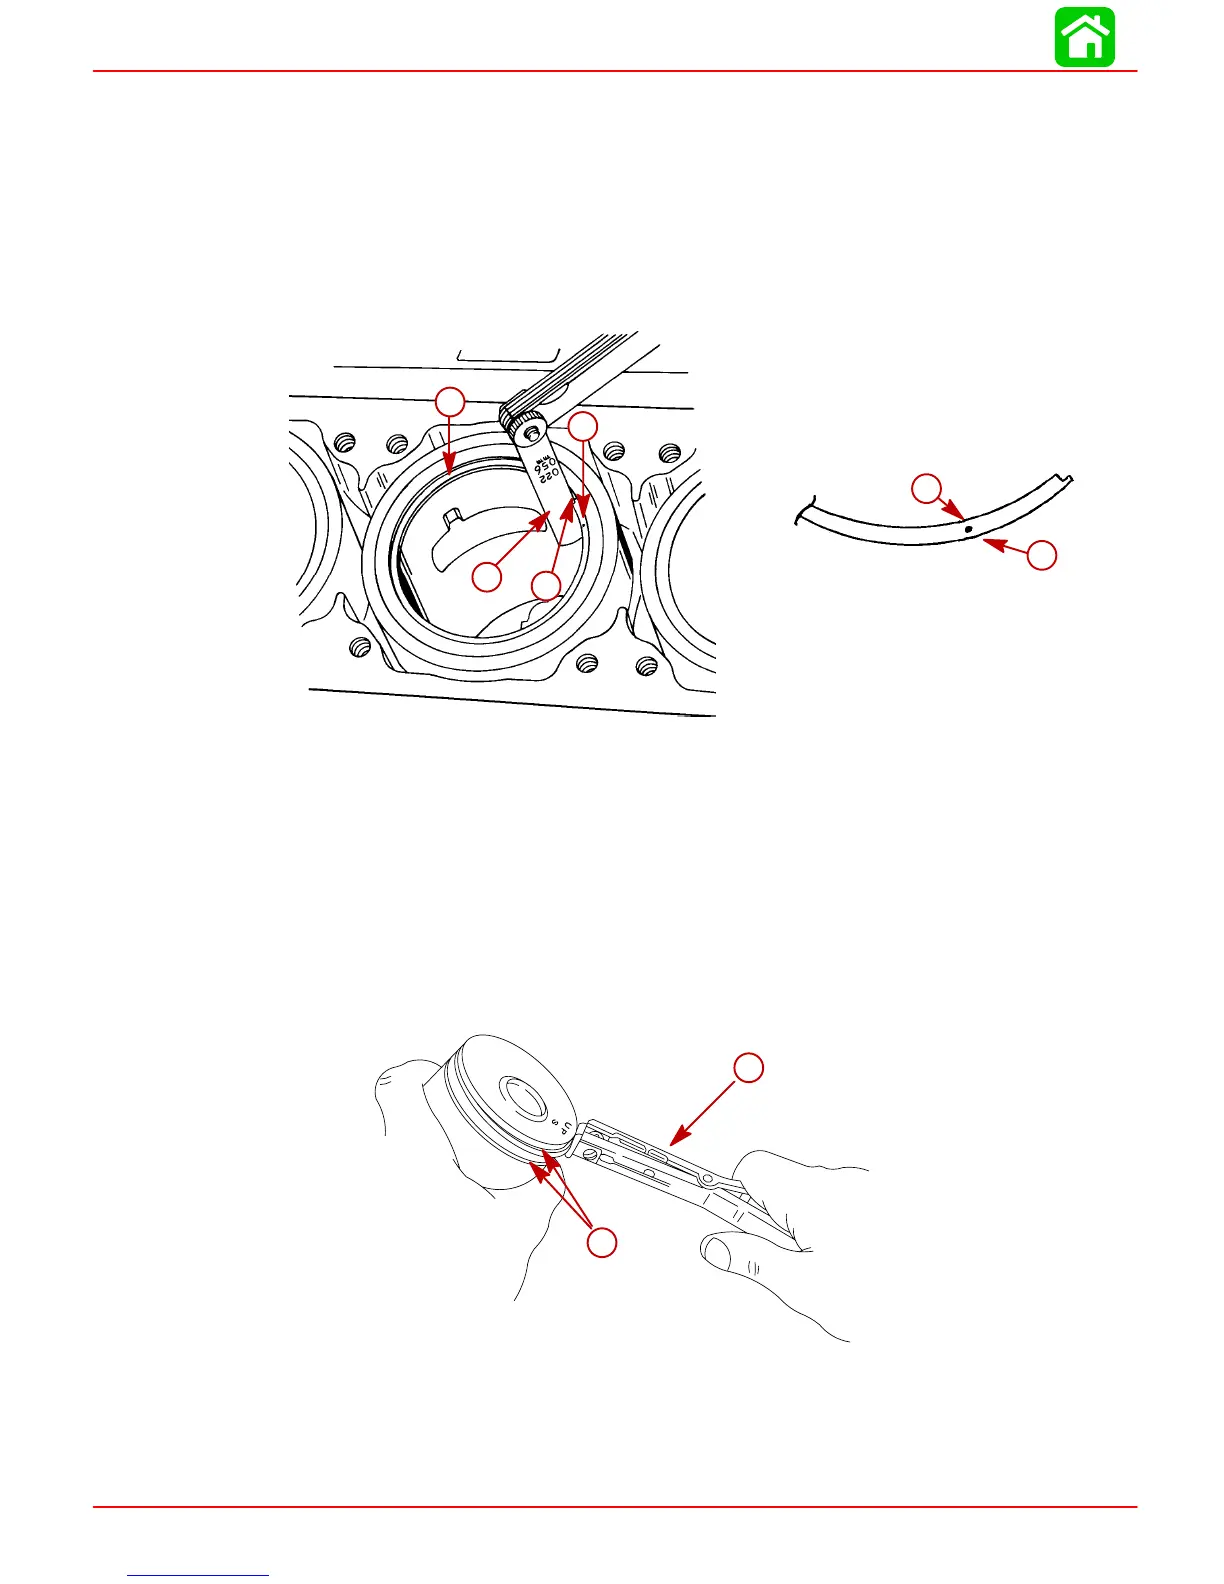
Piston Installation
1. Before installing new piston rings, check gap between ring ends by placing each ring
in its respective cylinder, then pushing ring about 1/2 in. (12.7 mm) into cylinder using
piston to assure proper position.
2. Check end gap of each new piston ring with a feeler gauge. End gap must be within
0.010 in. to 0.018 in. (0.25 mm to 0.45 mm). If end gap is greater, check other piston
rings in cylinder bore, until rings (within tolerance) are found.
IMPORTANT: Piston ring side with dot or letter must be facing up.
51852
b
a
c
d
e
f
a-Piston Ring
b-Dots (Faces Up)
c-Feeler Gauge
d-Ring End Gap
e-Dot or Letter
f-Piston Ring
3. Use Piston Ring Expander (91-24697) and install piston rings (dot side up) on each
piston. Spread rings just enough to slip over piston.
4. Check piston rings to be sure that they fit freely in ring groove.
5. Lubricate piston, rings and cylinder wall with 2-Cycle Outboard Oil.
56155
b
a
a
b
a-Piston Ring Expander
b-Dot Side “Up” on Piston Ring
6. Rotate each piston ring so end of ring is aligned with locating pin as shown.
7. Install Piston Ring Compressor.
 Loading...


