37
Checking Individual Components
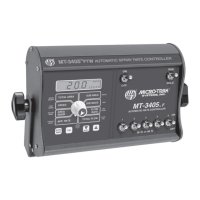
CONSOLE:
The only way to field test a console is to connect it to a harness
on a vehicle with a known working console or install it on an E-
POP (Electronic Point of Purchase) display stand.
HARNESS:
The harness can be checked using an ohmmeter or continuity
tester. The main wiring diagram shows the pin out of all
connectors.
See page 10.
ELECTRICAL INTERFERENCE:
Erratic operation of the system may be the result of electrical
interference from ignition wires or inductive loads (electrical
clutch, fan, solenoid, etc.). Always try to route wires as far away
from suspect areas as possible.If problems occur,you may need
to relocate the console and/or wiring harness, or install a noise
suppressor.
POWER:
Check power source with the MT-101 or a test light. If there is
no power, trace cable toward battery looking for breaks. Also
check any fuses or circuit breakers that supply power to the
console.
ACCESSORY POWER:
The sp
eed, flow and run/hold cables all have an accessory
power wire. Check for 12 volts between B (usually white) and C
(usually black) of these connectors. If power is not present,
make sur
e the accessory power wire is not open or shorted to
ground or to another wire. If this wire has a problem, the con-
sole may exhibit erratic behavior or not function at all.
RUN/HOLD HALL-EFFECT SENSOR:
Caution: Improper connection or voltage could damage the
Hall-Effect sensor. The Hall-effect sensor works similar to a reed
switch, but requires power in order to function. This particular
t
yp
e of Hall-eff
ect sensor “closes”when near the south pole of a
magnet and is otherwise “open”.
Ground pin C (black) and connect clean 12 volts to pin B (white)
of the Hall-effect sensor cable. Connect the positive lead (red)
of an ohmmet
er or c
on
tinuit
y tester to pin A (red) and the
negative lead (black) of the ohmmeter or continuity tester to
pin C (black) of the Hall-effect sensor cable.
Holding the tip of the sensor up to the south pole of a magnet
should result in a very low resistance (around 300 ohms).Taking
the sensor away from the magnet should result in a very high
resistance (infinite).
RUN/HOLD JUMPER DUST COVER:
T
o t
est f
or pr
op
er continuity on the jumper wire, connect the
ohmmeter to the pins of the dust cover with the jumper wire.
There should be continuity – near zero ohms.
Troubleshooting continued
M
AGNETIC HALL-EFFECT SPEED AND FLOW
SENSORS:
Caution: Improper connection or voltage could damage the
Hall-effect sensor.
The Hall-effect sensor works similar to a
reed switch, but requires power in order to function. Also, this
particular type of Hall-effect sensor requires alternating
magnetic polarities in order to switch.This means that the north
pole of a magnet will “open”the Hall effect and the south pole of
a magnet will “close”the Hall effect.
Ground pin C (black) and connect clean 12 volts to pin B (white)
of the Hall-effect sensor cable. Connect the positive lead (red) of
an ohmmeter or continuity tester to pin A (red) and the negative
lead (black) of the ohmmeter or continuity tester to pin C of the
Hall-effect sensor cable.
Holding the tip of the sensor up to the north pole of a magnet
should result in a very high resistance (infinite),while holding the
tip of the sensor up to the south pole of a magnet should result
in a very low resistance (around 300 ohms).
VANSCO RADAR SPEED SENSOR:
Carefully check your installation and operating instructions. The
following are tips for troubleshooting;
1. Disconnect the radar adapter cable from the console harness
2. Check for 12 VDC between pins B and C of the main harness
connector (yellow tie). If not present, console or harness may be
defective.
3. Using a jumper wire (paper clip bent into a "U"), rapidly short
together positions A and C of the main harness speed connector
(y
ellow tie) several times. The console should respond with some
speed reading. If not, the console or harness may be defective.
4.
R
ec
onnect the radar adapter cable to the main harness speed
connection (yellow tie).
5.
D
isc
onnec
t the r
adar fr
om the radar adapter cable.
6. Check for 12 VDC between pins 1 and 3 of the radar adapter
c
onnec
t
or
.
I
f it is not pr
esent but was present in step 2, the radar
adapter cable may be defective.
7. Using a jumper wire (paper clip bent into a "U"), rapidly short
together positions 2 and 3 of the radar connector (round 4-pin)
several times. The console should respond with some speed
reading. If not but had a reading in step 3, the radar adapter cable
may be defective.
8. If system passes all above tests, the radar may be defective.