40
Plumbing Guidelines
G
ENERAL
In order for your sprayer to function properly, it must be correctly
plumbed. The system diagrams (on pages 16 and 17) show the
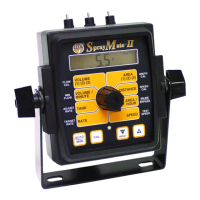
plumbing configuration that works best with the SprayMate II
Sprayer Controller. This section will explain the purpose of each
component, list some problems it can cause and recommend
some possible solutions to those problems.
A word about pressure drops: All hose, valves and fittings
(especially elbows) cause undesirable pressure losses. Keep hoses
as large as practical. Don’t use longer hoses than necessary. Avoid
bends whenever possible. Use as few fittings as possible. Use full
port valves or the next larger size valve. Long hoses should be
supported to avoid sagging and kinking. Many spray tip
manufacturers have charts showing pressure drop for various
fittings and hose sizes.
Now let’s break the system diagram into five sections and cover
each one separately. The five sections are the pump inlet line, the
agitation line, the flowmeter (boom) line, the servo line and the
pump itself.
PUMP INLET
The hose connecting the tank to the pump should be at least as
large as the pump inlet port. In most cases 11/4" is a good size.The
valve in this line is for complete tank shut-off only and should
always be fully open during operation.If this hose is too small or the
valve is partially closed,you may not be able to reach your high end
goals and pump damage could occur.
AGITATION
The size of the agitation line is dependent upon the amount of
agitation required which is determined by the size of the tank and
the type of chemical being used. In most cases a 1" hose is large
enough.
SER
VO
On the system diagram,the hose between tee “B”and the servo can
usually b
e 3/4" but 1" will also w
or
k. The hose between the servo
and tee “C” should be at least as large as the servo.If these lines are
too small, you may experience little or no pressure adjustment.
FLOWMETER
The line feeding the flowmeter and the boom shut-off valves
should b
e a
t least as lar
ge as the flowmeter.The size of lines going
from the shut-off valves to each boom section depends on the flow
r
a
t
e of each b
oom.
PUMP
T
he pump must ha
v
e enough c
apacit
y t
o sa
tisfy the agitation,
servo and flowmeter sections of the plumbing. To determine if
your pump is large enough you must add up the gallons per
minute of all three sections. The following example will take
you through the steps involved.
Example: Let’s say our example sprayer has a 300-gallon tank
with a Spraying Systems 6290 SC-8 Jet Agitator.The
agita
t
or uses 10.2 GPM a
t 40 PSI.
The sprayer has a 40',three-section boom.Each section is
160" with four tips at 40" for a total of 12 tips.We plan to
put on a 25 GPA at 5 MPH and in some areas of the fields
we may want to use the Delta feature and increase our
rate to 30 GPA and in other areas decrease to 15 GPA.
A
fter checking the tip charts we find that a TK-5 Floodjet
has a range of 14.9 to 30 GPA at 5 MPH. According to the
c
harts, to get 30 GPA at 5 MPH with a TK-5, the pressure
must be 40 PSI. At 40 PSI a TK-5 will spray 1.0 GPM.So, 12
tips at 1.0 GPM each is a total of 12 GPM.
Now let’s add everything together.
Agitation 10.2
Spray tips 12.0
Servo 5.0
27.2 Total GPM
The above addition shows that the system needs 27.2
GPM at 40 PSI. If we add a 10% margin (27.2 x 1 = 2.72
and 27.2 = 29.92), we have about 30 GPM.To be sure we
have enough volume, the pump should be able to
deliver 30 GPM or more at 40 PSI.
VALVE PURPOSE AND ADJUSTMENTS
Tank Shut-Off Valve
The tank shut-off valve is for convenience only. It allows you to
work on the plumbing without draining the tank. It should
always be fully open during operation.
Agitation Shut-Off Valve
The agitation shut-off valve is mostly for convenience.It allows you
to work on the plumbing without draining the tank. It should
normally be fully open during operation.
Pressure Relief Valve
The pressure relief valve is used to avoid excessive pressure
when the booms are turned off. Start with the handle screwed
mostly out. Slowly bring pump up to operating RPM (make
sure pressure does not go too high). Put the SprayMate II in
MAN and tur
n b
oom on. Hold adjust switch to “+” for about 30
seconds to fully close servo valve.Turn booms OFF. Now slowly
scr
ew handle in un
til maximum desir
ed pressure is reached.
L
o
ck handle in plac
e with locking nut or collar.
Note: Spraying Systems 144H DirectoValve has a maximum
pr
essur
e r
a
ting of 100 PSI (7 bar).
Range Adjust Valve
T
he r
ange adjust v
alv
e is r
equired when the pump is much
larger than necessary.When the range valve is opened,some of
the liquid will be bypassed around the pump to avoid
“
o
v
er
loading
”
the r
est of the system. The setting of the range
adjust valve is determined by the throttle valve. Start with the
range valve fully closed and perform the Prefield System
C
heck
out on pages 33 and 34.
I
f the thr
ottle v
alv
e needs t
o be
more than two thirds closed, open the Range valve slightly and
perform the Prefield System Checkout again.