Chapter 5 Trigger System
45
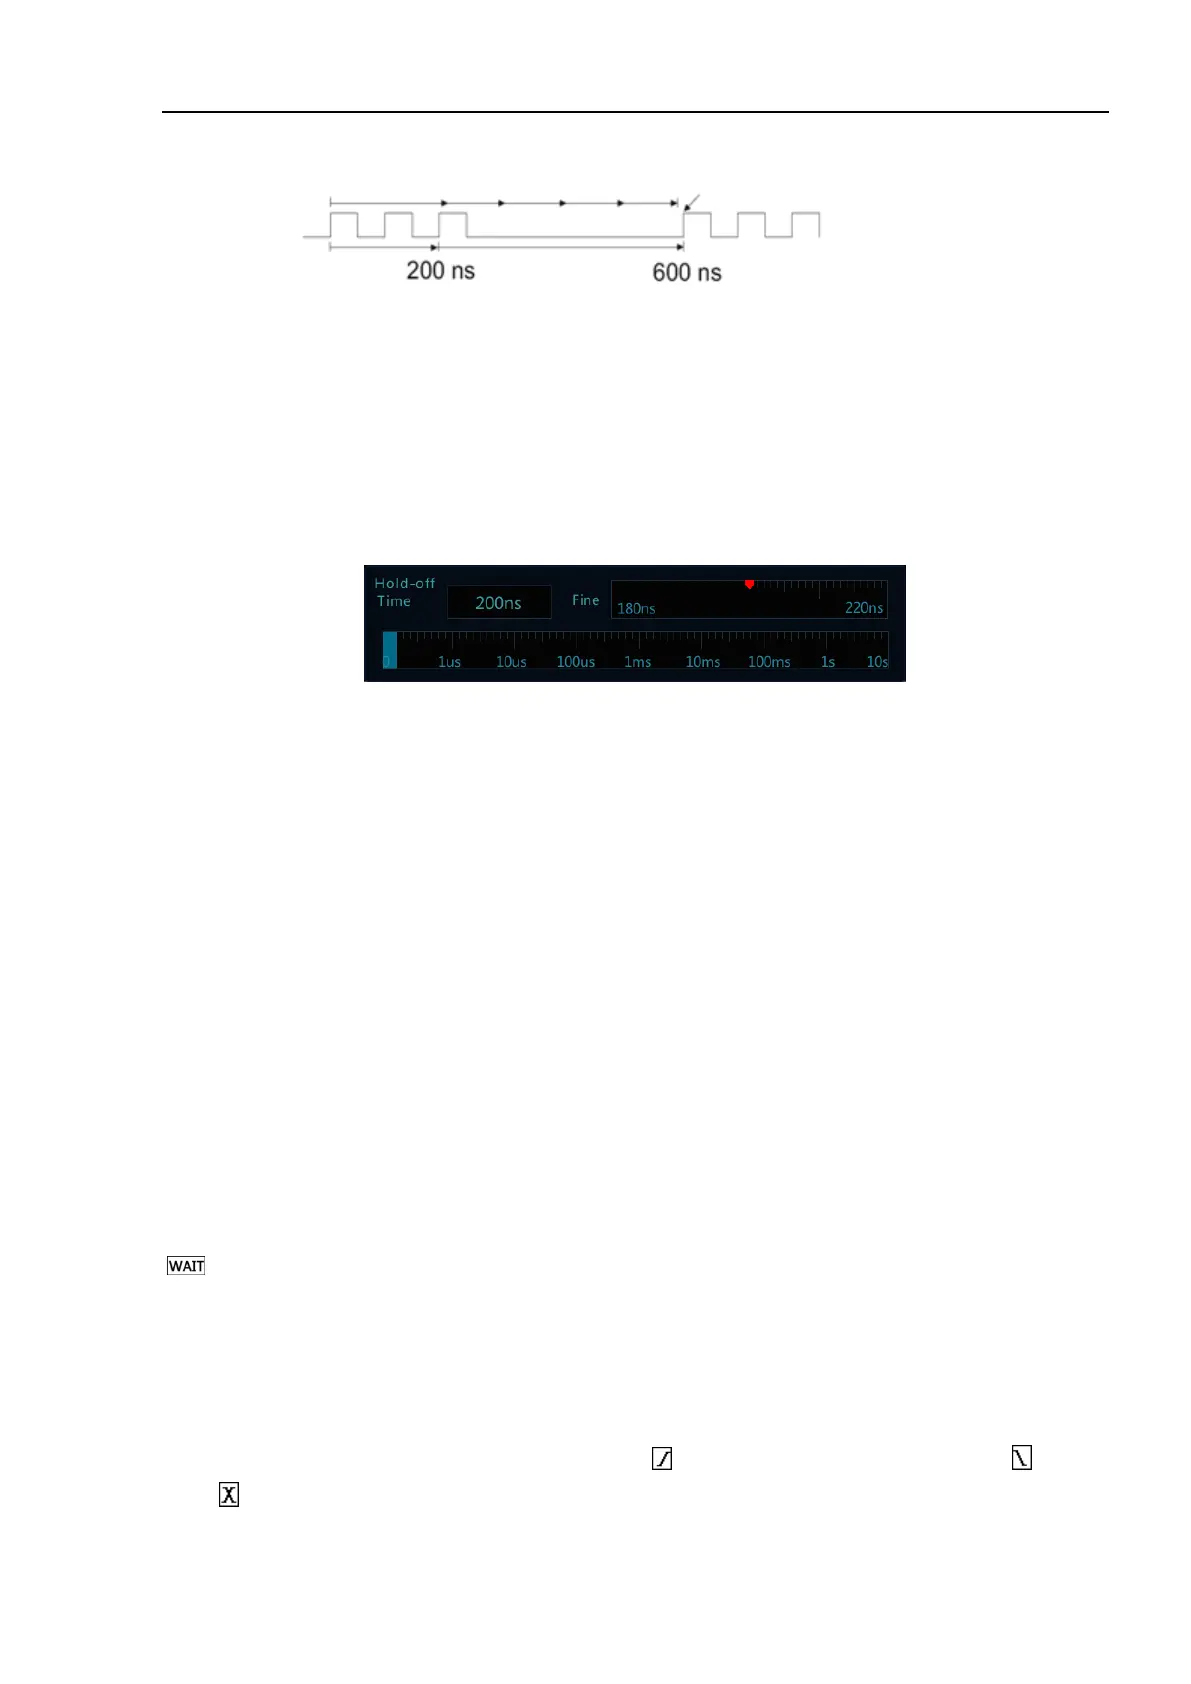
Figure 5-9 Trigger Rejection Time
Set trigger hold-off time:
1) Tap “Trigger” on the main menu to open the trigger menu. Under “Common”, tap the box after “Rejection
Time” to open the rejection time adjustment interface. The trigger time is displayed on the upper left, the
fine adjustment time scale is displayed on the upper right, and the coarse time scale is displayed below, as
shown in Figure 5-10.
Figure 5-10 Trigger Hold-off Time Set Interface
2) When adjusting the time, drag or tap the coarse adjustment scale for coarse adjustment, and then drag the
fine adjustment scale for fine adjustment of the rejection time.
Trigger rejection operation prompt
It is typically used for complex waveforms. The correct rejection setting is usually slightly smaller than one
repetition of the waveform. Setting the rejection time to this time can become the only trigger point for the
repetitive waveform.
Changing the time base setting will not affect the trigger rejection time.
Using Zoom function, you can tap “Run/Stop” to stop, then horizontally move and zoom the data to find the
position where the waveform is repeated. Use the cursor to measure this time and then set the rejection time.
⚫ Use “SingleSEQ” button for single acquisition
Usually when performing a single acquisition, you must initiate some operations on the measured equipment,
and the oscilloscope is not desired to trigger automatically before these operations. The trigger condition indicator
is displayed in the upper left corner of the screen before starting operations in the circuit (this means the
pre-trigger buffer is filled).
5.2 Edge Trigger
When the edge of trigger signal reaches a certain trigger level, the set signal is triggered and generated. Trigger
occurs on either edge of the rising edge (indicating icon at the top of the screen), falling edge ( ) or dual
edge ( ), and the trigger level can be set to change the vertical position of the trigger point on the trigger edge,