Enclosure Installation
Version 5.4 TX3 Telephone Access System Installation and Operation Manual 29
LT-969 Copyright 2019
2.2.3 Installing the Continental enclosure
The Continental enclosure flush mounts directly inside the wall to the wall stud
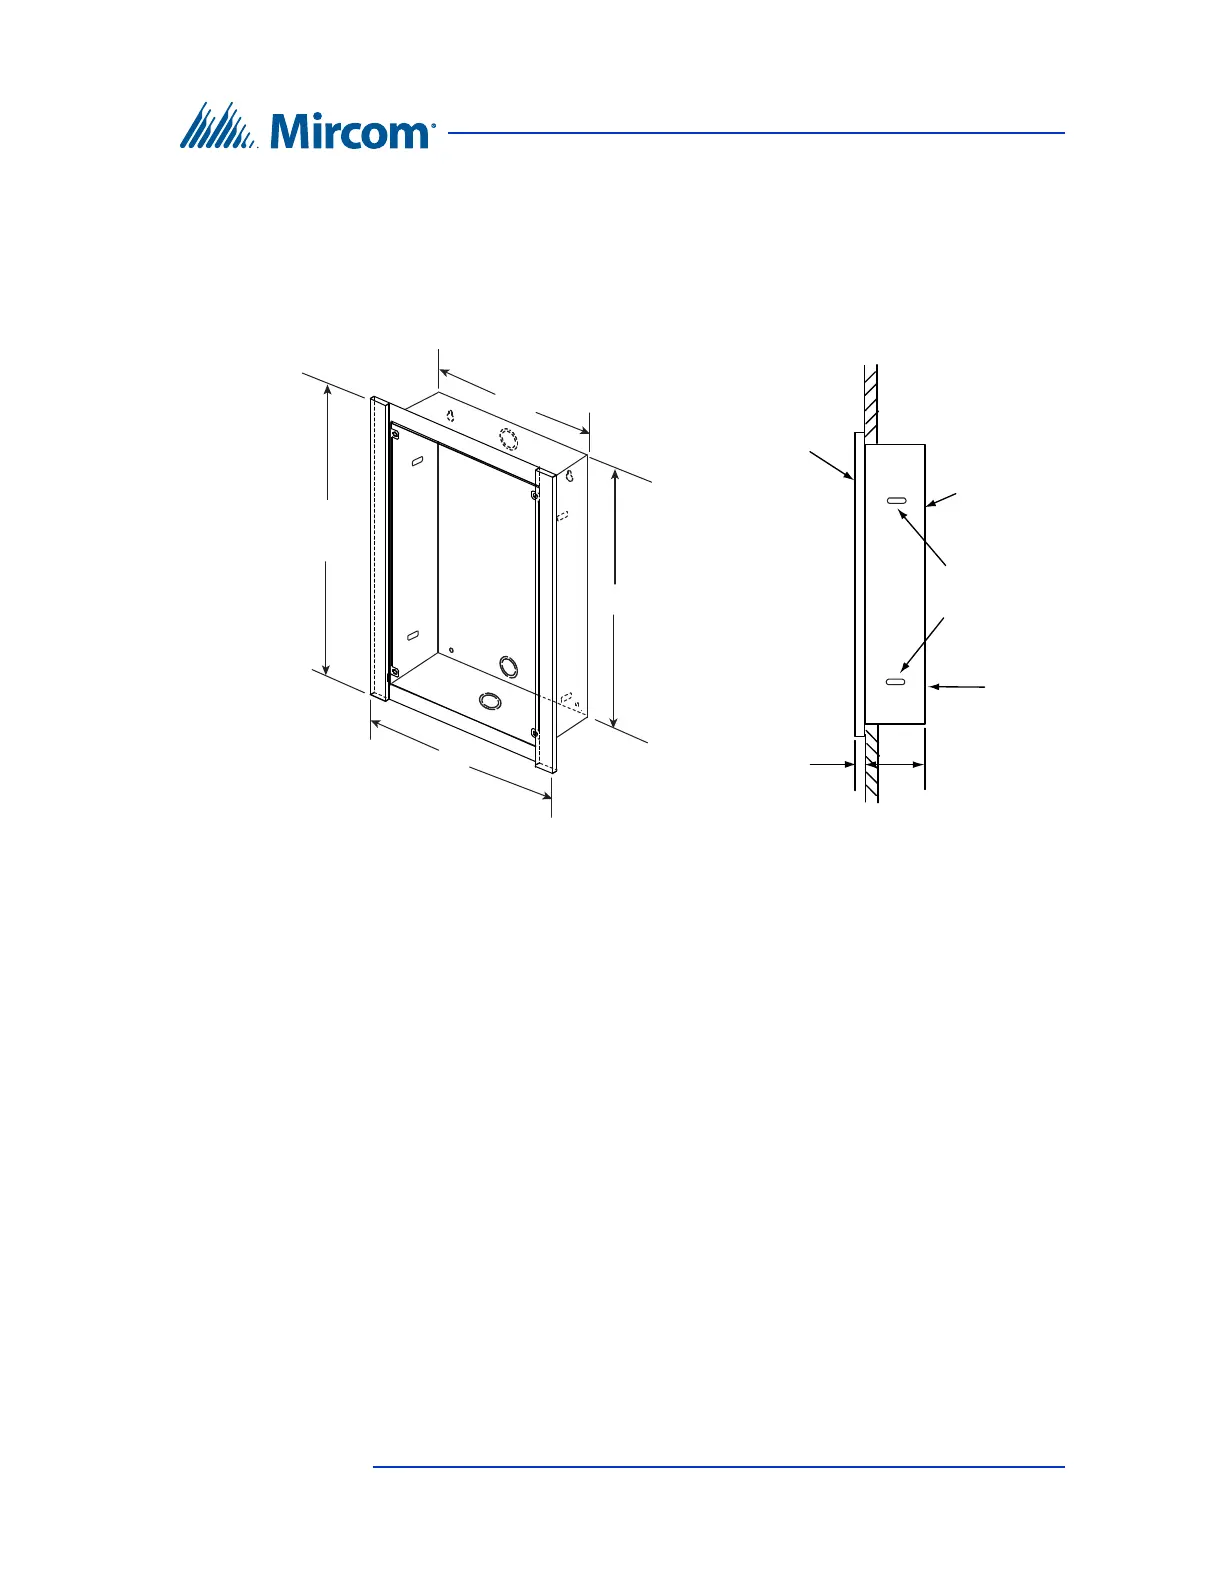
as shown in figure 5. Mount the back box flush with the wall and right-side up
(the ground screw location is at the bottom).
Figure 5. Continental Enclosure Flush Mount
To install the Continental enclosure
1. Find a suitable location for the Continental enclosure beside a wall stud.
2. Using the enclosure as a template, trace an opening in the wall for the cut
out with one side aligned with the side of the wall stud.
3. Cut an opening in the wall ensuring that one side is aligned with the wall
stud.
4. Insert the enclosure into the wall cutout and using the enclosure as a
template mark the top mounting hole location as shown in the side view in
figure 5. Ensure that at least one side is beside a wall stud.
5. Remove the enclosure and place the screw halfway into the wall into the
marked hole location using the supplied screw.
6. Place the enclosure onto the top screw.
10 3/8"
12"
Use the two side
slots for mounting
the box to the
wall stud
16 7/8"
18 1/2"
Cut out in wall should be :
16 7/8” H x 10 3/8” W x 3” D
Outside Frame dimensions are:
18 1/2”H x 12”W x 1/2” D
WALL
FRONT
OUTSIDE
FRAME
SIDE VIEW
BACKBOX
MOUNTING
KNOCKOUTS
3.0 ”
0.5 ”
TOP
The Continental enclosure back box must be
flush mounted with wall
GROUND
SCREW
LOCATION