114
FX3UC Series Programmable Controllers
User’s Manual - Hardware Edition
3 Generic Specifications/Installation Work
3.6 Special Adapter Connecting
3.6 Special Adapter Connecting
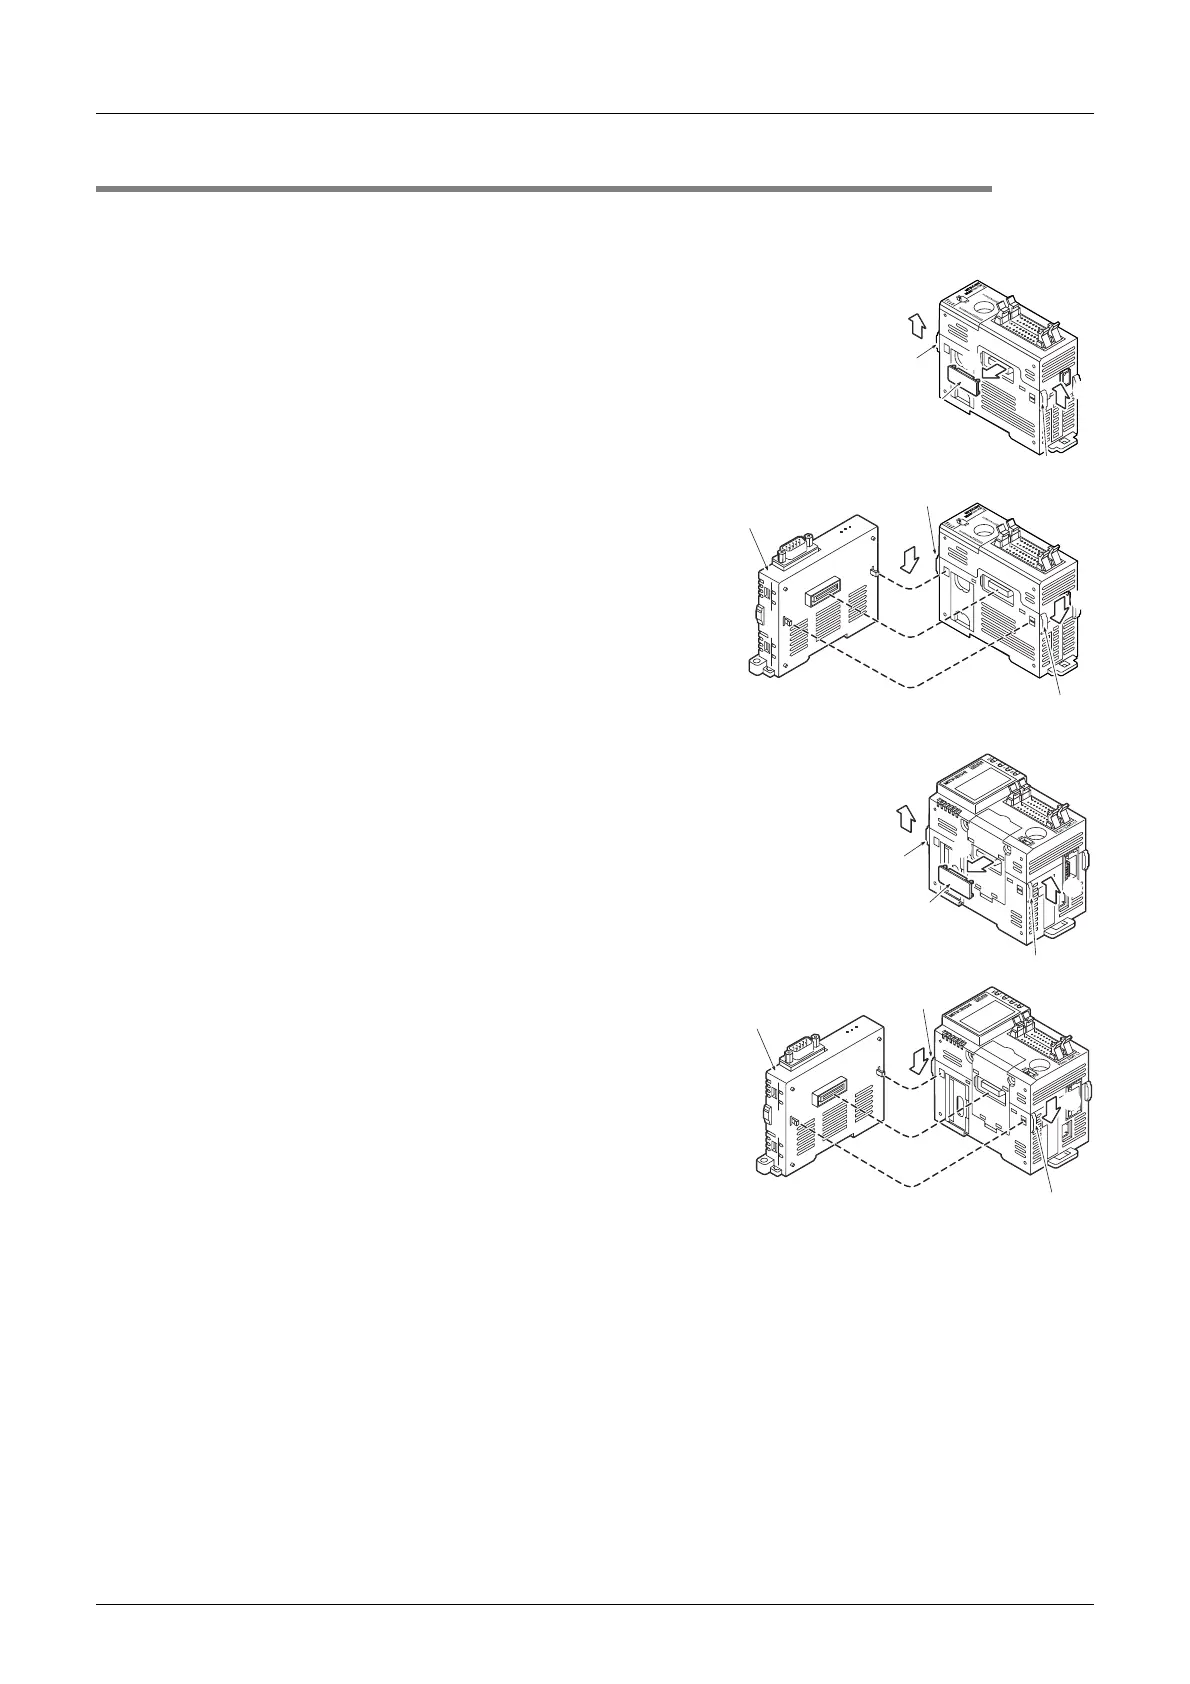
The FX3UC-32MT-LT supports special adapters only when an expansion board is connected.
1. Connection procedure to the FX3UC-MT/D or
FX
3UC-MT/DSS
1) Turn off the power.
Disconnect all the cables connected to the PLC, and
demount the PLC from the DIN rail.
→ For the removal method, refer to Section 3.3.
2) Remove the special adapter connector cover (fig. A).
3) Slide the special adapter slide lock (fig. B) of the main unit.
when connecting this product to another special adapter,
please replace the 'main unit' in the above description with a
'special adapter' and perform the procedure as indicated.
4) Connect the special adapter (fig. C) to the main unit as
shown on the right.
5) Slide back the special adapter slide lock (fig. B) of the main
unit to fix the special adapter (fig. C).
2. Connection procedure to the FX3UC-32MT-LT
1) Turn off the power.
Disconnect all the cables connected to the PLC, and
demount the PLC from the DIN rail.
→ For the removal method, refer to Section 3.3.
2) Install an expansion board to the main unit.
→ For the expansion board installation procedure,
refer to the Section 3.5.
3) Remove the special adapter connector cover on the
expansion board (fig. A).
When connecting this product to another special adapter,
please replace the 'expansion board' in the above description
with a 'special adapter' and perform the procedure as
indicated.
4) Slide the special adapter slide lock (fig. B) of the main unit.
When connecting this product to another special adapter,
please replace the 'main unit' in the above description with a
'special adapter' and perform the procedure as indicated.
5) Connect the special adapter (fig. C) to the main unit as
shown on the right.
6) Slide back the special adapter slide lock (fig. B) of the main unit to fix the special adapter (fig. C).
4)
3)
B
A
B
3)
2)
POWER
RD
SD
FX
3U
-232ADP
5)
C
B
B
4)
4)
4)
5)
B
B
A
4)
4)
4)
3)
POWER
RD
SD
FX
3U
-232ADP
6)
C
B
B
5)
5)
5)
6)
 Loading...