287
FX3UC Series Programmable Controllers
User’s Manual - Hardware Edition
9 CC-Link/LT Built-in master ability (Only FX3UC-32MT-LT)
9.10 Details of the operation mode
1
Outline
2
External
Dimensions
3
Generic
Specifications
4
Power Supply
Specifications
5
Input
Specifications
6
Output
Specifications
7
Examples of
Wiring for
Various Uses
8
Terminal Block
9
CC-Link/LT
Master FX
3UC
(LT only)
10
Display module
FX
3UC
(LT only)
9.10.5 Test (TEST mode) execution procedure
1 Turn the power OFF
Turn the power supply OFF for the PLC, the power supply adapter, and exclusive power supply.
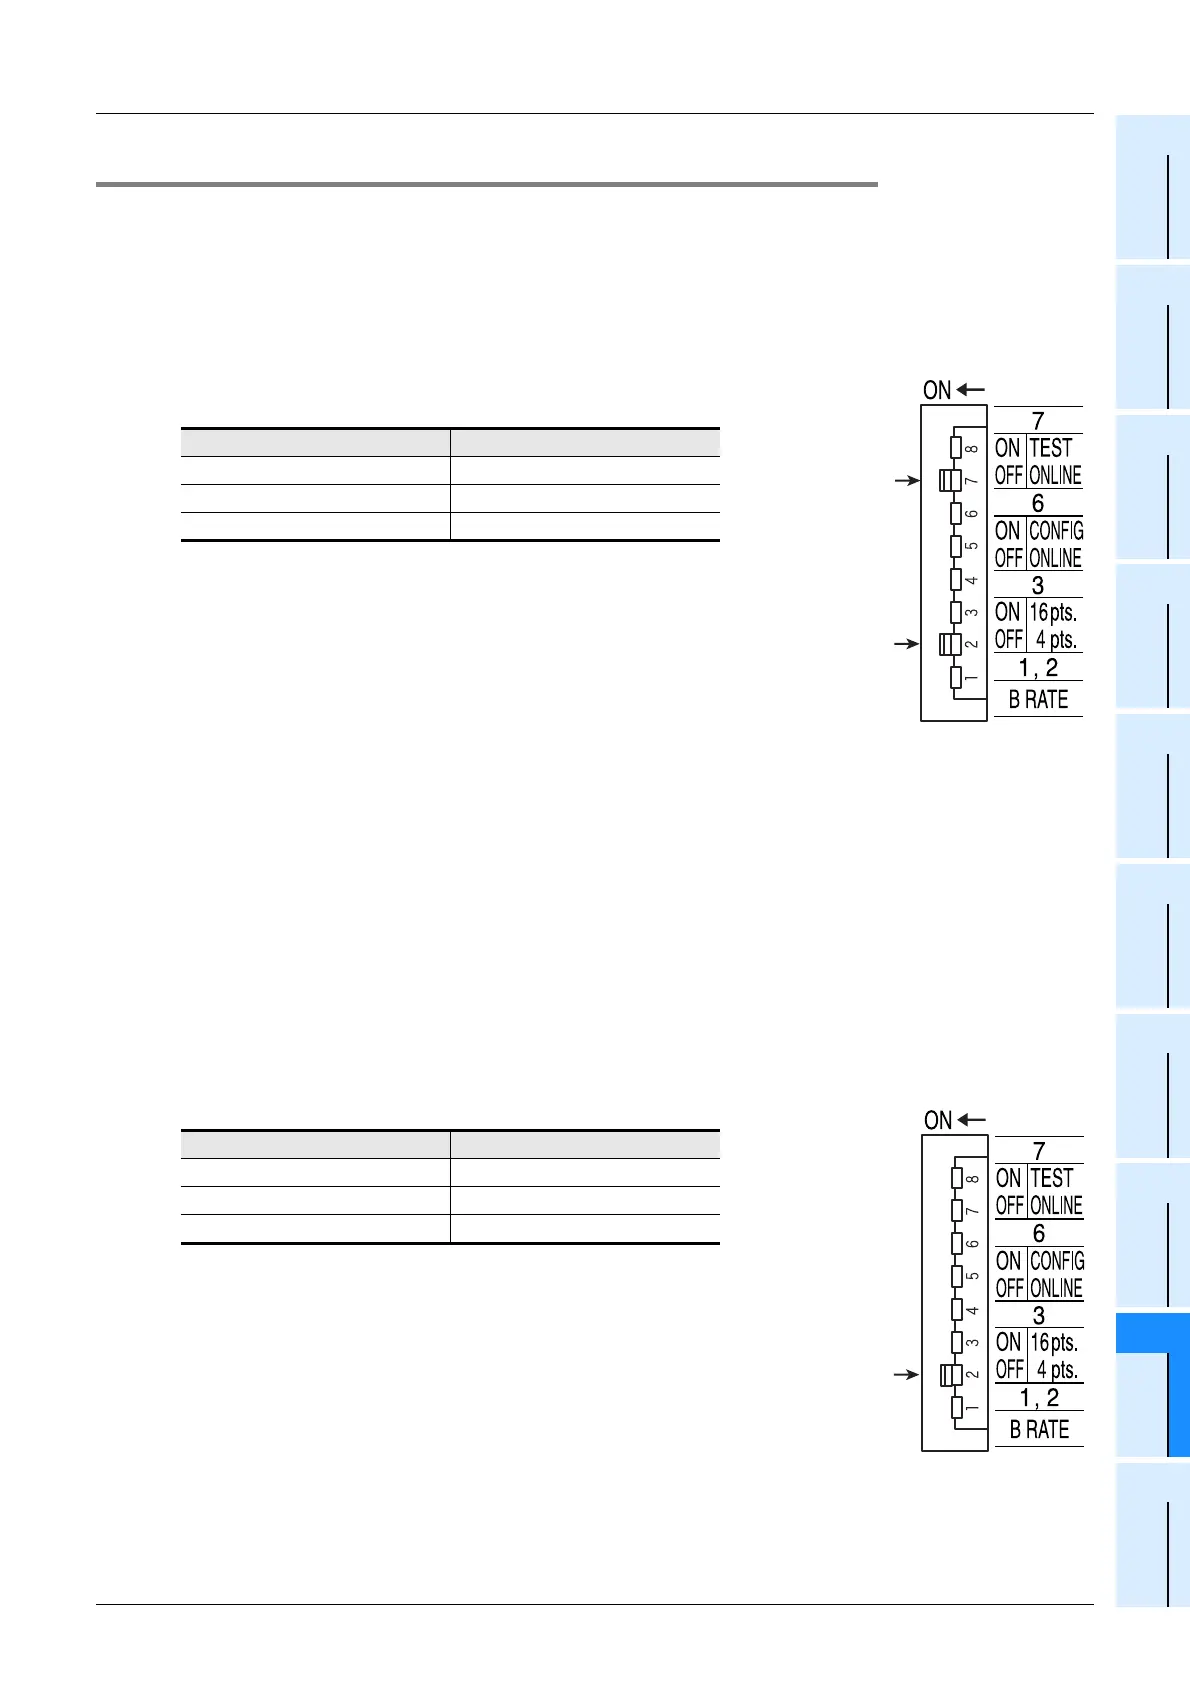
2 Setting the TEST mode
Set the DIP switches as shown in the right figure to set the follow-
ing status.
3 Turn the power ON
Turn ON the power of the PLC.
When the power supply adapter or dedicated power supply is used, turn ON the power in the order
"Power supply adapter (or dedicated power supply) → PLC".
4 Start the test, and check the status indicator LEDs.
The test (self-loop-back test) is completed in several seconds.
The L RUN LED turns ON in the normal status. The L ERR LED turns ON in the error status.
Refer to "Contents indicated by status indicator LEDs and countermeasures" on the previous page.
When the RUN LED is ON, set the ONLINE mode. (Set the DIP switch 6 to OFF and DIP switch 7
to OFF in the built-in master.)
Set the DIP switches as shown in the right figure to set the following status.
Item Setting Content
B RATE 2.5Mbps
16pts/4pts 4-point mode
operation mode TEST mode
Item Setting Content
B RATE 2.5Mbps
16pts/4pts 4-point mode
operation mode ONLINE mode
DIP switch
7 = ON
DIP switch
2 = ON
DIP switch
2 = ON

 Loading...
