5.3 Setting Shelf ID with ODP Pushbutton
The shelf ID for the controller shelves and drive shelves can be changed externally by using the ODP
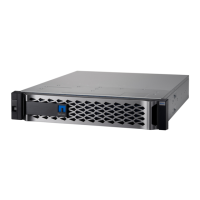
pushbutton, shown in Figure 57 for the EF570 (DE224C).
Figure 57) ODP on the DE224C (front bezel or end caps removed).
Follow these steps to modify the shelf ID:
1. Turn on the power to the shelf if it is not already on.
2. Remove either the front bezel or the left end cap to locate the ODP push button.
3. Change the first number of the shelf ID by pressing and holding the button until the first number on
the digital display blinks, which can take two to three seconds.
4. If the ID takes longer than two to three seconds to blink, press the button again, making sure to press
it in all the way. This action activates the shelf ID programming mode.
5. Press the button to advance the number until you reach the desired number from 0 to 9. The first
number continues to blink.
6. Change the second number of the shelf ID by pressing and holding the button until the second
number on the digital display blinks, which can take two to three seconds. The first number on the
digital display stops blinking.
7. Press the button to advance the number until you reach the desired number from 0 to 9. The second
number continues to blink.
8. Lock in the desired number and exit the programming mode by pressing and holding the button until
the second number stops blinking, which can take two to three seconds.
9. Repeat steps 1 through 8 for each additional shelf.
Note: It is also possible to modify the shelf ID using SANtricity System Manager.