Do you have a question about the NewTek 3Play and is the answer not in the manual?
Explains the intrinsic recording capabilities and how to mark timed segments for replay.
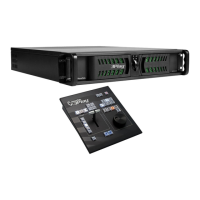
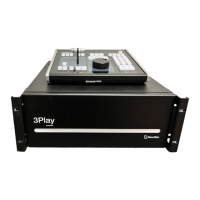
Describes the dedicated external control surface for primary operational control.
Explains that live production features are accessed from the Replay Desktop interface.
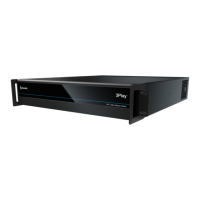
Covers accessible connectors, industry-standard connections, and audio/video capabilities.
Details how replay output features depend on recorded data and the Record button.
Explains how recorded data segments are bookmarked as events and appear in the Clips List.
Describes the Play List pane for creating and controlling sequences of clips.
Details the steps for activating and authorizing the Windows operating system on 3Play™.
Covers connecting external audio and video sources to the appropriate inputs on 3Play's backplate.
Details connecting video sources via SDI, Component, Y/C, or Composite, and audio sources.
Discusses audio and video output connectors and relevant settings for displaying streams.
Explains flexible options for displaying live and recorded video streams via multiple outputs.
Guides connecting downstream video devices to the VIDEO OUT connectors.
Explains how to configure video output settings and monitoring on the Replay Desktop.
Explains configuring video sources connected to the system.
Details configuring audio input settings for captured video clips.
Guides creating a new session, designating video standard, format, and record configuration.
Provides a top-level view of the Replay Desktop interface and its main components.
Guides users through the Output Configuration panel with its tabbed panes for various settings.
Details video format for Outputs A, B, and Aux, and analog output type options.
Describes the Multiview connection and control group for secondary display monitors.
Explains the Genlock feature for locking video output to a reference video signal.
Covers input preview monitors and contextual tools for configuring specific sources.
Explains how to select the appropriate connection type for cameras based on session format.
Details Proc Amp settings for individual inputs, identical to output Proc Amps.
Details configuring audio input settings for captured video clips.
Explains how to supply timecode from internal clock or external LTC sources.
Details the Record button's function to toggle audio/video data capture to mounted storage.
Explains how A and B buttons control the corresponding Output Mode, with A+B for linked operations.
Details how Control Modes (Clips, Play List, Live) determine the source displayed and module interacted with.
Describes operations directed to the Clips List when this mode is active.
Describes operations directed to the Play List module when this mode is active.
Explains controlling live sources from system inputs and passing them to outputs.
Details VCR-style controls for navigating and playing back media.
Controls playback speed using presets or the T-Bar.
Details the core function of marking events using IN and OUT buttons.
Adds a new event row to the Clips List, setting the In Point and enabling recording.
Completes an event by setting the Out Point and establishing the Duration.
Allows creating events by pressing OUT, automatically setting In/Out points.
Inserts selected clips from the Clips List to the current Play List page.
Discusses the two independent output sections, Output A and Output B, and their importance.
Guides deciding which inputs to capture and on which hard drives data will be stored.
Explains how to distinguish between recorded and non-recorded sources on the Replay Desktop.
Details the Record buttons on the Replay Desktop and control surface to toggle recording.
Covers event marking features provided by the Dashboard and control surface.
Explains the system's two independent playout devices, Output A and Output B.
Details how Control Modes (Clips, Play List, Live) determine the source displayed and module interacted with.
Describes how A+B mode causes operations to occur in tandem for both outputs.
Describes the spreadsheet-style table layout of the Clips List.
Explains how to modify timecode fields and trim clips.
Details moving through clips using Play, Stop, and Jog controls.
Governs playback speed using T-Bar position, Speed Presets, and Dashboard equivalents.
Describes the Play List table layout, including columns for Clip ID, Memo, Audio, Speed, etc.
Covers adding clips, re-ordering, and using Cut, Copy, Paste for playlist preparation.
Explains changing clip timing in the Play List using methods similar to the Clips List.
Covers adjusting playback speed for clips, from 10% to 400%.
Initiates Play List playback by selecting a clip and pressing Play.
Details how Dashboard Speed Preset buttons mimic control surface counterparts for speed settings.
Corresponds to IN and OUT buttons on the control surface for marking events.
Mimics control surface transport functionality, including Jog and Shuttle buttons.
Covers starting, ending, and marking events, with two primary methods.
Details methods to start recording using the control surface or Replay Desktop.
Explains how to stop recording using the control surface or Replay Desktop.
Describes the One-Button and Two-Button methods for marking events.
Details importing files into session folders for use in Clips List and Play List.
| Brand | NewTek |
|---|---|
| Model | 3Play |
| Category | Security Camera |
| Language | English |