Chapter 8 Capturing Images with Advanced Setting Menu
86
Photographing and
Playing Images
Displaying the frame of the photometry area
Display the frame marking the metering area range. This system allows you to operate normally even if the metering area
frame is displayed.
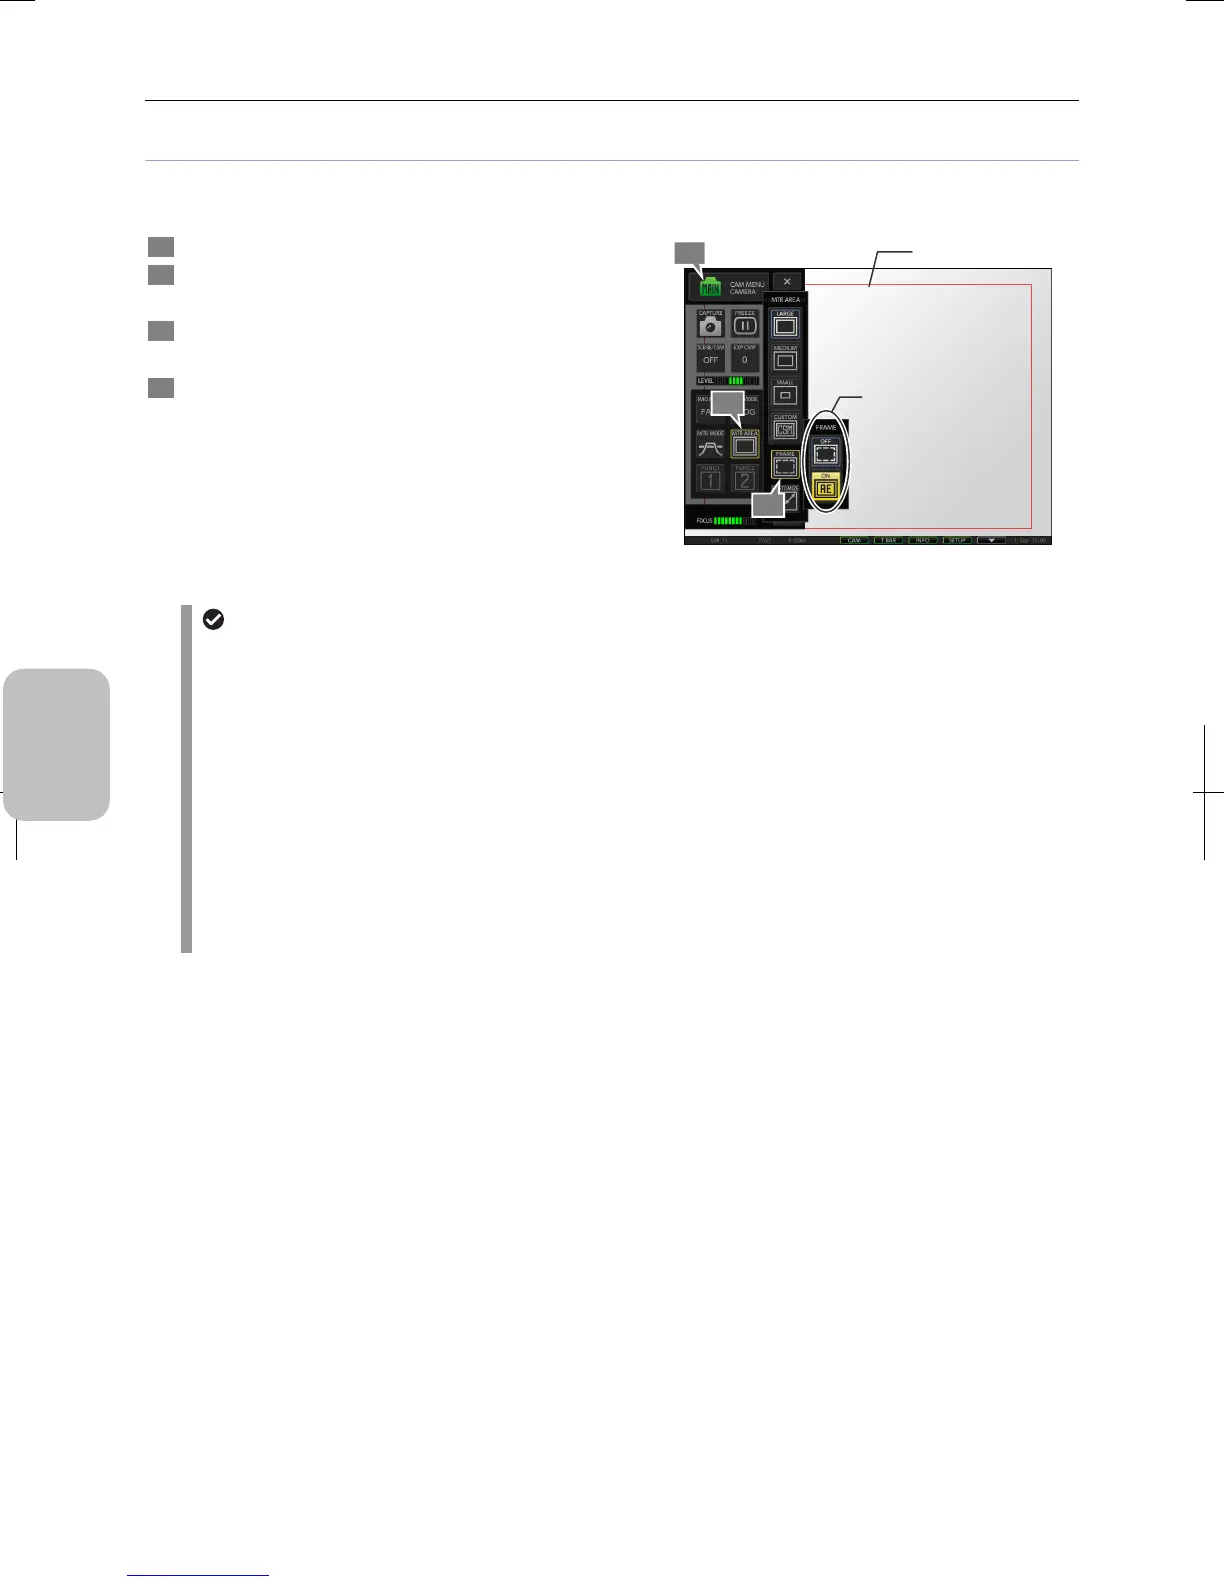
1 Display the [CAM MENU: CAMERA] long screen.
2 Press the [MTR AREA] button.
The [MTR AREA] submenu appears.
3 Press the [FRAME] button.
The [FRAME] submenu appears.
4 Select the photometry area display using the [ON] and
[OFF] buttons.
Selecting any of them closes the submenu.
When [ON] is selected, the photometry area frame is shown
on the screen.
Photometry area frame display
Photometry area frame display
The photometry area frame becomes off with the following operations:
• Power-off:
The on/off of the frame display is not saved. The photometry area frame becomes off when the power is turned
on.
• Pause:
The frame display becomes off when the live image pauses. Resuming the live image returns the frame display
on.
• Setting two-screen mode on:
Switching the screen to the two-screen mode sets the frame display off. Changing the live image back to the
one-screen mode returns the frame display on.
• Displaying [VIEW MENU] and [TOOL MENU] (including [TOOL SET])
The frame display becomes off when any of these menus is displayed. When the screen returns to [CAM MENU]
and the live image is in the one-screen mode, the frame display returns to on.
1
Photometry area frame
2
3
Select on/off of
frame display.





 To Next Page