Chapter 8 Capturing Images with Advanced Setting Menu
87
Photographing and
Playing Images
Customizing the photometry area
DS-L3 allows you to specify the photometry area in any way. You can specify the area on the screen and move it to a desired
position or to the center.
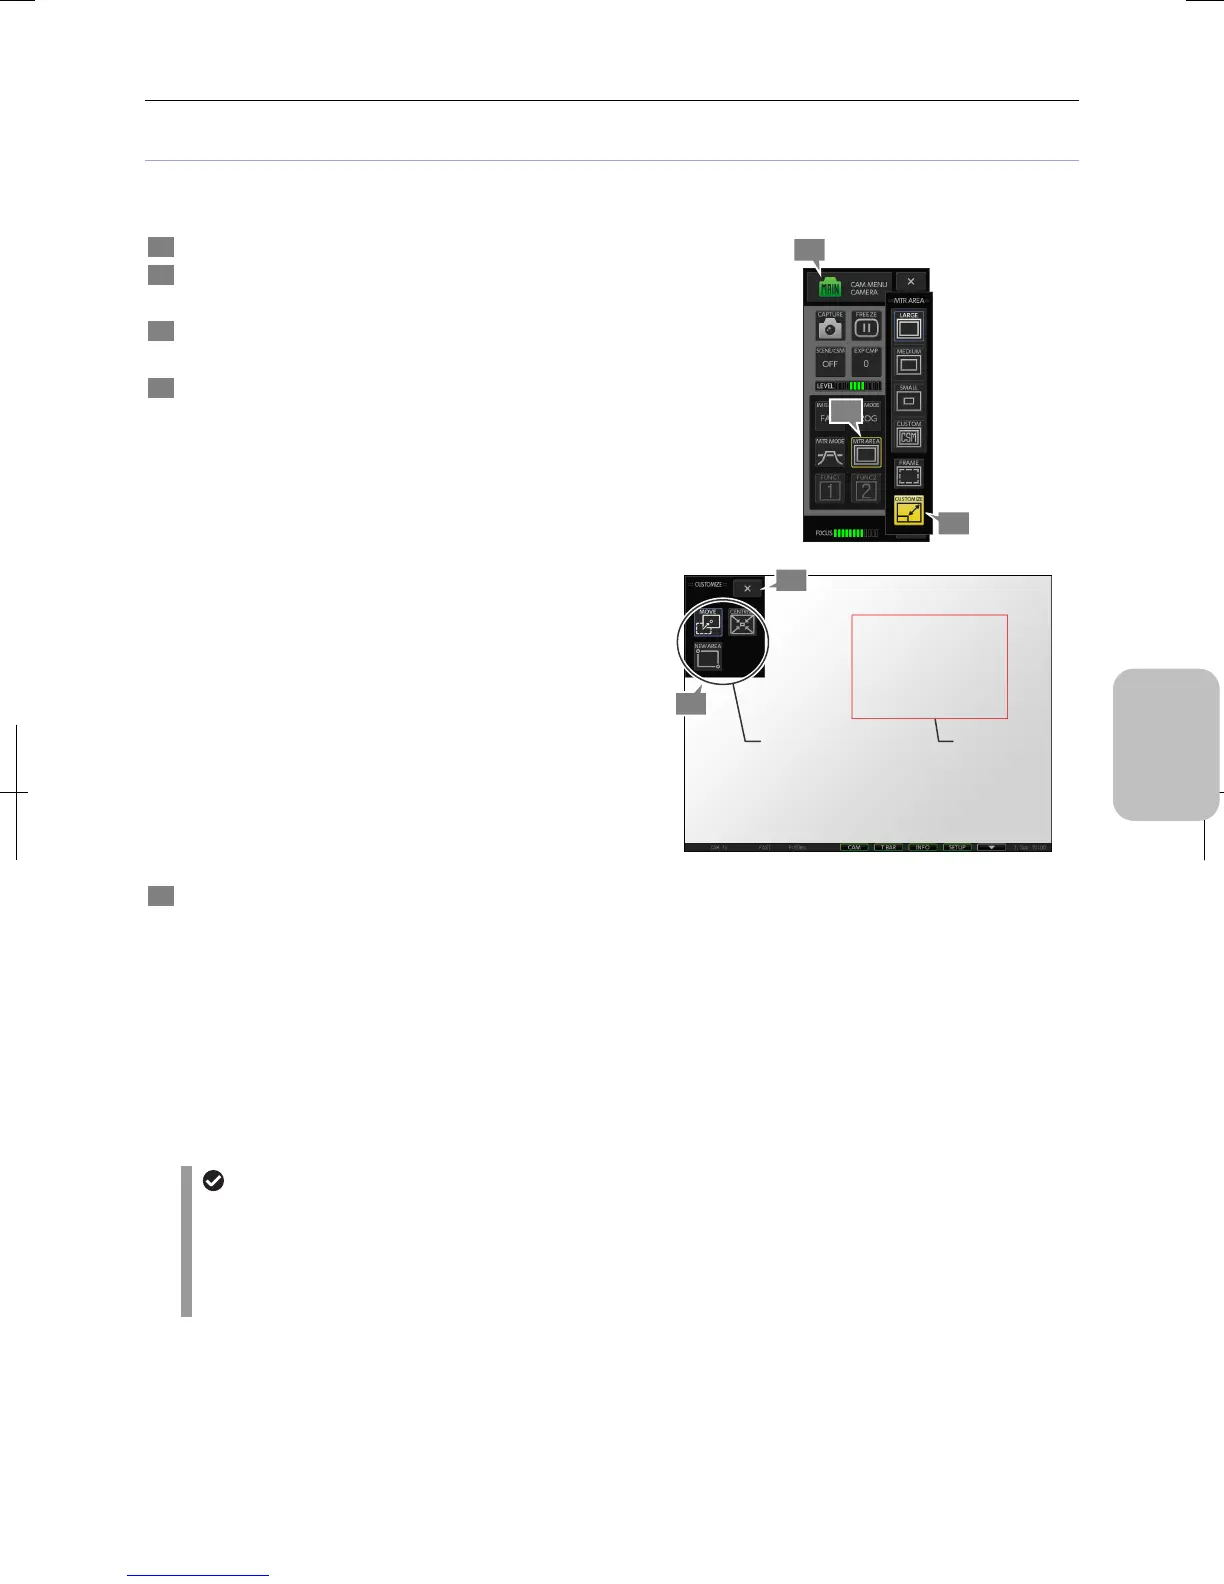
1 Display the [CAM MENU: CAMERA] long screen.
2 Press the [MTR AREA] button.
The [MTR AREA] submenu is displayed.
3 Press the [CUSTOMIZE] button.
[CAM MENU] closes and the [CUSTOMIZE] menu opens.
4 Operate on the [CUSTOMIZE] menu to specify any
photometry area.
The following operations can be made on the [CUSTOMIZE]
menu:
• Setting a new photometry area:
Press the [NEW AREA] button, and specify two points on
the screen that define a rectangle area.
Specifying two points on the screen displays the
rectangle that includes these points as its diagonal
vertexes, and specifies the rectangle as the photometry
area.
• Moving the photometry area:
Press the [MOVE] button, and specify a point with a
stylus or mouse. The photometry area moves by aligning
its center with the specified point.
Note: You cannot move the photometry area outside the
screen.
• Moving the photometry area to the center of the
screen:
Pressing the [CENTRNG] button moves the photometry
area to the center of the screen without changing its size.
5 When the photometry area setting is completed, press
the [X] button to close the [CUSTOMIZE] menu.
The [CAM MENU: CAMERA] long screen is displayed
again.
Customizing the [NEW AREA] of the photometry area
automatically brings the photometry area into effect. When
you return to [CAM MENU], the [MTR AREA] button has
changed to [CUSTOM].
Note: Setting the frame on displays the photometry area
frame on the screen allowing you to see the actual
photometry area.
Customizing the photometry area
Setting of photometry area for power-on
• The size and position o of the photometry area is saved at the time of power-off and recovered at the next
power-on. If [CUSTOM No] is set to a registered custom option number in the [SETUP MENU: MAIN], the
photometry area size specified by the custom setting is used. The position is set to the center.
• If the metering area is set to [CUSTOM] for custom settings registration, the resulting metering area will be half
the size of [SMALL] with (or a quarter). The position is set to the center.
Photometry
area frame
4
5
Specify a desired
photometry area.
1
3
2
 Loading...