3-7
CHAPTER 3 REPAIR PROCEDURES
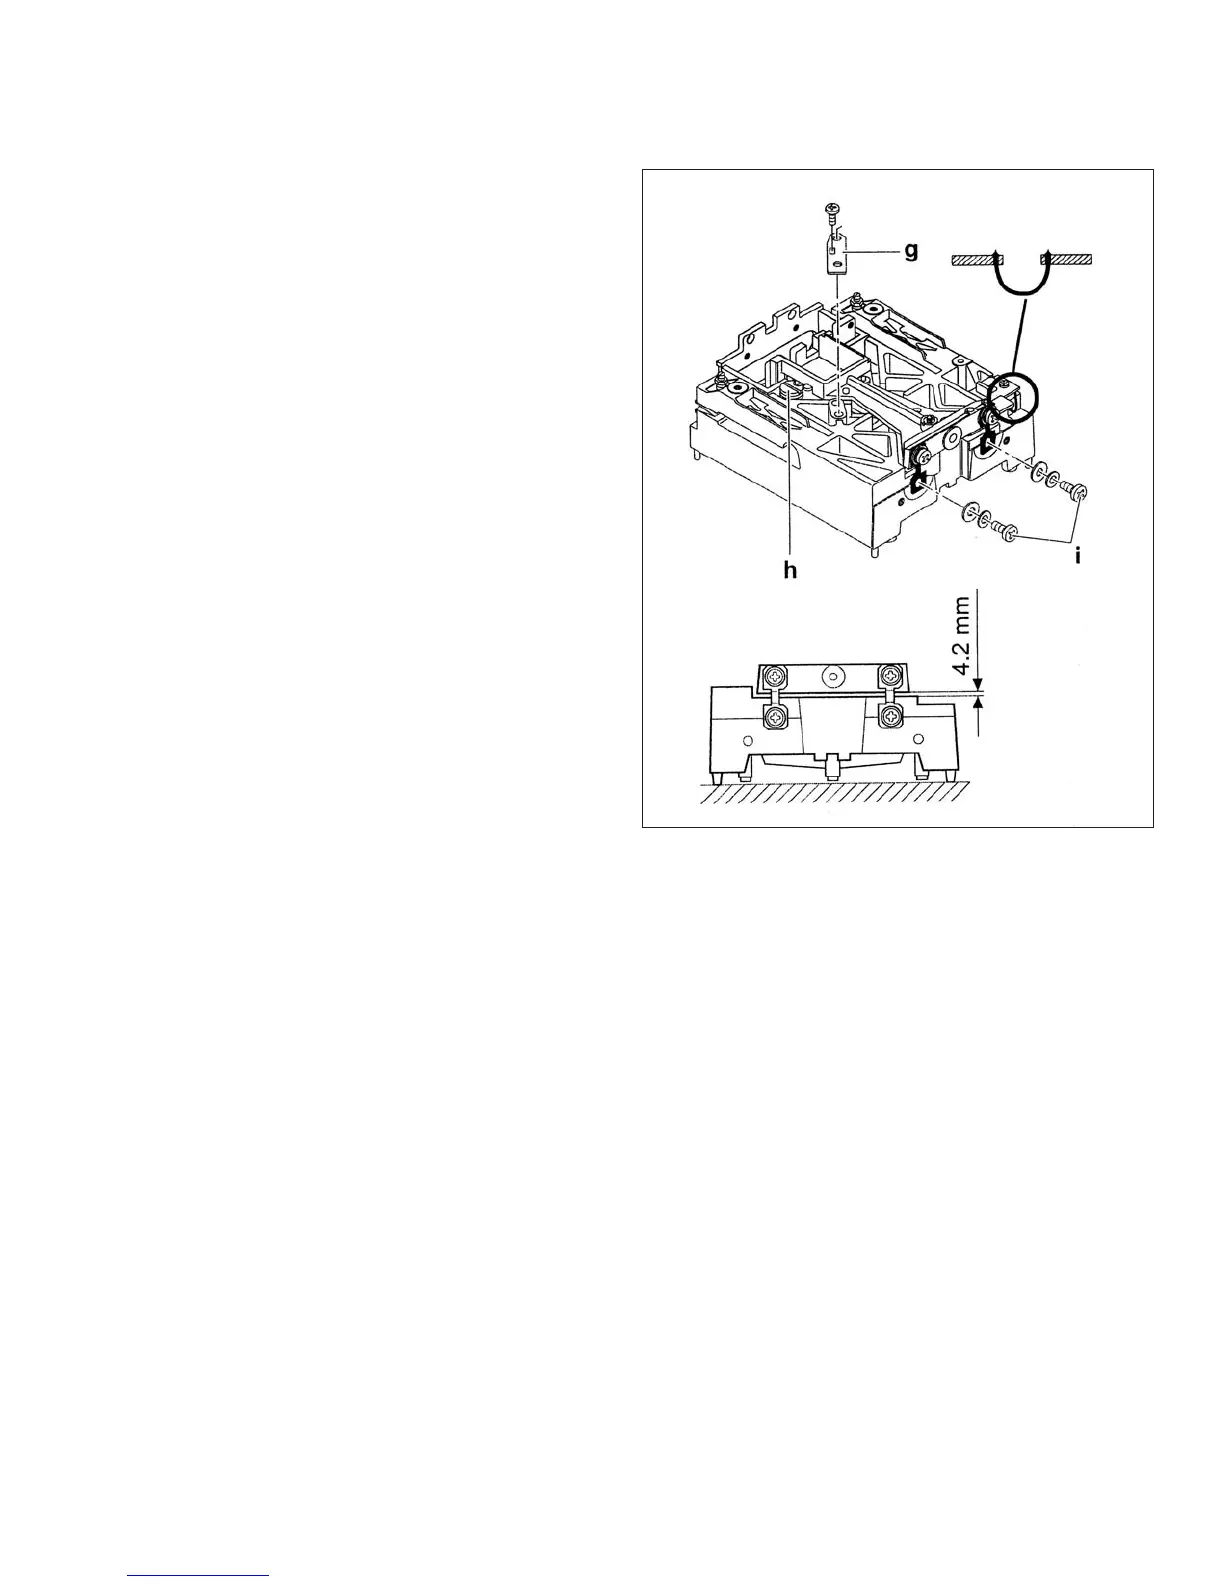
3.1.10 Replacing the Lever and Coil.
1.Before replacing the Lever make sure the guides
have been checked or replaced in necessary, and
the magnet system is cleaned.
2.Place the lever in the chassis and lock by turning
the up/down stop to the original position.
3.Install the Ohaus fixture included in part number
476001-020. This will give all the proper distances.
4.Install the lateral stop. Make sure the post is
centered in the hole.
5.Solder the contact strips. Make sure the strips are
parallel.
6.Install the magnet holder.
7.Install the Vane and center it in the detector hous-
ing.
8.Remove the fixture.
Figure 3-9. Installing Lever and Coil.
3.1.11 Monoblock Load Cell Removal Precision Top Loader Balance and Analytical
Refer to Figures 5-1 and 5-3 in Chapter 5 for location of components called out in this procedure. To remove the Monoblock
Load Cell, proceed as follows:
See Figure 5-1 for steps 1 through 5.
1.With the balance turned OFF and unplugged, remove the Pan (1).
2.Remove Wind Shield (2) if applicable or Draft Shield.
3.Remove the four Corner Spacers (5) if required.
4.Remove two Screws (2) and Lockswitch Cover Seal (4).
5.Remove the Cover (6) from the Base.
See Figure 5-3 for remaining steps.
6.Remove the two Hex Screws (1) from the Subplatform (2) if required.
7.Remove the Subplatform (2) if required.
8.Remove two Screws (3) which secure Shield (4) in place.
9.Remove Shield (4) from the balance.