3-28
CHAPTER 3 REPAIR PROCEDURES
3.2.9 Membrane Switch Replacement (Cont.)
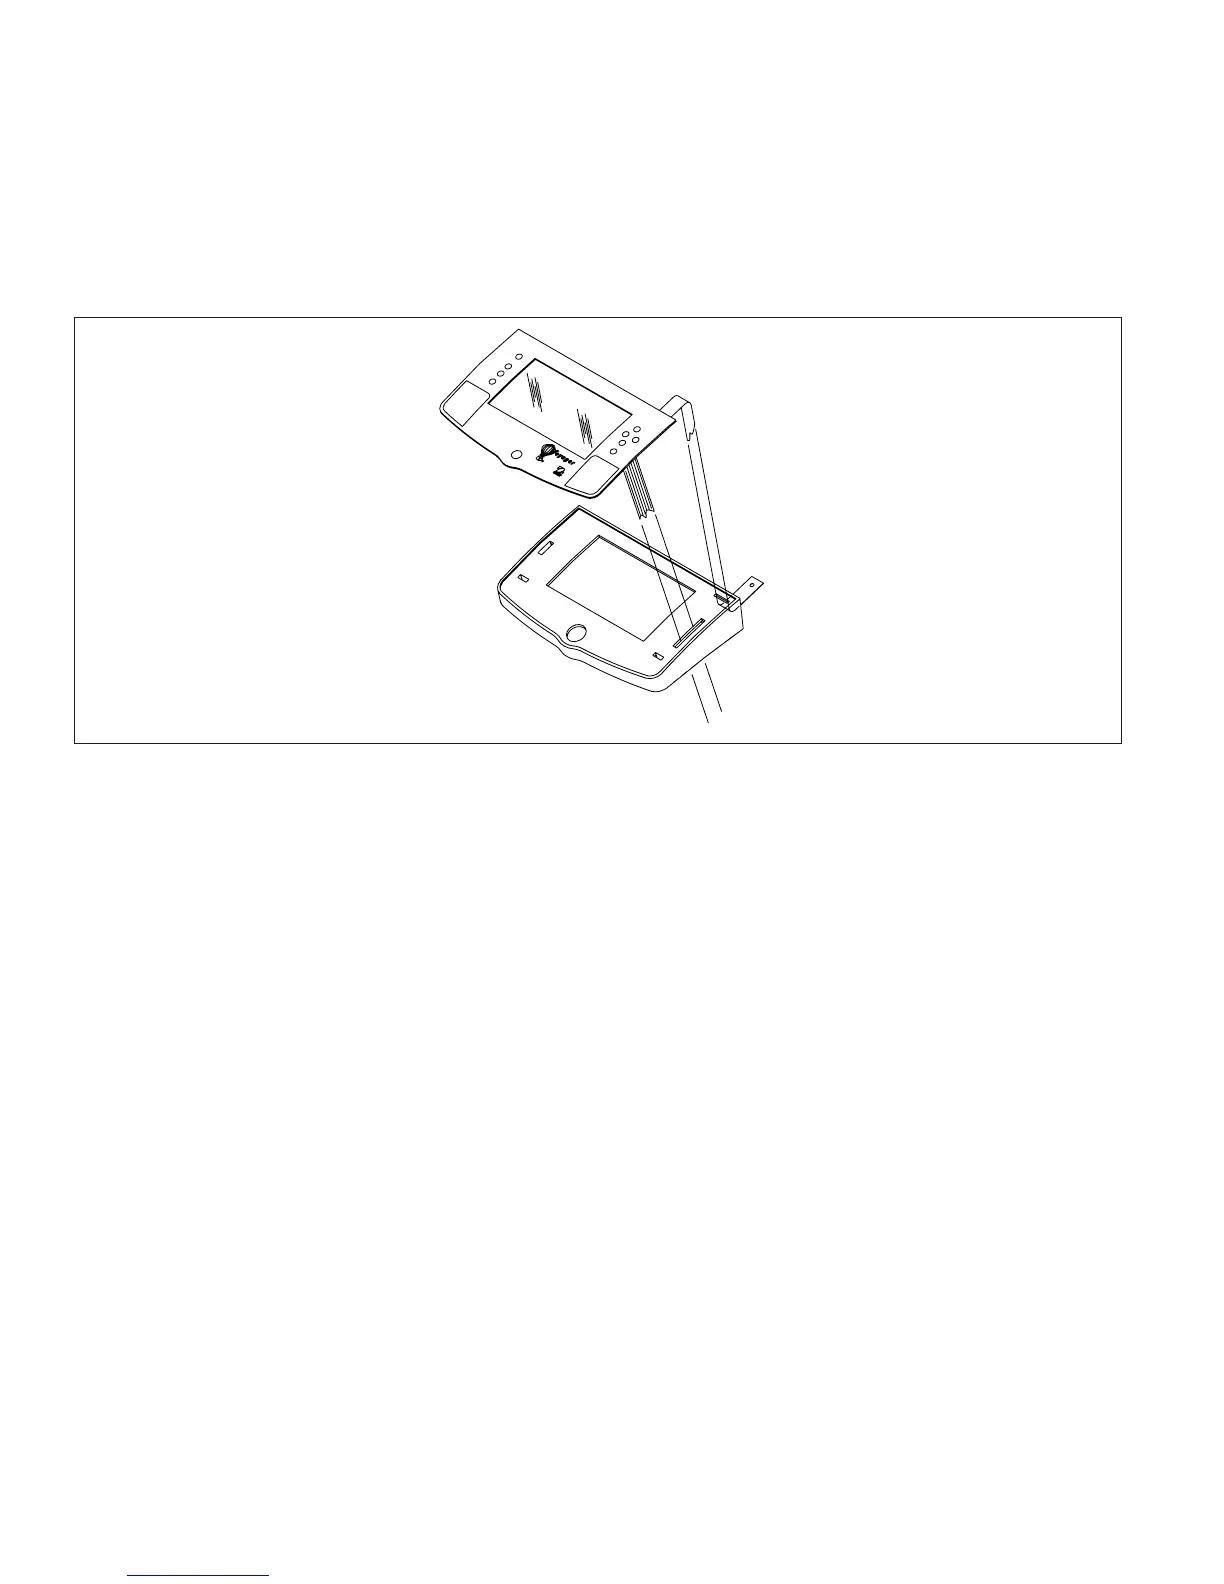
7.Insert the flat cable from the membrane switch and ground cable through the holes on the display panel.
See Figure 3-29.
CAUTION
BE CAREFUL NOT TO BEND THE RIBBON CABLE SHARPLY. IF IT
IS CREASED, USE ANOTHER MEMBRANE SWITCH.
8.Carefully align the membrane switch top edge with the top edge of the display panel.
9.Using a rolling motion, press the membrane switch into position. Smooth the membrane switch down to make
sure it is securly fastened.
10. Replace the membrane switch ribbon cable, see Figure 3-28.
3.2.10 Replacing the Display
1.Secure the ground strap using the hardware previously removed.
2.Plug the cable into the connector (5) on the PC board of the Voyager Display module. See Figures 3-26 or
3-27.
4.Carefully position the display flush with the top of the balance and press into position. The tabs underneath the
balance should lock into place.
5. Replace the two screws underneath the balance (if previously removed) to secure the display in place.
6.Reconnect power to the balance and check operation.
>O/T<
>O/T<
Figure 3-29. Membrane Switch Cable Routing.