3-27
CHAPTER 3 REPAIR PROCEDURES
3.2.8 Display Printed Circuit Board (Cont.)
8.Secure the grounding strap using the hardware previously removed.
9.Carefully position the display flush with the top of the balance and press into position. The tabs underneath
the balance should lock into place.
10. Reconnect power to the balance.
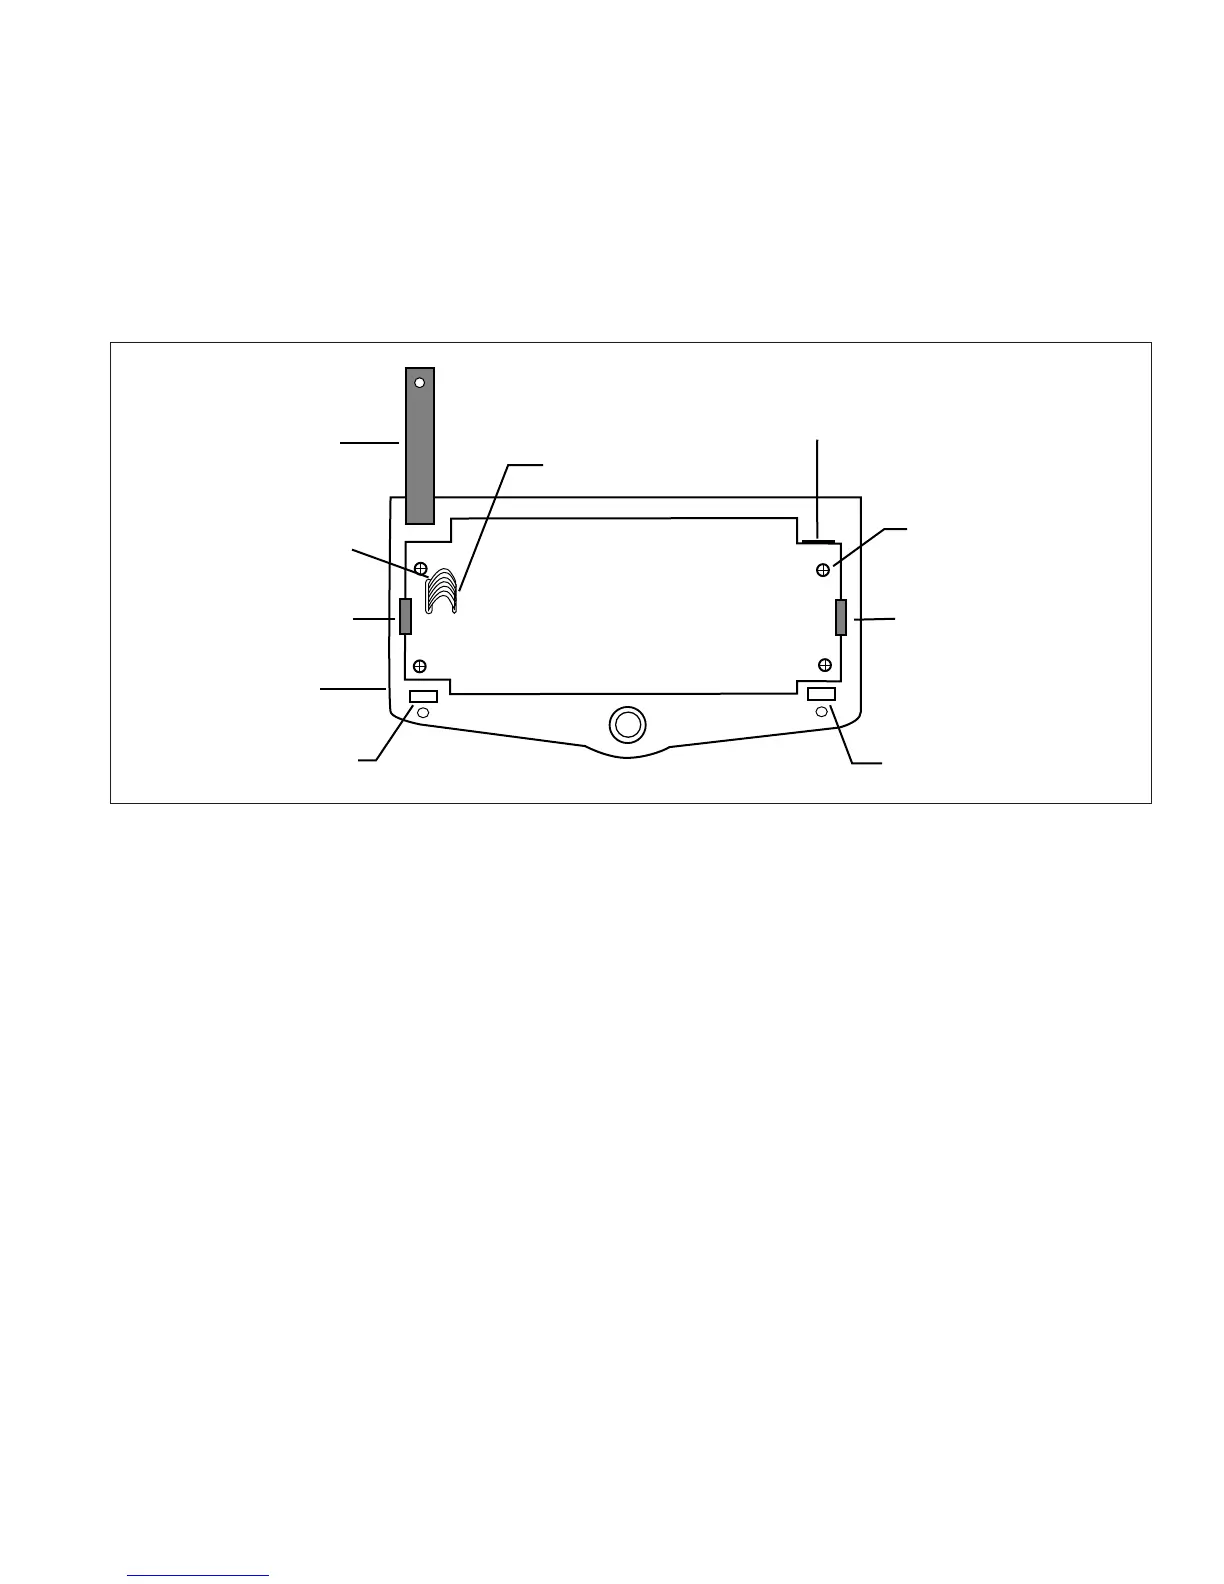
GROUNDING STRAP
MOUNTING CLIP
MOUNTING CLIP
BOTTOM OF DISPLAY PCB ASSEMBLY
COVER
RIBBON CABLE CONNECTOR END
COVER CLIP
LOCATING PIN
INSERT RIBBON CABLE FROM
MAIN PCB ASSEMBLY
MEMBRANE SWITCH
RIBBON CABLE
Figure 3-28. Rear View of the Display PCB Assembly.
3.2.9 Membrane Switch Replacement
1.Follow the procedure in paragraph 3.2.6 or 3.2.7 and remove the display module from the balance.
2.Remove the membrane switch ribbon cable from the PC Board, see Figure 3-28.
3.On the front of the display, carefully remove the existing membrane switch from the display panel. Lift the
membrane switch off starting at one corner.
4.Remove all adhesive residue from the display panel.
5.At the back of the new membrane switch, remove the protective covering from the window area first.
6.Remove the adhesive backing from the membrane switch. Be very careful at this point. You want to make sure
the membrane switch is properly placed as you cannot remove it to reposition it on the display panel.