487
LCD Option Board Function Section 8-6
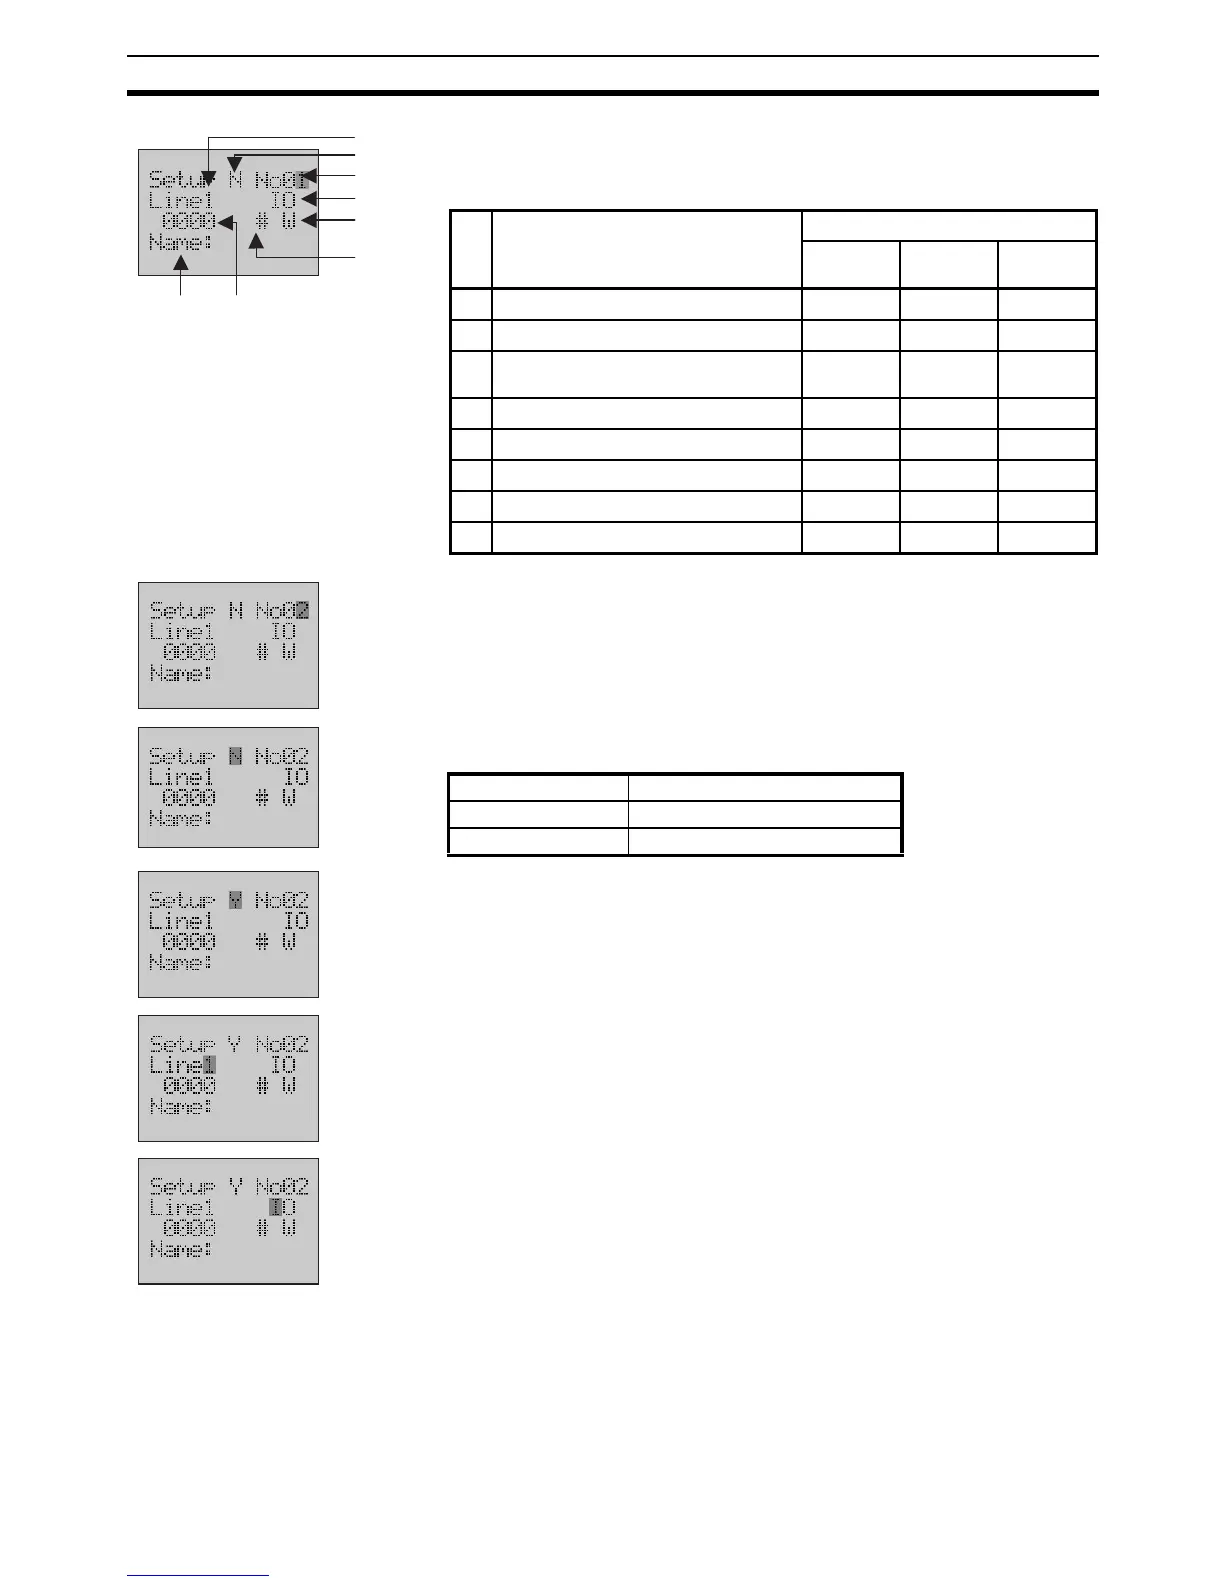
4. Press the OK button to enter the User Monitor Setup Screen.
The final digit of the Screen No. will be flashing.
The following table shows the setting items for each display type.
5. Use the Up button to change the Screen No. to 2.
6.
Use the
Forward
button to move the column cursor to the monitor flag position.
Select the monitor flag in the following table.
7. Press the Up button to select the monitor flag Y.
Then user can monitor this screen after the setting is complete.
8. Use the Forward button to move the column cursor to the Line No. position.
The present setting is Line 1.
9. Use the Forward button to move the column cursor to the display type po-
sition.
The following table shows the display types which can be selected, includ-
ing the default address and the setting range for each type.
b
a
c
f
e
g
h
d
No. Description
Display type
Word Bit
Text
string
a Monitor flag Yes Yes Yes
b User Monitor Screen No. (01 to 16) Yes Yes Yes
c
Line No. (1 to 4) of the User Monitor
Screen
Ye s Ye s Ye s
d Display type Yes Yes Yes
e I/O memory address Yes Yes No
fDisplay format Yes No No
g Date length Yes No No
h I/O memory name Yes Yes Yes
Monitor flag Meaning
Y User Monitor Screen in use
N User Monitor Screen not in use