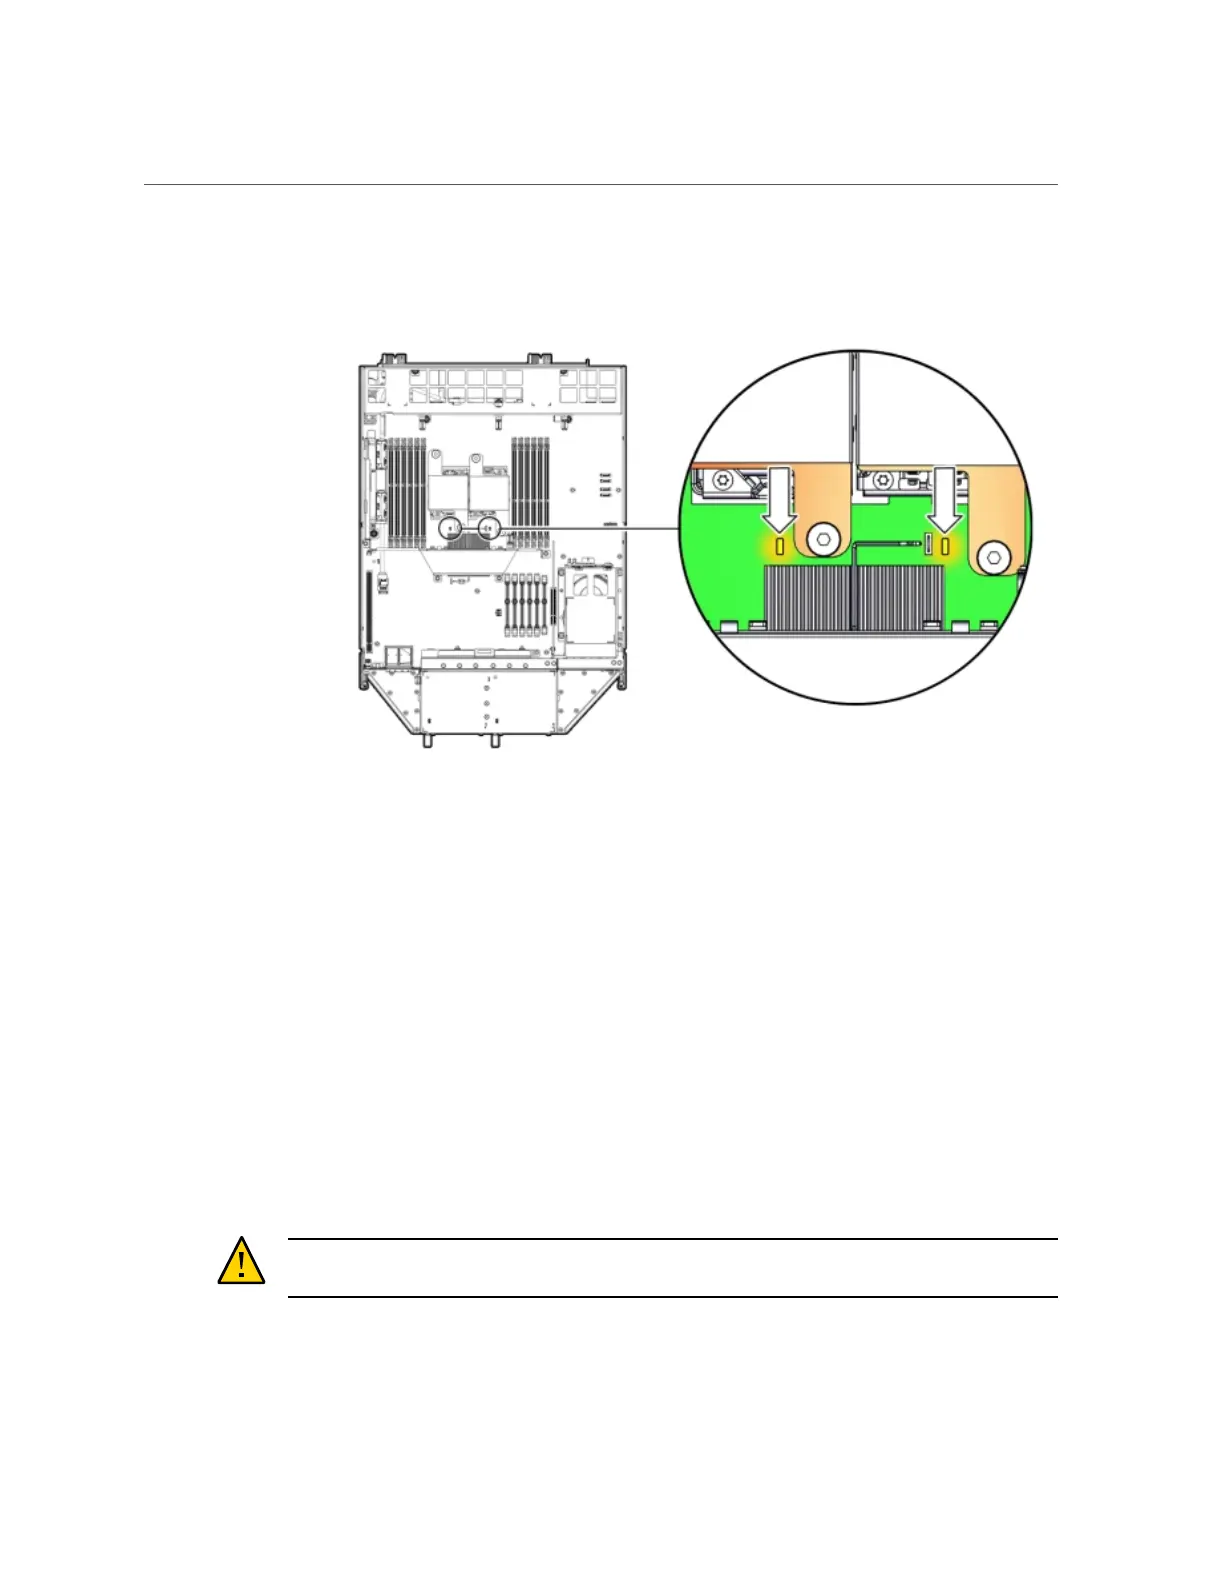
Remove Processor (CPU)
The fault LED is located next to the CPU.
■ If CPU fault LED is off: CPU is operating properly.
■ If CPU fault LED is on (amber): CPU is faulty and should be replaced.
Viewing the server node from the front, CPU0 (P0) is on the right side of the server node.
d.
Using a Phillips screwdriver, turn one captive screw on the heatsink
counterclockwise two full turns, then turn the other screw two full turns, and
keep alternating between the two screws until they are removed [2].
e.
Twist the heatsink slightly to break the grease seal, then lift it off and
place it upside down on a flat surface to prevent the thermal grease from
contaminating other components.
f.
Using the wipes supplied with the replacement CPU, carefully clean the
thermal grease from both the bottom of the heatsink and the top of the CPU.
Caution - Equipment damage. When cleaning the top of the CPU, be careful not to get the
thermal grease on the CPU socket and associated components.
Appendix A • Servicing the Oracle Database Appliance Version 1 199

 Loading...


