Replacing an NVMe Storage Drive
2.
Unmount and power off the drive to be replaced. Do one of the following:
■ If you are replacing a failed drive, check to see if its blue ready-to-remove
light is lit.
If a drive has failed, it should power off automatically and light its blue ready-to-remove
indicator after 5 minutes.
■ If the drive being replaced doesn't already have its blue ready-to-remove
indicator lit, type the following command from the host to unmount and turn
off power to the drive:
# odaadmcli power disk off pd_xx
Where pd_xx is the name of the disk to be replaced as described in step 1.
Before proceeding to the next step confirm that the blue ready-to-remove indicator on the
drive is lit.
3.
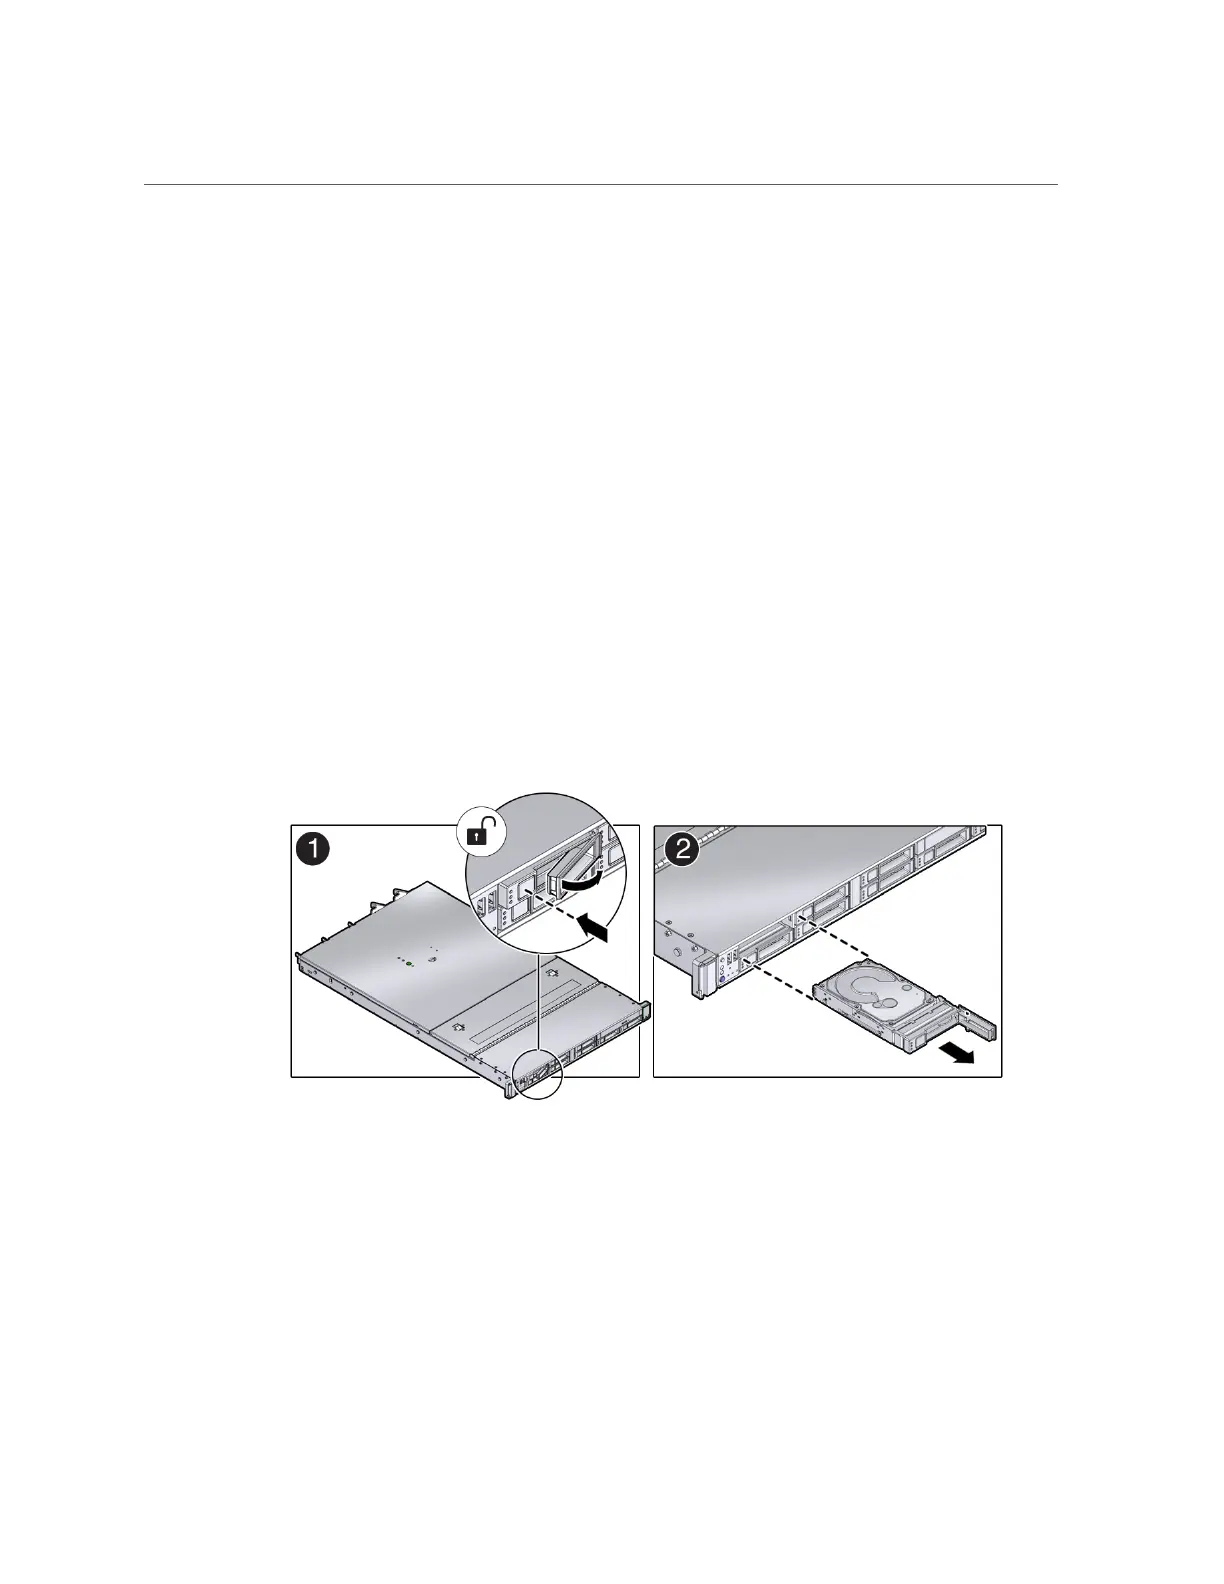
Push the latch release button on the front of the drive to open the drive latch [1],
grasp the latch, and pull the drive out of the drive slot [2].
4.
Align the replacement drive with the drive slot.
The drive is physically addressed according to the slot in which it is installed. It is important to
install a replacement drive in the same slot as the drive that was removed.
Chapter 3 • Servicing CRUs That Do Not Require System Power Off 73

 Loading...


