How to Replace a Disk Shelf I/O Module
1.
A faulted I/O Module is indicated by an amber LED. Go to the Maintenance >
Hardware section of the BUI, click the right-arrow icon at the beginning of the
appropriate disk shelf row, and then click Slot to view details, or click the locator
icon to turn on the locator LED.
2.
Locate the failed I/O Module at the back of the disk shelf.
3.
Label and disconnect the I/O Module interface cables.
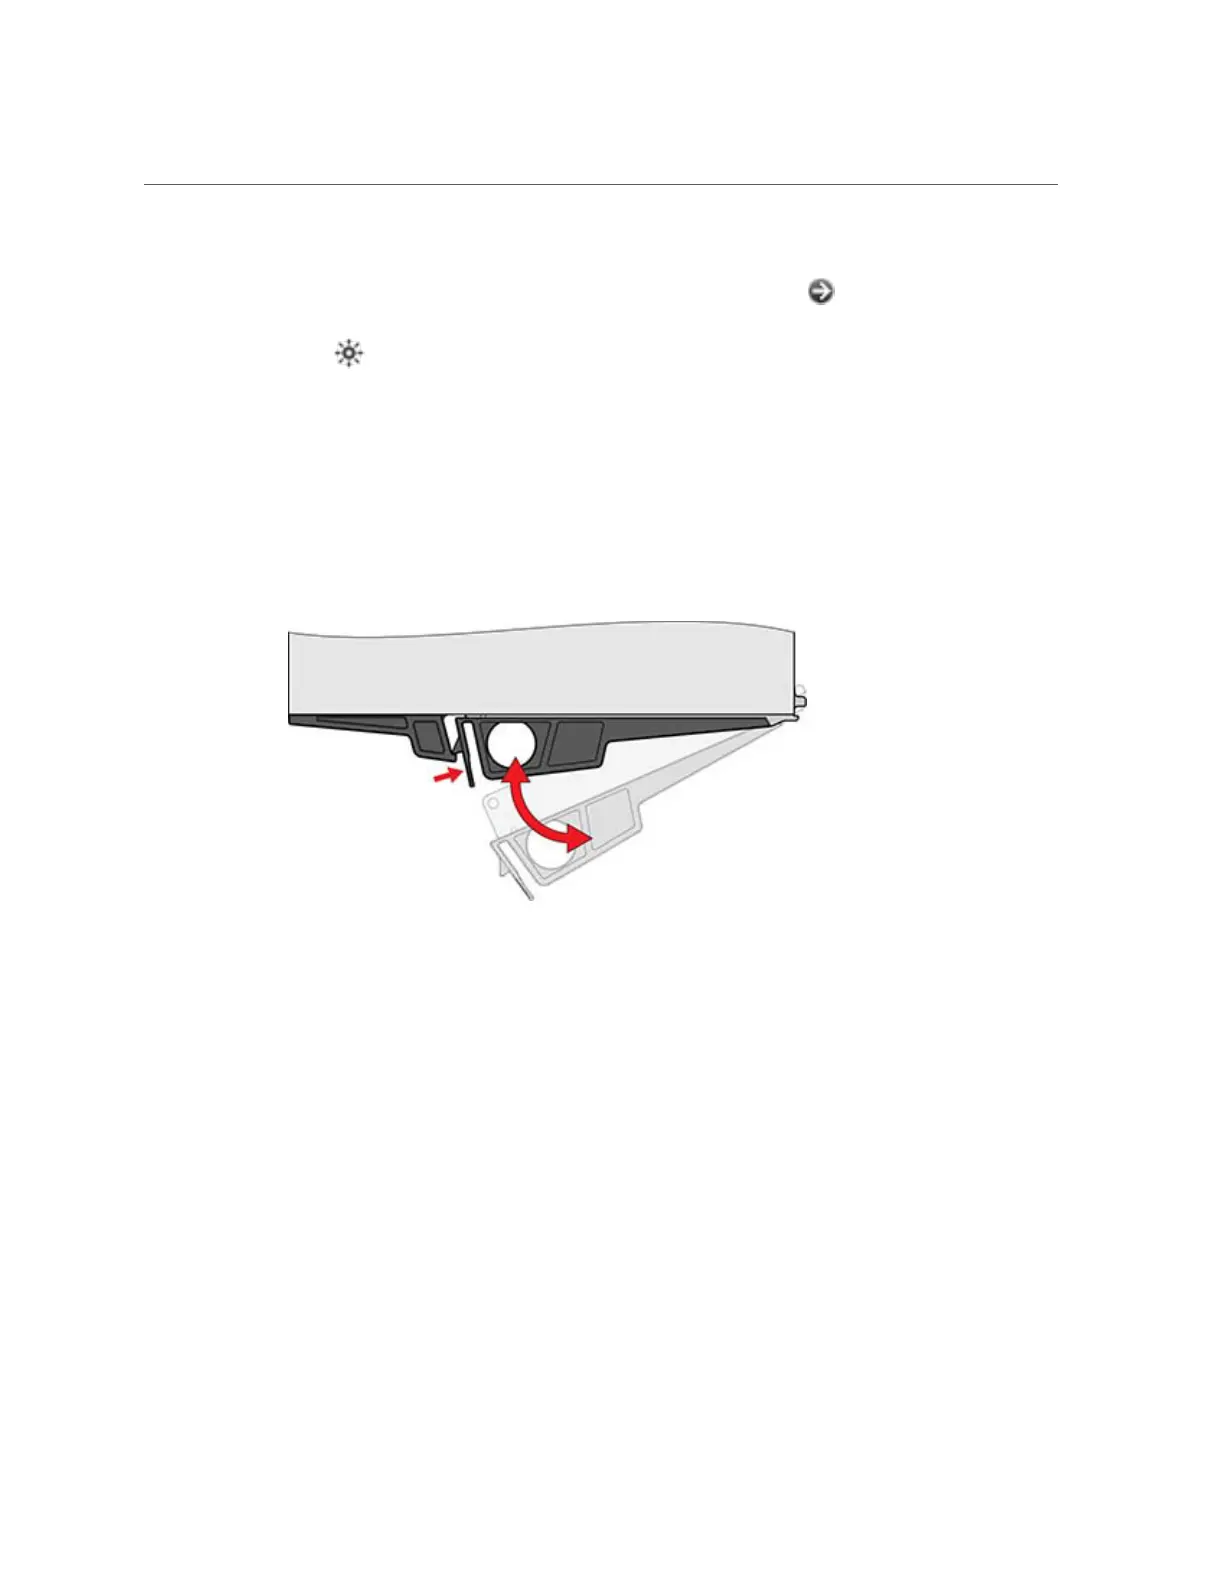
4.
Using your thumb and forefinger, squeeze the release button toward the lever
hole to release the lever.
5.
Grasp the lever and remove the I/O Module, being careful not to damage the
connector pins in back.
6.
With the lever of the new I/O Module in the open position, slide the I/O Module
into the disk shelf, being careful of the connector pins.
7.
Push the lever fully closed until you hear or feel a click.
8.
Reconnect the interface cables to their original locations.
9.
Wait approximately 60 seconds for the I/O Module to complete its boot process,
at which time the Power LED should be solid green and the Fault/Locate LED
should be off. All four activity LEDs should be solid green for each SAS-2 port in
use.
Servicing the Hardware 259
 Loading...


