3-5-5. REPLACEMENT OF THE
CAPSTAN ROTOR AND
CAPSTAN STATOR
When replacing the Capstan stator unit the centre
Fixing Tool must
be
used to fix the centre of Capstan
Stator Unit.
1.
Remove the loading belt.
2.
Unscrew the 4
(F)
screws and remove the Gear
base Unit.
3.
Carefully lift up the capstan rotor from the capstan
housing, taking care so as not loose the 2 oil seals
as shown
in
Figure M14-A.
SCREWS
(F)
GEAR
BASE
UNIT
Figure
M14-A
4. Remove the 2 oil seals.
5.
Unscrew the 3 (G) screws and remove the
Capstan Stator.
6.
Place the capstan stator unit into position.
7.
Loosely tighten the 3 (G) screws.
8.
Insert the Centre Fixing Tool as shown
in
Figure
M14-B.
CENTER
FOXOMG TOOL (VFK0951)
l
LOWER
METAL
UPPER
METAL
Figure
M14-B
3
-11
STATOR
UNIT
Figure
M14-C
9.
Tighten the 3 (G) screws.
10. Remove the centre fixing tool.
11. The new capstan rotor unit can be reinstalled by
reversing the removal procedure.
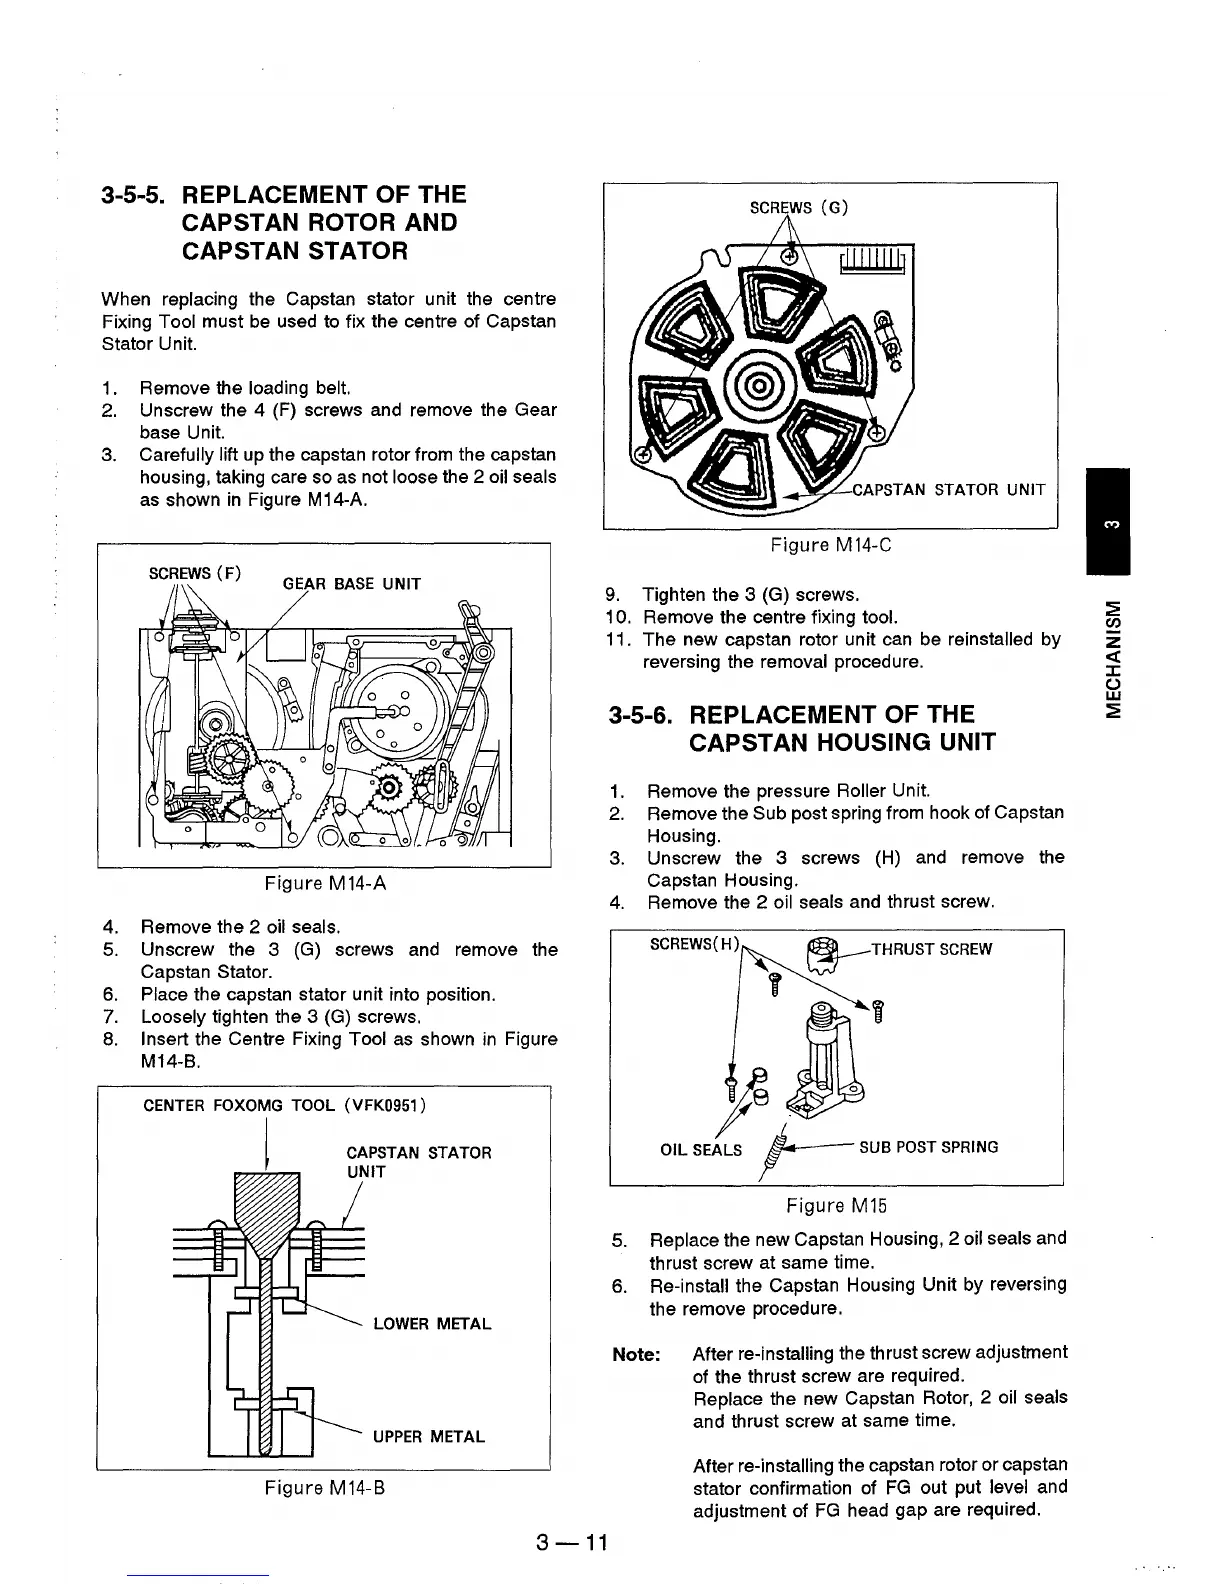
3-5-6. REPLACEMENT OF THE
CAPSTAN HOUSING UNIT
1.
Remove the pressure Roller Unit.
2.
Remove the Sub post spring from hook of Capstan
Housing.
3.
Unscrew the 3 screws
(H)
and
remove the
Capstan Housing.
4.
Remove the 2 oil seals and thrust screw.
SCREWS(H)
~
THRUST
SCREW
ye
a
OIL
SEALS
f--
SUB POST SPRING
Figure
M15
5.
Replace the new Capstan Housing, 2 oil seals and
thrust screw at same time.
6.
Re-install the Capstan Housing Unit by reversing
the remove procedure.
Note: After
re-installing the thrust screw adjustment
of the thrust screw are required.
Replace the new Capstan Rotor, 2 oil seals
and thrust screw at same time.
After re-installing the capstan rotor or capstan
stator confirmation of
FG
out put level and
adjustment of
FG
head gap are required.
~
Cl)
z
<C
J:
U
w
~