3-6-15. ADJUSTMENT OF REV TENSION
SENSOR POSITION
«TOOL»
Tension Sensor Adj. Fixture
Tension
Post Adj. Plate
Fine Adj. Screwdriver
Digital Volt Meter
«SPEC»
2.3V - 2.7V
VFK0806
VFK0236
VFK0330
Purchase locally
Note: Assemble a Tension Sensor Adjustment
Fixture
(VFK0806) and a Tension Post Adj.
Plate (VFK0236) as shown
in
Figure M38-A.
TENSION
SENSOR
AOJ. FIXTURE (VFK0806)
SCREWS
TENSION
POST
AOJ. PLATE (VFK0236)
Figure M38-A
1.
Remove the Top Plate
and
Cassette Holder Unit.
(refer
to
Disassemble Procedures)
2.
Disconnect the 4pin and 2pin flat wire to the pin3
and 4 of the connector
P1508.
3.
Connect two wires of 4pin flat wire to the pin3and
4 of the connector
P1508.
4.
Push the Sub Wiper Arm (R) to direction of
Cassette
loading.
Then the Sub Wiper Arm (R) goes down it self
and
mode of machine change to STOP.
5.
Turn the Power switch off.
6.
Remove the Cassette Compartment (refer
to
Disassembly Procedures).
7.
Connect the V.T.v.M. of D.v.M. to TP8008
on
the
Video 3 C.B.A.
8.
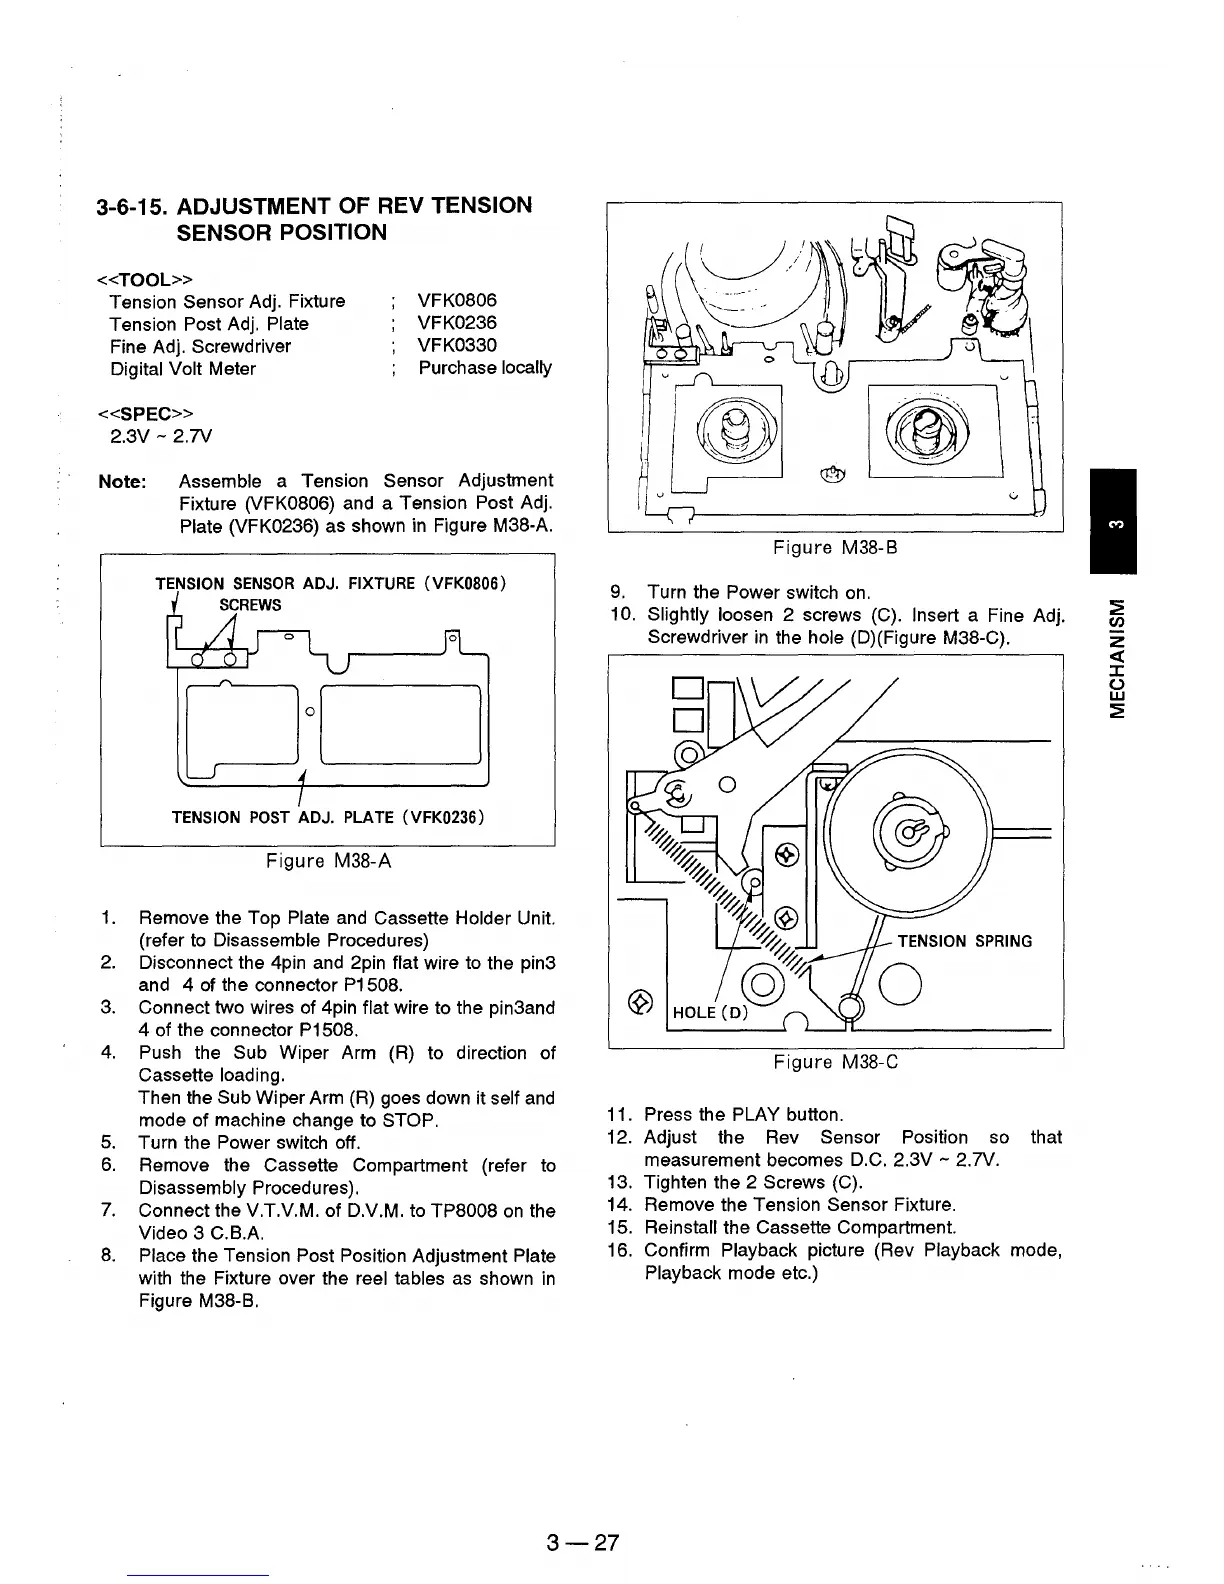
Place the Tension Post Position Adjustment Plate
with the Fixture over the reel tables
as
shown
in
Figure M38-B.
Figure
M38-B
9.
Turn the Power switch
on.
10. Slightly loosen 2 screws (C). Insert a Fine Adj.
Screwdriver
in
the hole (D)(Figure M38-C).
Figure
M38-C
11.
Press the PLAY button.
12. Adjust the Rev
Sensor Position so that
measurement becomes D.C.
2.3V - 2.7V.
13. Tighten the 2
Screws (C).
14. Remove the Tension
Sensor Fixture.
15.
Reinstall the Cassette Compartment.
16. Confirm
Playback picture (Rev Playback mode,
Playback mode etc.)
3-27
~
Cl)
z
c:{
J:
(J
w
~