4 Getting Started
Workflow Overview
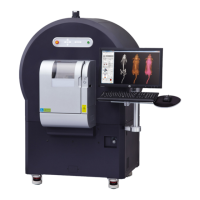
Starting the Imaging System
4.1 Workflow Overview
Table 4.1 presents an overview of acquiring CT data on the Quantum GX2 microCT Imaging System.
Table 4.1 Workflow Overview
Step
See Page
1. Start the Quantum GX2 microCT Imaging System. See below
2. Warm up the Quantum GX2 microCT Imaging System (click the button in the Control
Panel).
40
3. Create and/or connect to a database. 29, 30
4. Create or select a sample and study where the image data (series) will be saved. 41
5. Set the scan conditions. 43
6. Place the anesthetized subject in the sample chamber and center the subject in the Xcapture
window.
47
7. Start the CT scan. 51, 52, or
55
8. View and analyze the 3D reconstruction. 65
9. Post-processing options:
Reconstruct a subvolume or slice(s).
Reconstruct the sinogram (image data).
Note: Post-processing analyses may be performed offline on a workstation not connected to
the imaging system.See page 63 for required software, workstation requirements, and
workstation setup.
58
 Loading...