Quantum GX2 microCT Imaging System Manual Chapter 5 | Working With Databases and Data 33
5.4 Managing Data
Reconstructed image data (*.vox) can be imported between databases or exported from the database
to another location such as the desktop.
Importing Data
1. Select a save location (sample and study) for the data in the Database window. See page 41 for
instructions on selecting a save location.
2. Click the toolbar button. Alternatively, select File → Import File on the menu bar.
3. Select the data (*.vox) for import in the dialog box that appears and click Open.
The imported series appears in the Database window. The original data name is listed in the
Series Description.
Exporting Data
1. Select the series for export in the Database window.
2. Click the toolbar button. Alternatively, select File → Export File on the menu bar.
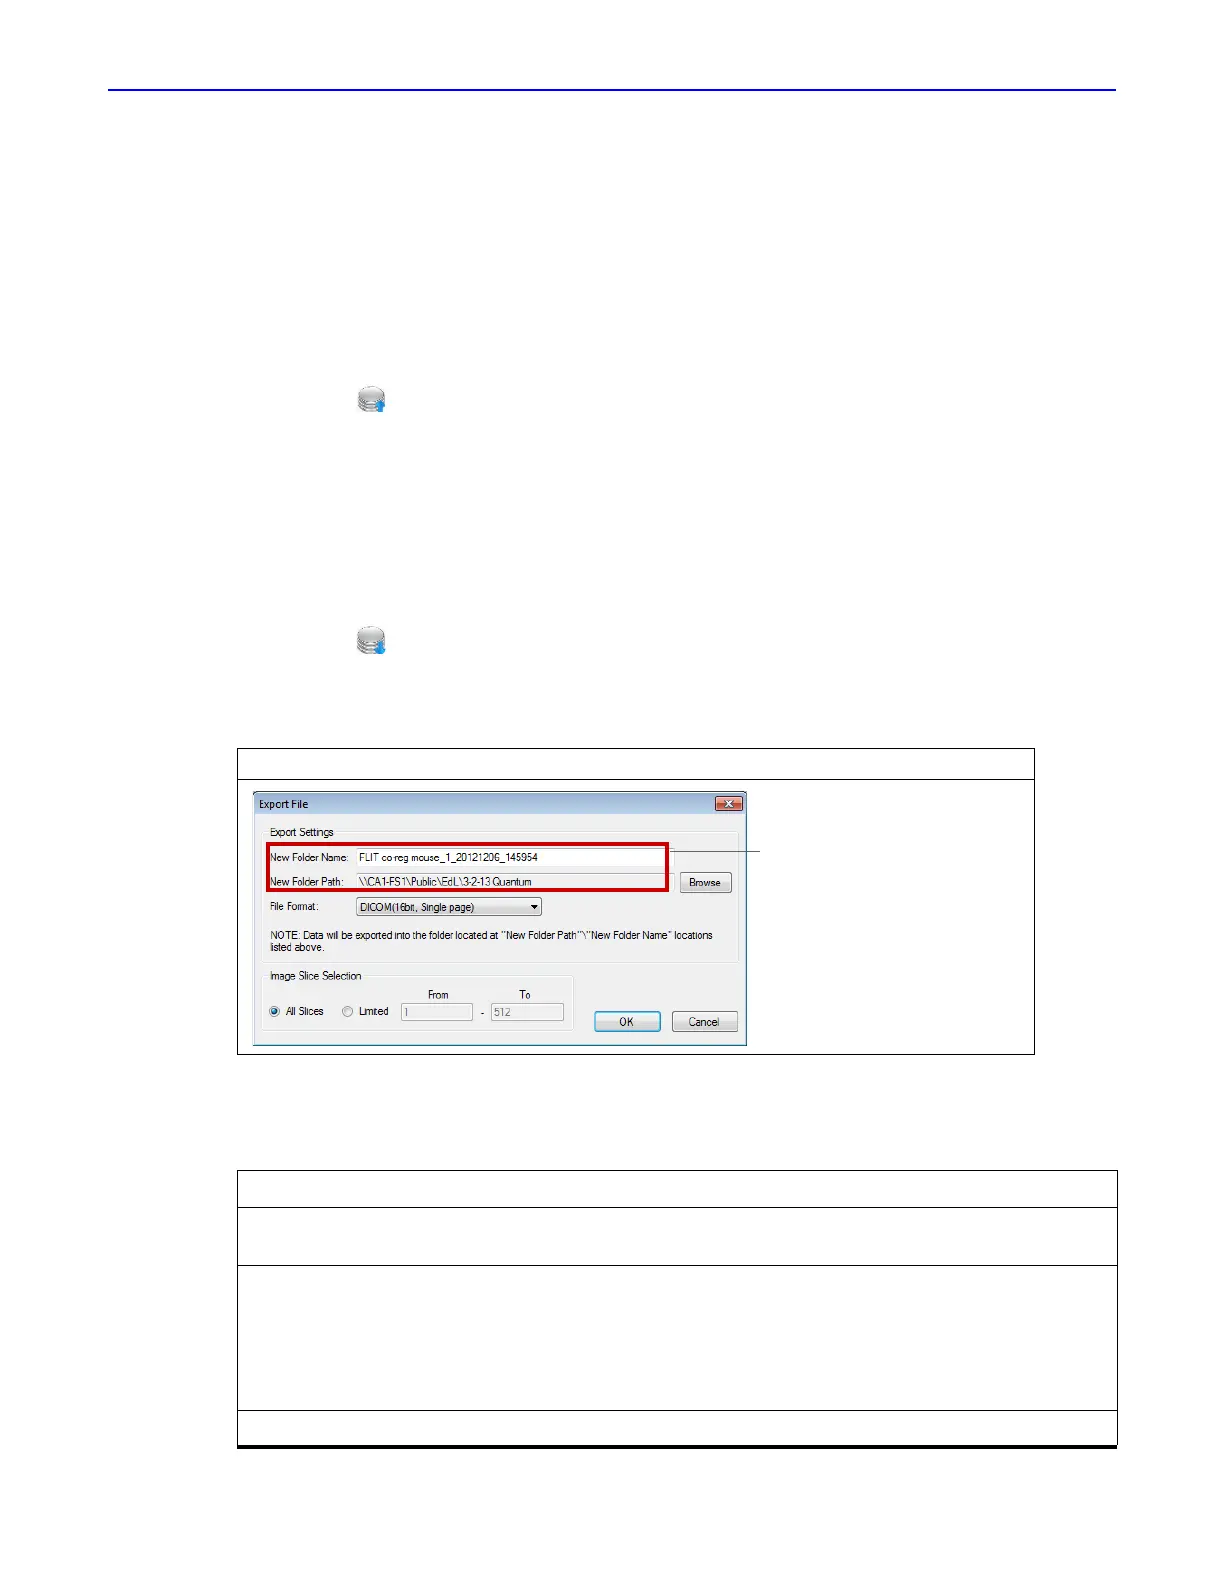
3. In the dialog box that appears (Figure 5.7), confirm the default name or enter a different name for
the new folder where the data will be copied.
4. To change the folder path, click Browse and select a location in the dialog box that appears.
5. Select a file format from the drop-down list.
Figure 5.7 Export File
File Format Description
CT image with a SimpleViewer Exports the 3D reconstruction (.vox) along with the SimpleViewer. See
page 68 for more details on the Viewer.
DICOM (16bit, Single page)
Tiff (16, Multi page)
JPEG
Bitmap
PNG
Exports individual slices in a file formats common for medical imaging.
Exporting to DICOM format creates a folder of .dcm files, one file per
slice. Exporting to Tiff format creates a single file which includes all of
the slices.
AVI Exports the selected images in a video file format.
Data will be copied to this folder
 Loading...