Quantum GX2 microCT Imaging System Manual Chapter 6 | Image Acquisition 51
6.6 CT Scan Without Gating
1. Click the CT Scan button to begin the scan.
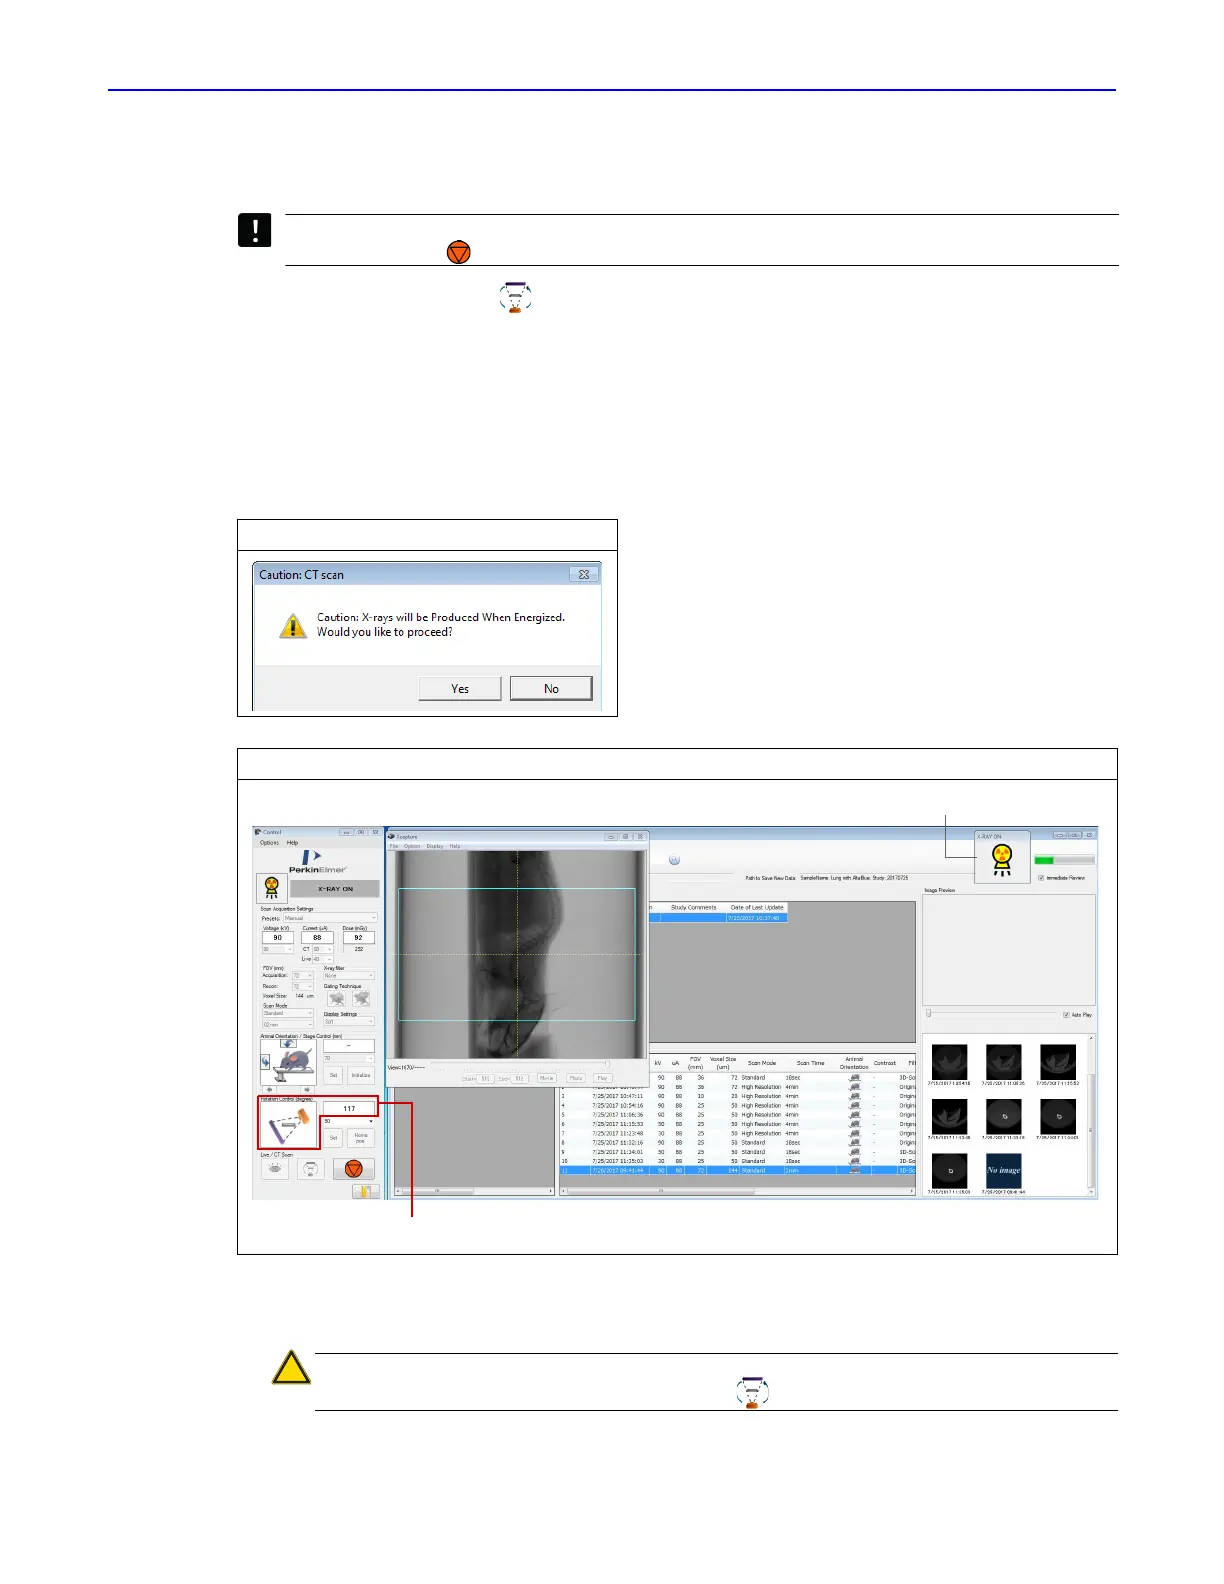
2. Click Yes in the confirmation message that appears (Figure 6.13).
X-rays are energized as indicated by the blinking voltage icon and the imaging system status box
(Figure 6.14). The Xcapture window opens, then gantry rotation and image acquisition begin.
3D reconstruction automatically proceeds after acquisition is complete.
The AutoViewer displays the 3D reconstruction (Figure 6.15). See Chapter 7 on page 71 for more
information on viewing 3D reconstructions.
3. Remove the subject from the sample chamber after the Quantum GX2 microCT is in Standby
mode.
IMPORTANT: If you need to abort acquisition and stop X-ray generation, click the
emergency stop button in the Control Panel.
Figure 6.13 CT Scan Confirmation Message
Figure 6.14 Control Panel and Xcapture Window During a Scan
CAUTION: Do not remove or change the bore cover until the Quantum GX2 microCT
is in standby mode and the CT scan button becomes available.
Gantry position
X-ray tube status = ON
 Loading...