Quantum GX2 microCT Imaging System Manual Chapter 7 | Viewing Images 70
Reconstruction
Options
Places an ROI on an image that will be used to select the image data for reconstruction.
Places an ROI on an image that will be used to select the image data for reconstruction
Pixel Size – Pixel dimensions.
Slice Thickness – Voxel dimensions.
Slice Pitch – Distance between slices.
Number of Slices – The number of slices to reconstruct
Starts the reconstruction.
Measurement
Tools
Click and drag to draw a measurement cursor on an image. Right-click a measurement cursor to
delete the selected cursor or all cursors.
Draws a rectangular ROI on an image. Right-click an ROI to delete the selected ROI or all ROIs.
Draws a circular ROI on an image.
Displays a line graph of pixel intensities along a line segment drawn on an image.
1. Select a slice view.
2. Click the button.
The Line Profile window appears.
3. Press and hold the mouse button while drawing a line segment on the image.
The Line Profile graph shows the pixel intensities along the line segment.
4. Drag either end of the line segment to resize or reposition the line segment.
The graph is automatically updated.
5. Click the button again to turn off and close the line profile graph.
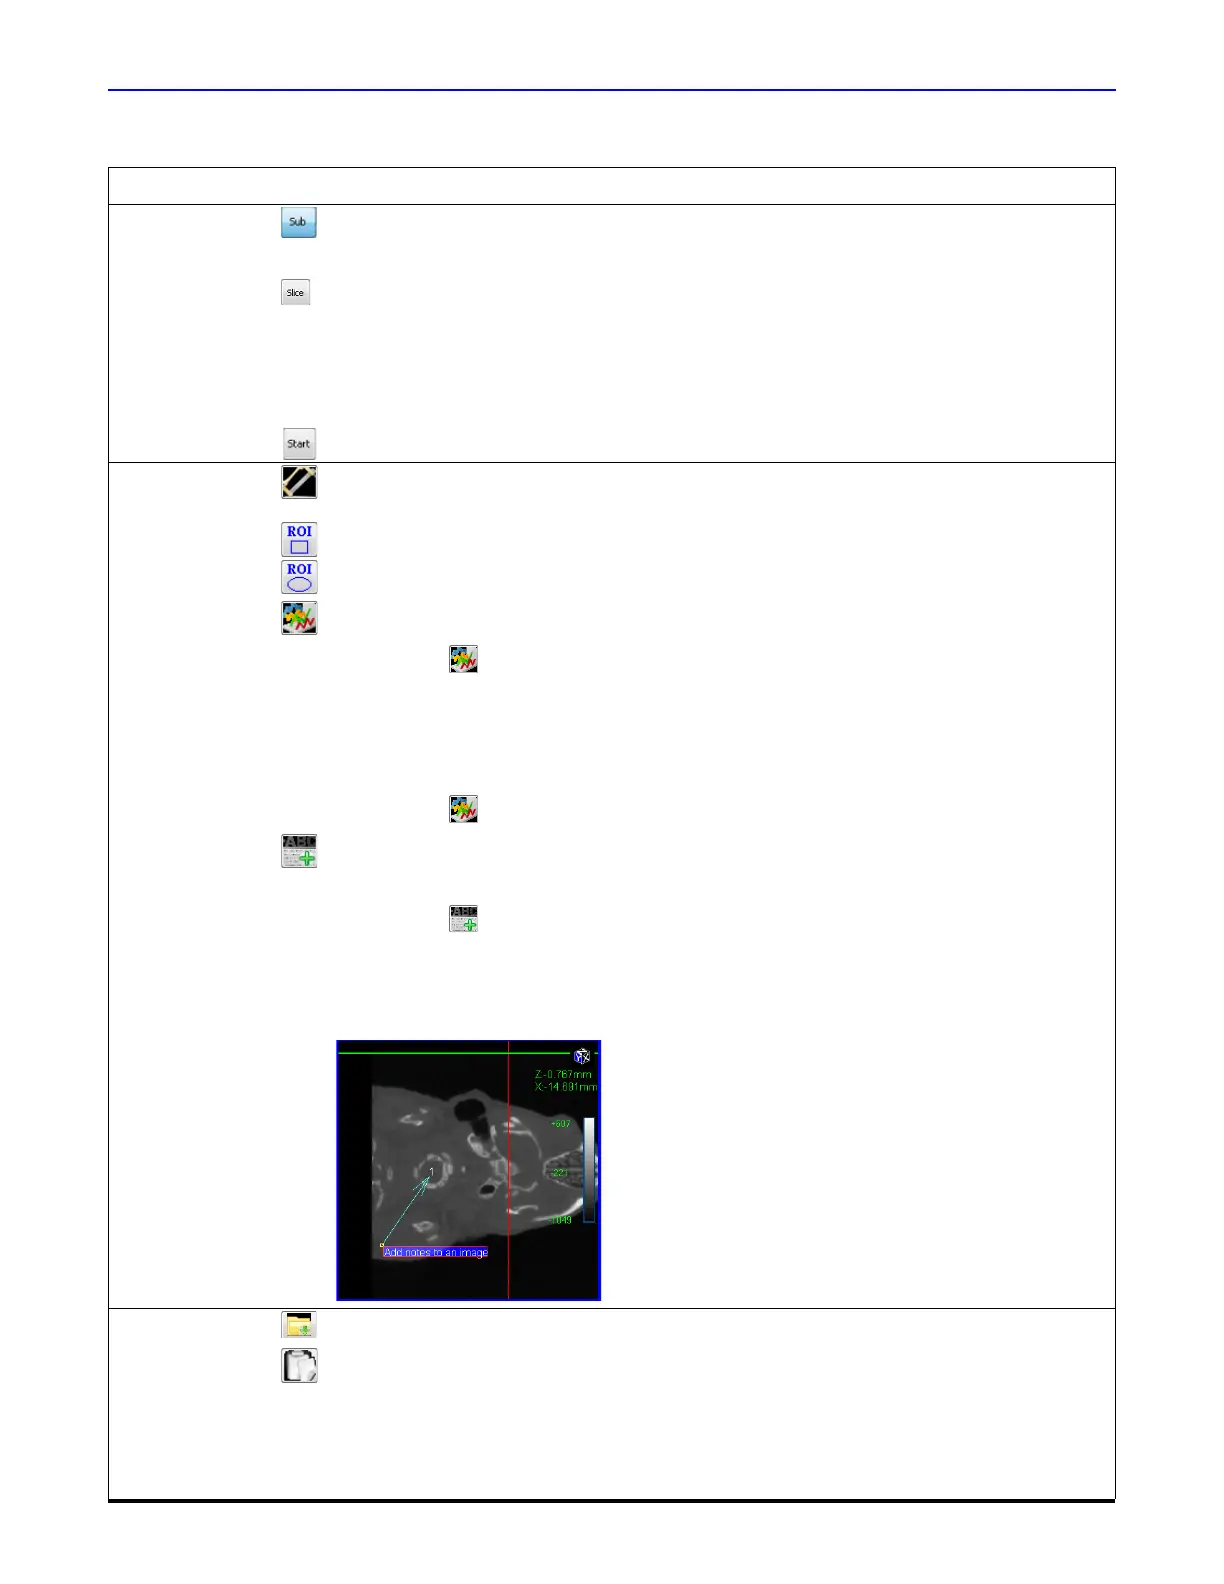
Opens a dialog box that enables you to insert a comment on an image. To add a comment to an
image:
1. Select a slice view.
2. Click the button.
3. Enter text and click OK in the dialog box that appears.
4. To resize or reposition the arrow, drag the arrow tip or the arrow end. To move the arrow,
drag the entire arrow.
5. To delete a comment or all comments, right-click a comment and select a delete option from
the shortcut menu.
Image Save Opens a Save As dialog box that enables export of the 3D reconstruction (.vox).
Copies the image to the system clipboard.
X = Cross hair location in the X-plane.
Y = Cross hair location in the Y-plane.
VAL =
Grayscale value at the crosshair location.
Table 7.4 Viewer Window (continued)
Item Description
 Loading...