13 - 47
Adjustment
24V = 4% ED
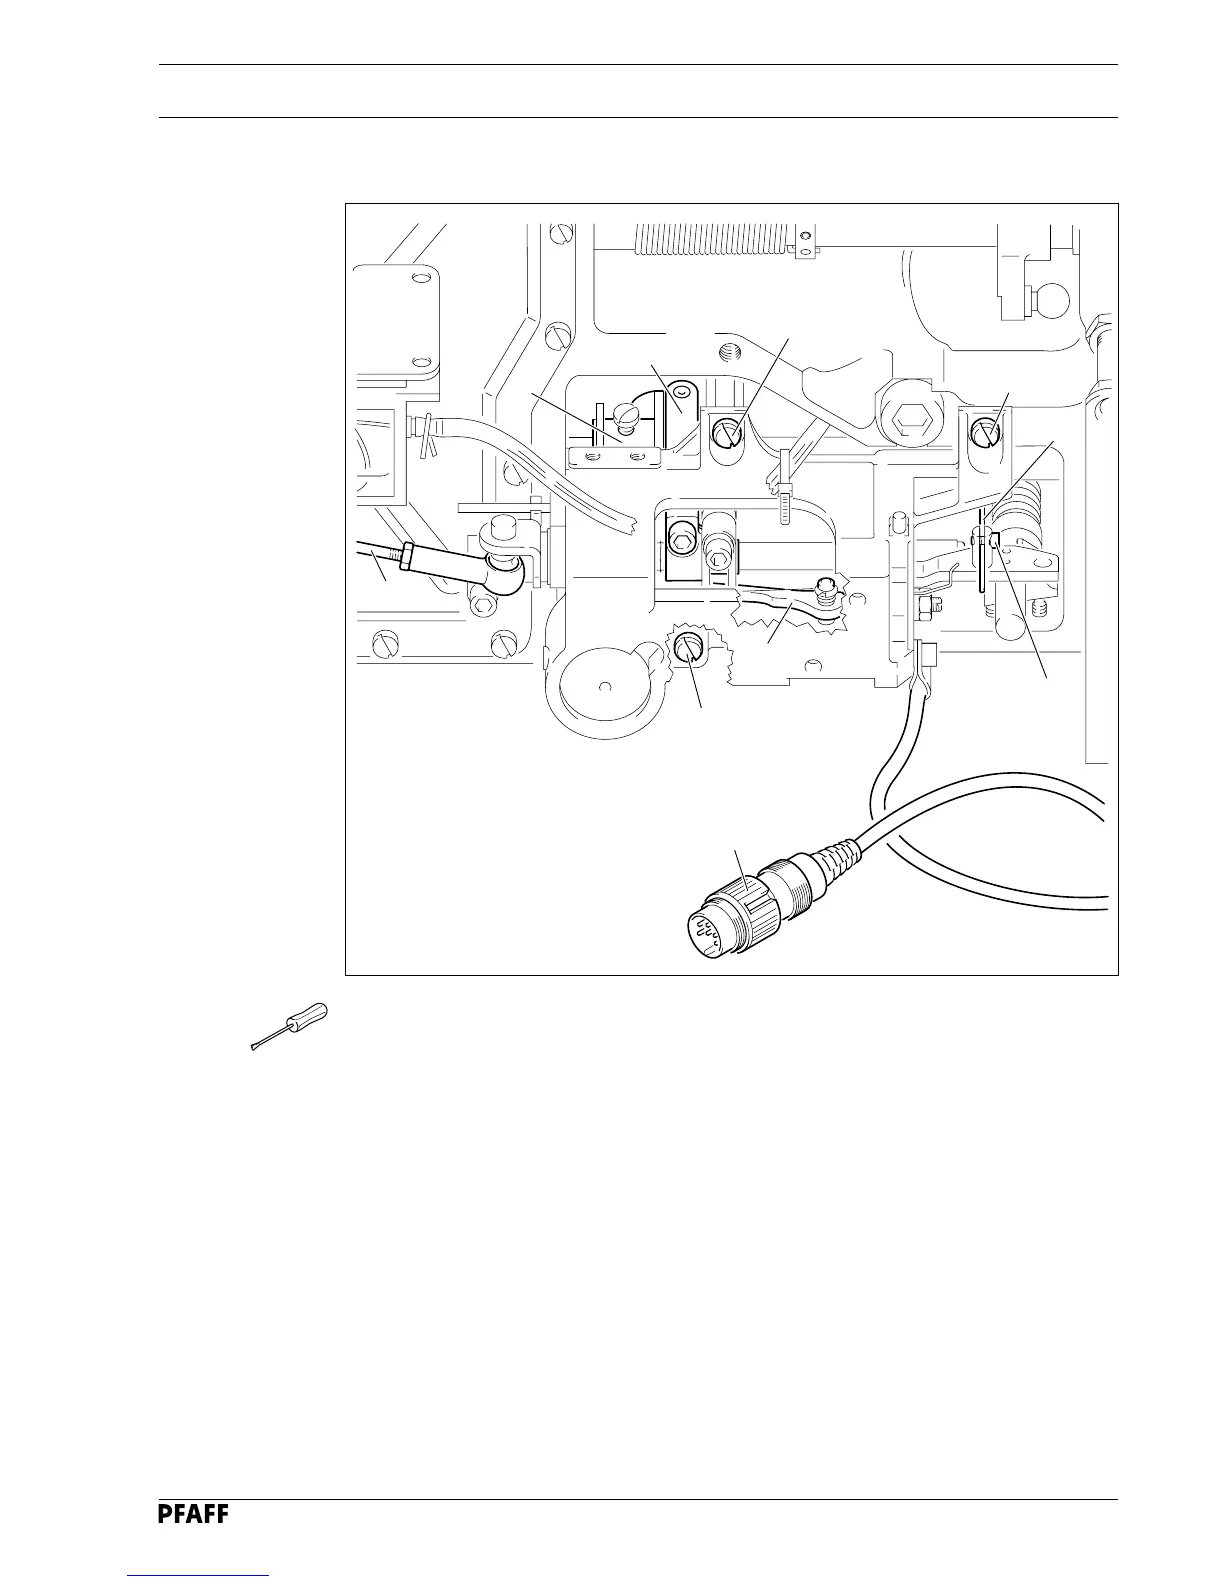
13.06.14 Mounting and dismounting the control unit
Fig. 13 - 46
1
3
2
4
5
6
5
5
7
8
● In order to dismount the control unit, pull plug 1
out of the socket of the motor control
plate or the control box as applicable.
● Loosen screw 2 and remove linkage 3 from its slot.
● Remove connecting rod 4.
● Loosen screws 5 and take off complete control unit.
● In order to mount the control unit, position the needle bar at t.d.c
● Put the control unit back on and tighten screws 5 slightly.
● Activate engaging lever 6 manually, so that roller lever 7 engages with control cam 8.
● Align the control unit, so that the roller of roller lever 7 is centred in the cam notch 8.
● Tighten screws 5 firmly.
● Replace connecting rod 4 and linkage 3 and tighten screws 2 firmly.
● Plug in plug 1.
● Check performance manually.
● If engaging lever 6 is not released, repeat adjustment of control unit
 Loading...


