Determining The Oil Pattern
61-900040-000 Rev. Date: 01/22 6-9
While different environmental conditions, such as temperature and humidity, between the
factory and bowling center can alter the amount of oil applied, the overall pattern profile
should remain approximately the same.
By using wicking foams of various densities along the 42 inch width of the oil tank, the
Phoenix LT4 can apply numerous oiling patterns. Mixing and matching wicking foams and
varying the adjustment bars will allow for a large number of oil patterns. Refer to Section
4.4.3 – Replacing the Wicking Foams and Section 4.3.9 – Adjusting the Oil Tank Bars.
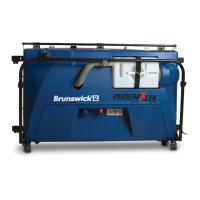
6.5.2 Wicking Foam Densities
The Phoenix LT4 is shipped with six wicking foams made of three different densities.
Changing wicking foam types can result in significant changes to the amount of oil being
applied to the lane, while adjusting the adjustment bars on the top of the oil tanks will result
in smaller changes.
A set of replacement wicking foams of different densities was supplied with the Phoenix
LT4 Lane Machine. Each density of wicking foam is printed with a number for easy
identification. The higher the number printed on the foam, the higher the foam’s density,
and therefore the lower the oil output. Having different density foams as well as having the
ability to change the location of each foam type allows for the creation of many different oil
patterns.
Table 6- 2 shows the correlation between the number printed on the wicking foam and the
comparative oil output along with the part number of each type of foam.
Table 6- 2
6.5.3 Preparing Custom-Sized Wicking Foams
Replacement wicking foams come in lengths of 48 inches. When cutting a replacement
foam section, try to make the cut as clean and as straight as possible. Using a straight
edge as a guide and a new blade in the cutter will help prevent jagged edges and gaps
between foam sections and in the pattern. One trick is to slightly overlap two foams keeping
their top edges aligned, and make a single cut through both of them. The resulting cut will
match perfectly, even if its angle is a little off.