Maintenance and Adjustments
61-900040-000 Rev. Date: 01/22 4-35
3. Carefully peel the waste tank seal from the vacuum pump.
4. Scrape off any remaining pieces of the seal and any adhesive.
5. Wipe the waste tank seal area with a solvent to remove any remaining residue.
6. Allow the solvent to completely evaporate from the sealing surface. Failing to do
so will prevent the new seal from adhering properly.
7. Remove the plastic backing from the new waste tank seal.
8. Center the new seal over the vacuum pump inlet and press firmly.
9. Allow the adhesive 15 to 20 minutes to set before installing the waste tank.
10. Reinstall the waste tank and vacuum hose.
11. Check for gaps in the seal between the waste tank and vacuum pump. Refer to
Section 4.3.6 – Adjusting the Vacuum Motor Position for instructions on adjusting
the vacuum pump motor and bracket.
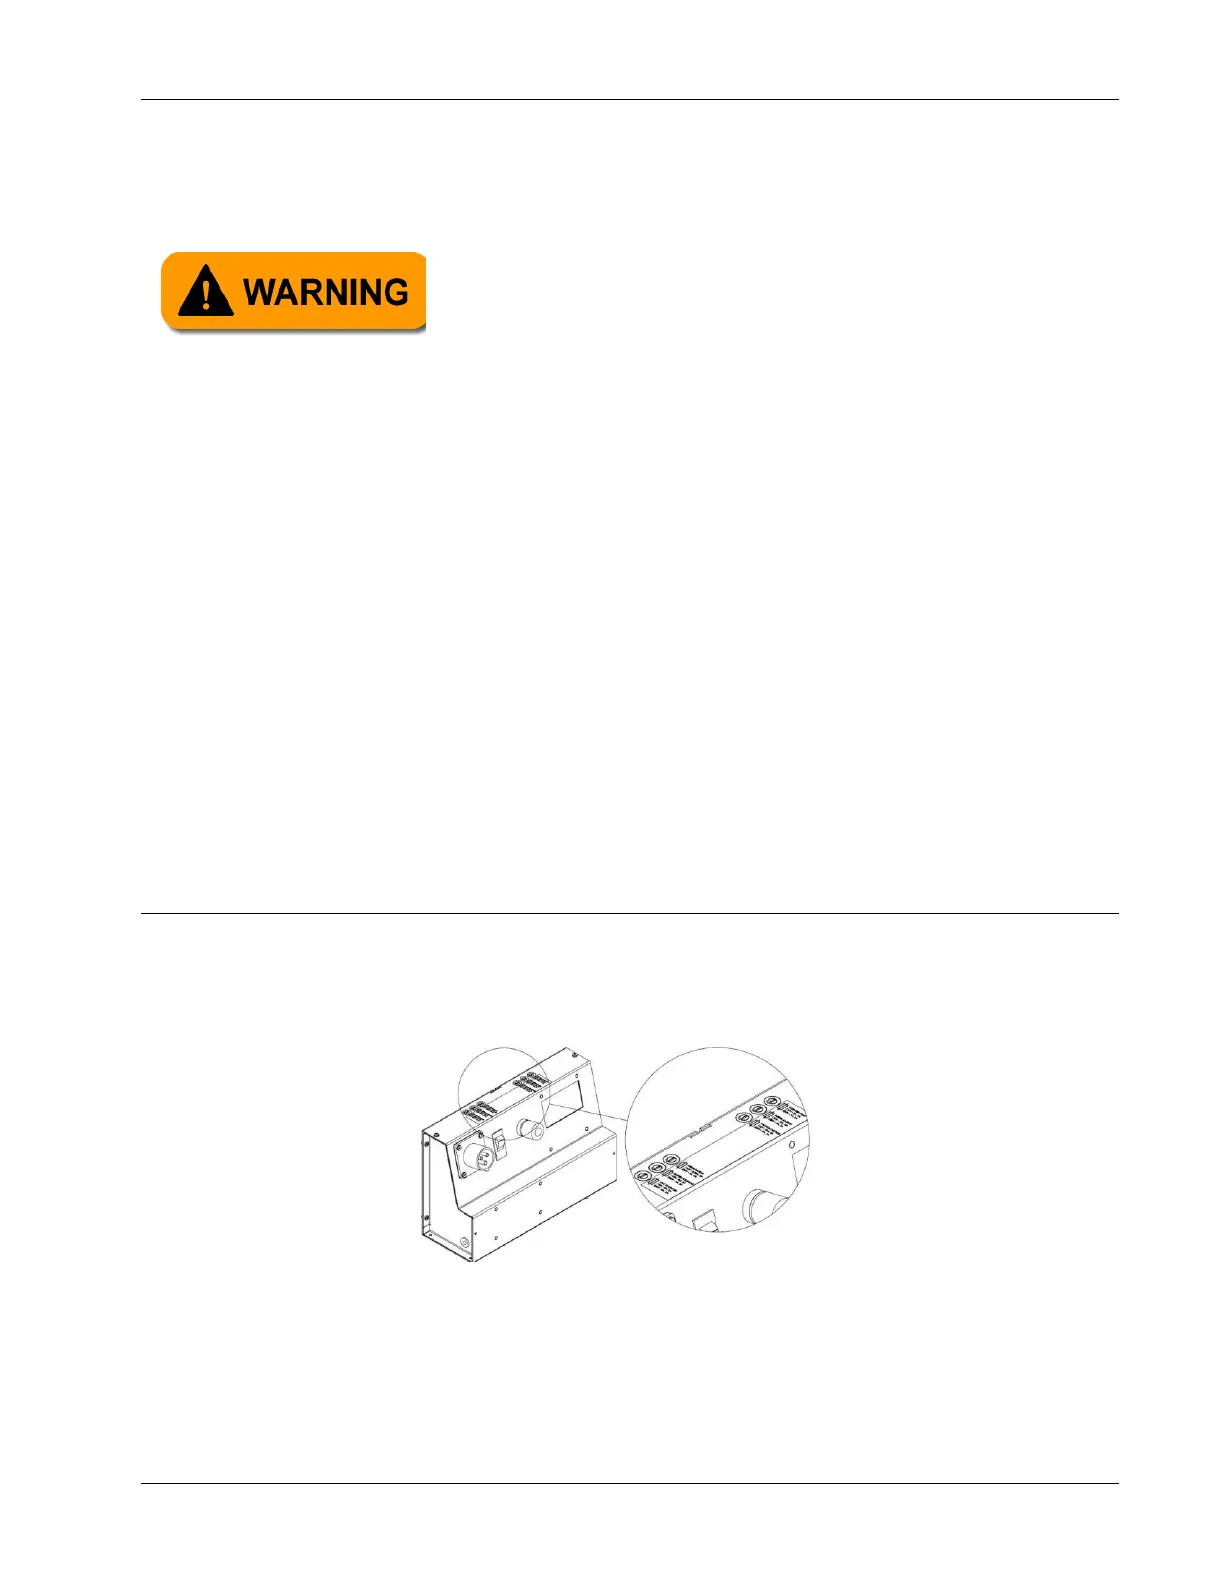
4.4.5 Replacing Fuses
The Phoenix LT4 contains six fuses that are used to protect its electrical components. All six
fuses are located on top of the control box as shown in Figure 4- 444. Several spare fuses
have been included in the yellow envelope that was shipped with the machine.
The voltage, current, and part number for each of the fuses is listed in Table 4- 2 on the
following page. This information, with exception to the part number, is also present on the
top of the control box.
Some solvents are flammable. Do not use while smoking or
near open flames. Solvents can give off harmful vapors. Use
in a well ventilated area. Follow the manufacturer’s
precautions.