Phoenix LT4 Lane Machine Operation, Maintenance, and Parts Manual
4-36 Rev. Date: 01/22 61-900040-000
Table 4- 2
To replace the fuses, perform the steps below with the machine in the operating position.
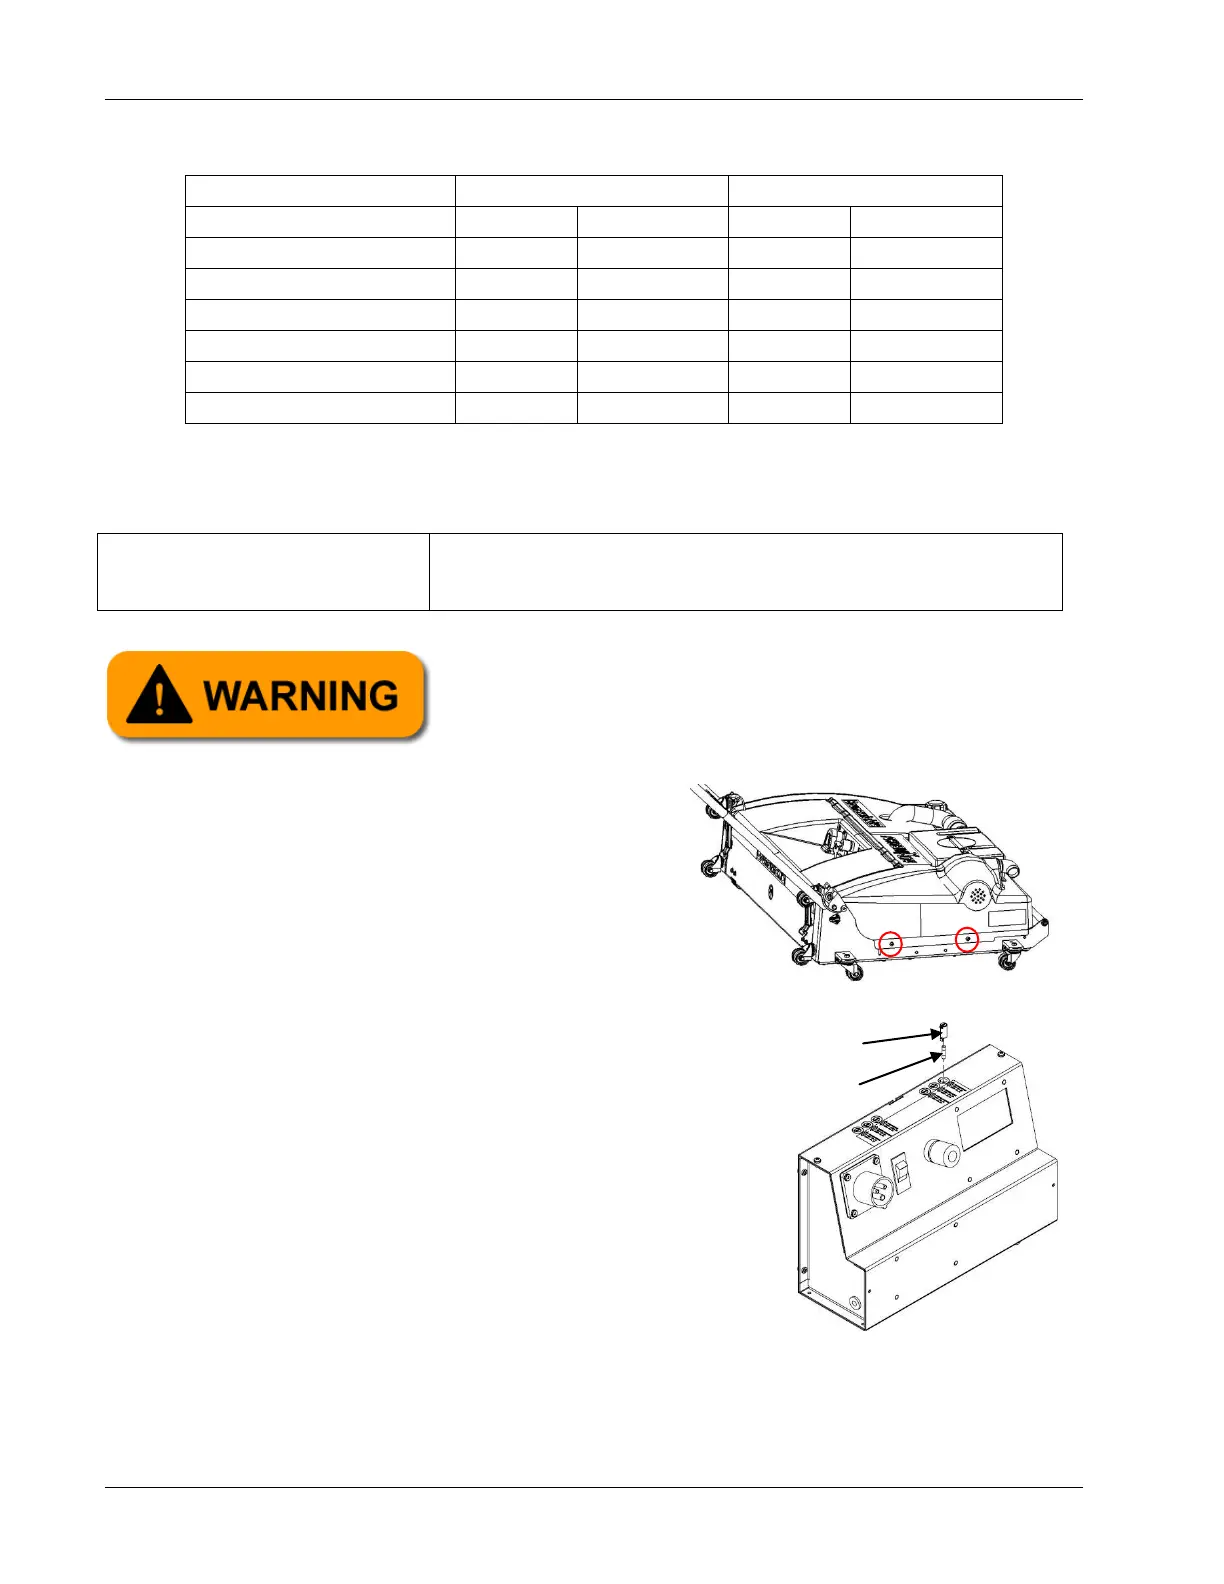
1. Unlatch the oil compartment door latches,
disconnect the vacuum hose and remove
the waste tank, remove the cap from the
cleaner tank, remove the two screws from
each side of the hood (see Figure 4- 455),
and lift the hood from the frame. Set the
screws aside.
2. Remove the fuse holder and fuse by
pushing the holder in with the screwdriver
while unscrewing it (rotate counterclockwise).
3. Lift the fuse holder and fuse out of the control box.
4. Remove the fuse from fuse holder by pulling it
straight out of the holder.
NOTE
Replacement fuses must have the identical voltage,
current, and time delay ratings.
5. Place the new fuse into the fuse holder and insert into
the control box.
5/32” hex wrench
Flat blade screw driver
Always ensure the Phoenix LT4 Lane Machine is
disconnected from any power source before starting
any maintenance, replacement, or repair task.