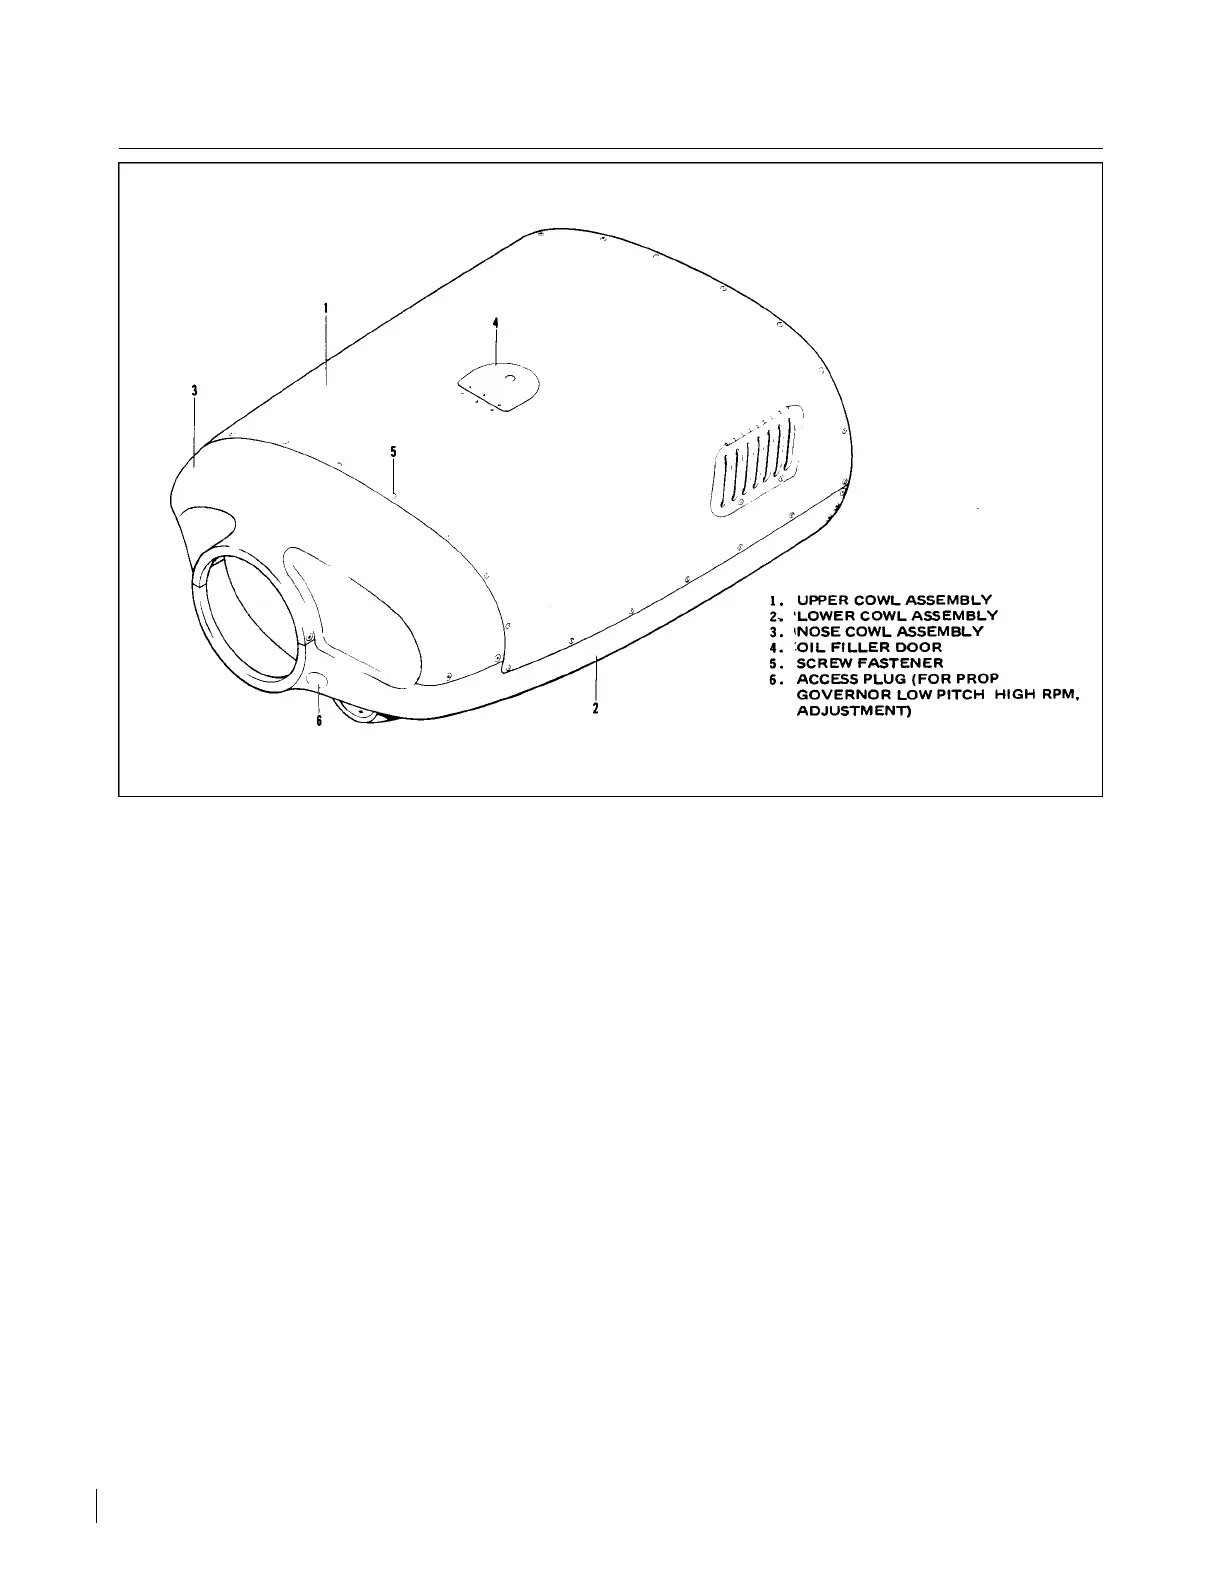
Figure 8-1. Engine Cowling Installation
8-7. INSTALLATION OF ENGINE COWLING. (Refer to Figure 8-1.)
a. Position the bottom cowl and secure with screw fasteners to the fuselage and engine mount.
b. Position and connect the upper nose cowl to the lower cowl.
c. Install the top cowl with attaching screw fasteners.
d. Attach nose gear door rods.
e. Connect the fuel drain flex line to the drain valve assembly.
8-8. PROPELLER.
8-9. REMOVAL OF PROPELLER. (Refer to Figure 8-3.)
WARNING
Before performing any work on the propeller, be sure the magneto and
master switch is OFF and the mixture control is in the IDLE CUT- O F F
position.
a. Remove the hardware that attaches the nose cowl and remove the cowl. The top and side panels may
be removed for greater accessibility.
b. Remove the safety wire from the propeller mounting nuts and remove the nuts.
c. Place a drip pan under the propeller to catch oil spillage and pull the propeller from the engine shaft.
d. If the spinner and spinner bulkhead are to be removed, remove the spinner nose cap attaching screws
and cap. Remove the spinner by removing the safety wire and check nut from the propeller at the
forward end of the forward spinner bulkhead and the screws that secure the spinner to the aft bulkhead.
The aft spinner bulkhead may be removed from the hub by removing the locknuts.
Revised: 8/31/77
2A13
CHEROKEE ARROW III SERVICE MANUAL
POWER PLANT - CONTINENTAL