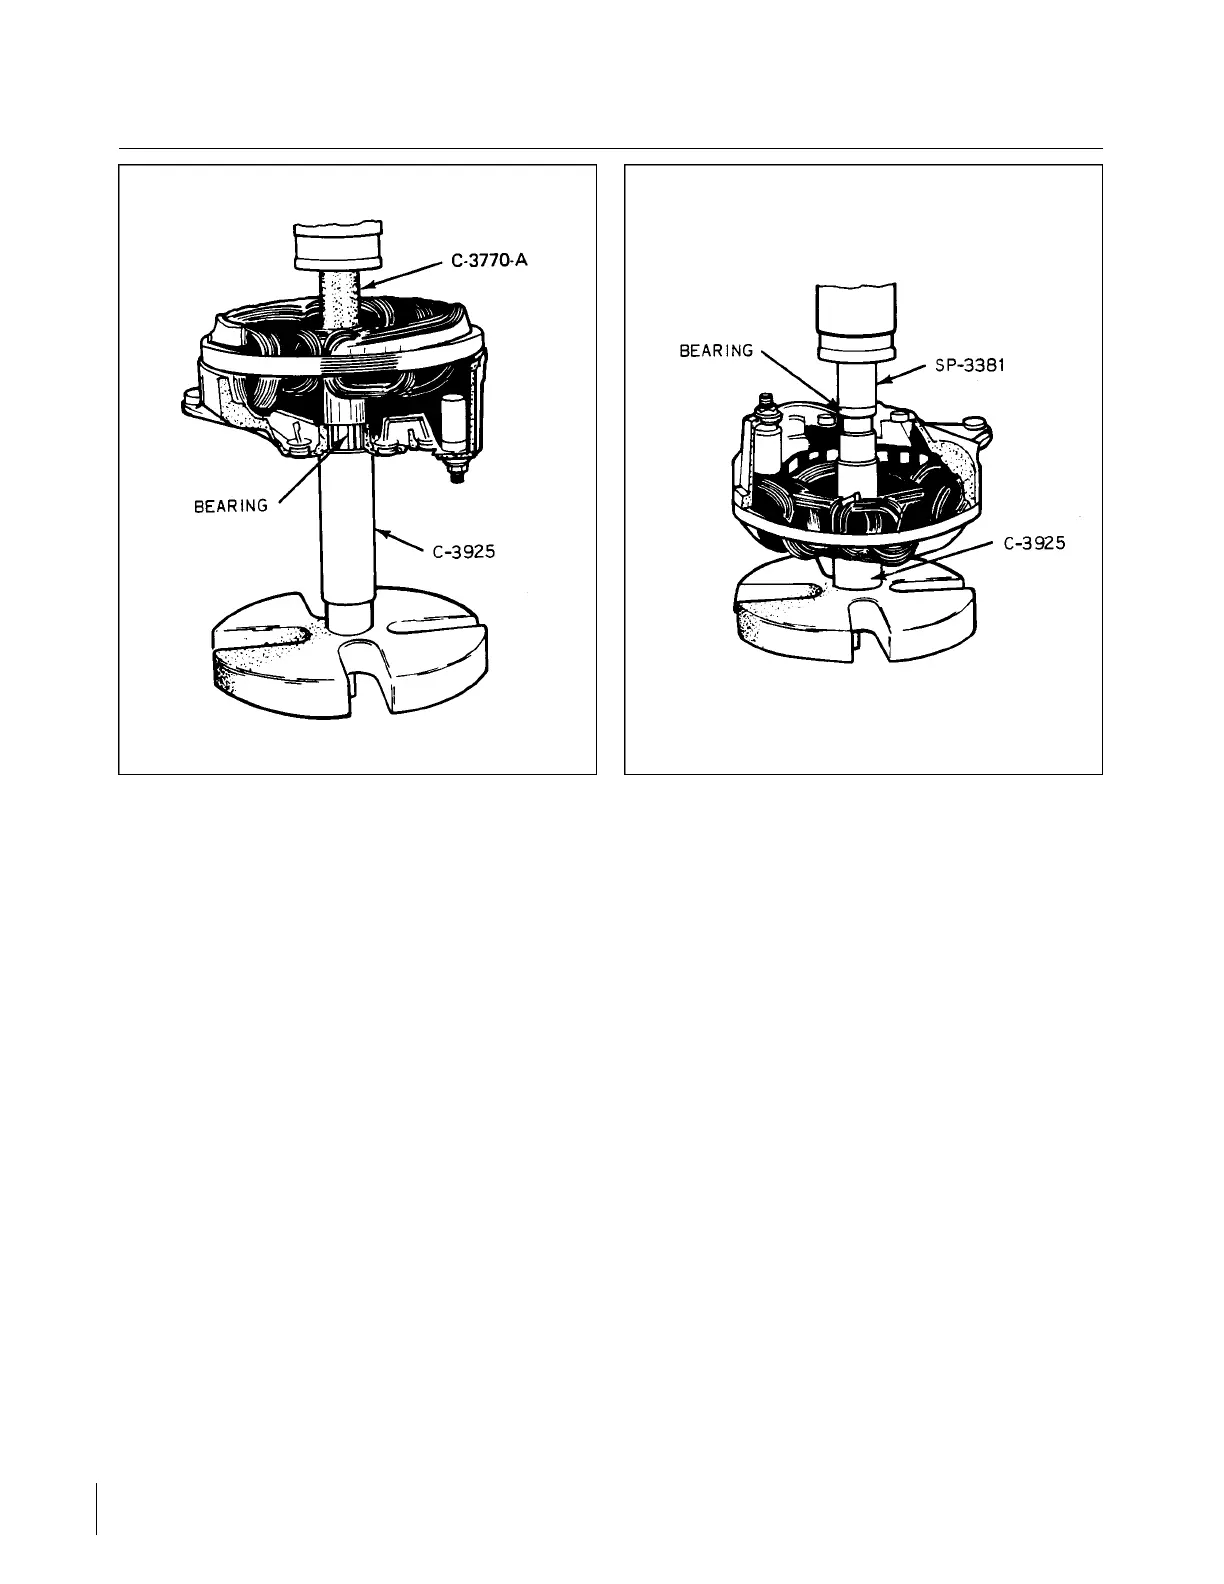
Figure 11-12. Removing End Bearing Figure 11-13. Installing End Bearing
11-18. REMOVING NEEDLE BEARING FROM END SHIELD. (Refer to Figure 11-12.) If inspection
indicates that the needle bearing is faulty, it may be replaced.
The bearing is a press fit in the end shield. To protect the end shield, it is necessary to support it with tool
C-3925 while pressing the bearing out with tool C-3770-A.
NOTE
Tool C-3925 is a double end tool. One end will only fit into the counterbore
on alternators provided with the grease retainer. The opposite end is used as
a support for end shields without the grease retainer counterbore.
11-19. INSTALLING NEEDLE BEARING IN END SHIELD. (Refer to Figure 11-13.) Support the end shield
on the C-3925 tool and press the bearing into the end shield with tool SP-3381. Tool SP-3381 has a concaved
end that is shaped to fit over the end of the bearing case. It is essential to use this tool to prevent damage to the
bearing.
The face of the tool has been relieved to prevent pressure being applied on the center of the bearing. The
use of a flat object to press in the bearing can cause the bearing to become distorted and result in a noisy
bearing. Tool SP-3381 will also position the bearing properly. When the tool contacts the end shield the
bearing is in the end shield, the proper distance.
NOTE
New bearings are prelubricated, additional lubrication is not required and
should not be used.
Revised: 2/13/89
2H4
CHEROKEE ARROW III SERVICE MANUAL
ELECTRICAL SYSTEM