3D FACE PHOTO
38 Planmeca ProMax 3D Max with ProTouch
User’s Manual
3. Adjust the X-ray unit to suit the height of the patient. To
do this, press either of the height adjusting buttons
until the chin cup is approximately level with the
patient’s lower jaw.
4. Ask the patient to grasp the patient handles.
5. Use the forward field at the bottom right corner to enter
the view where you can adjust the lights.
6. Rotate the C-arm 90 degrees clockwise by touching
the 90° button at the bottom of the screen. This will
give you a better view for checking the position of the
side light (Y laser).
Touch the button again if you wish to rotate the C-arm
back to the original position.
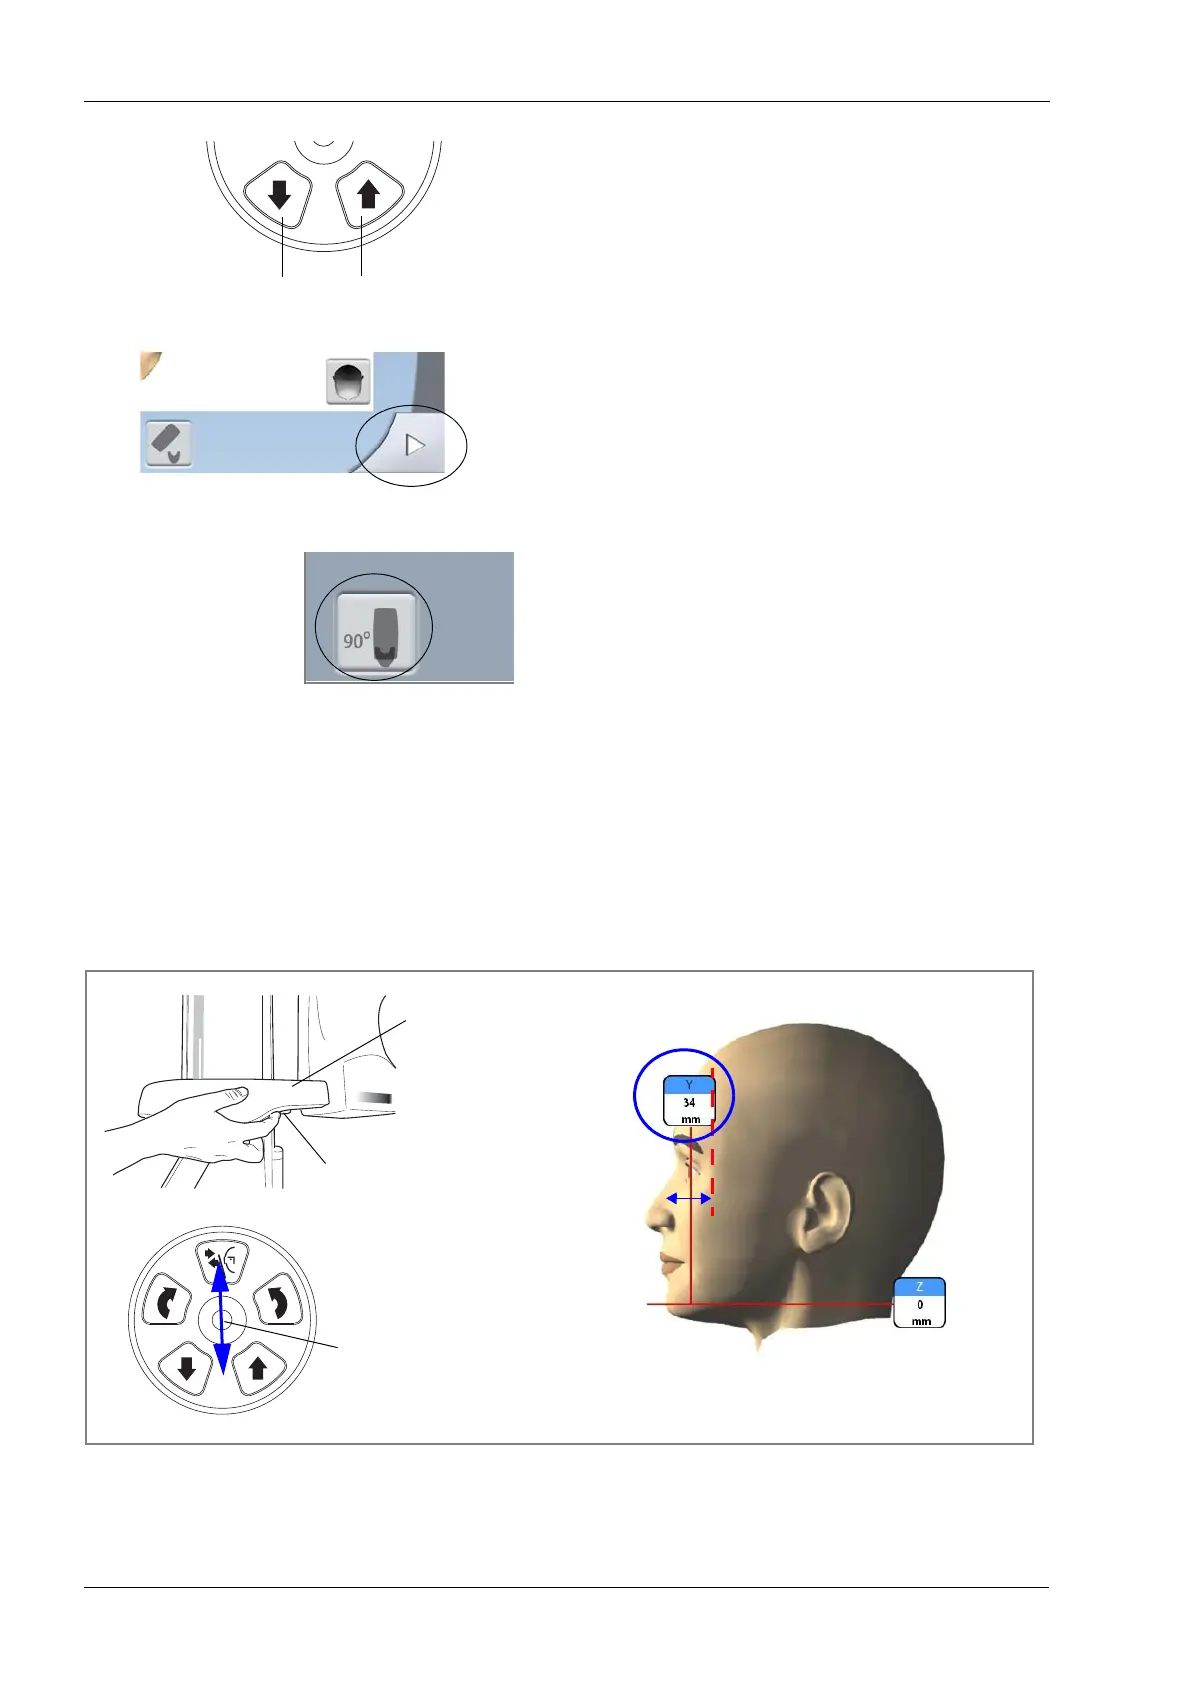
7. Check that the side light (Y laser) is positioned 1 -
3 cm (0.4 - 1.2 in.) behind the eye corner.
If you need to move the side light do one of the
following:
• Move the thumb wheel that is located on the underside
of the patient support table.
• Move the positioning joystick towards you or away
from you.
NOTE When you adjust the light position the positioning
light moves on the patient’s face. The positioning light
on the illustration does not move according to your
adjustment.
Positioning joystick
(side light = Y laser)
Thumb wheel
Patient support
(side light = Y laser)
OR
table