Planmeca ProMax 3D Max with ProTouch 41
3D MODEL EXPOSURE
User’s Manual
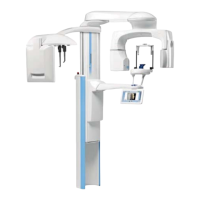
4. Remove all excess material from the top of the
calibration cup.
5. Gently pull the calibration pin out and ensure that the
surfaces of the hole formed by the calibration pin are
even (no air bubbles in inside walls).
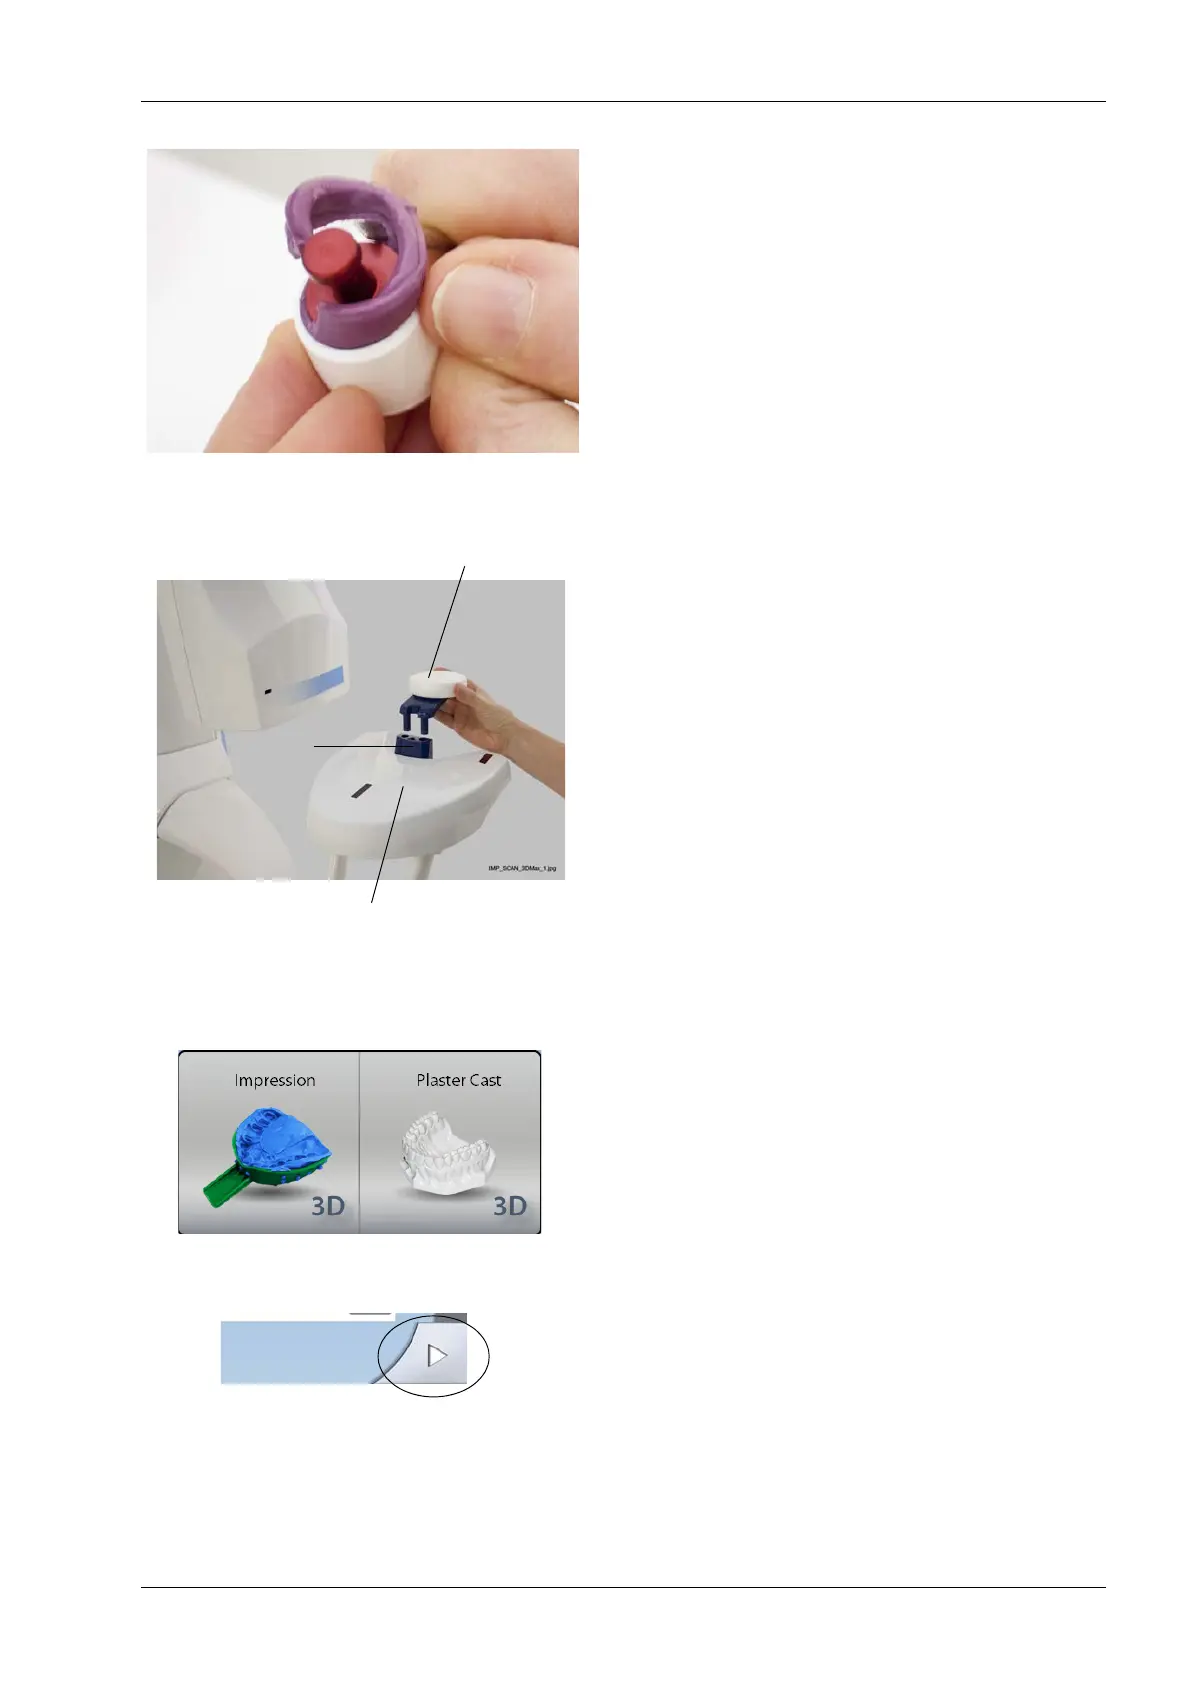
6. Remove any patient supports attached to the X-ray
unit patient support table. Insert the polystyrene disc
provided (part number 10017436) into the adapter.
10.1.2 Selecting settings
1. On the X-ray unit, select the program.
• For impression material select
3D Models > Impression.
• For plaster material select
3D Models > Plaster Cast.
The required exposure values depend on the material
and X-ray unit (X-ray tube and sensor) used. If you
need to adjust the preset exposure values (80 kV /
12.5 mA), proceed as described in section 8.2.4
“Adjusting exposure values” on page 22.
2. Select the forward field on the touch screen. The
positioning lights (volume center lights, volume bottom
light and incisor light) come on. The volume center
lights cross in the middle of the image volume.
Adapter
Polystyrene disc
Patient support table
(Part number 10017436)