3D MODEL EXPOSURE
40 Planmeca ProMax 3D Max with ProTouch
User’s Manual
10 3D MODEL EXPOSURE
CAUTION The 3D Model programs must not be used
for patient imaging. The programs are
intended for taking exposures of
impressions and plaster casts only.
10.1 Calibrating X-ray unit for impression or plaster material
NOTE The X-ray unit has to be calibrated for each new
material that is used. The X-ray unit needs to be
calibrated only once for each material.
NOTE FOR IMPRESSIONS
Only monophase impression materials can be used.
NOTE FOR PLASTER CASTS
If the plaster cast consists of two materials, the X-ray
unit has to be calibrated for the teeth material.
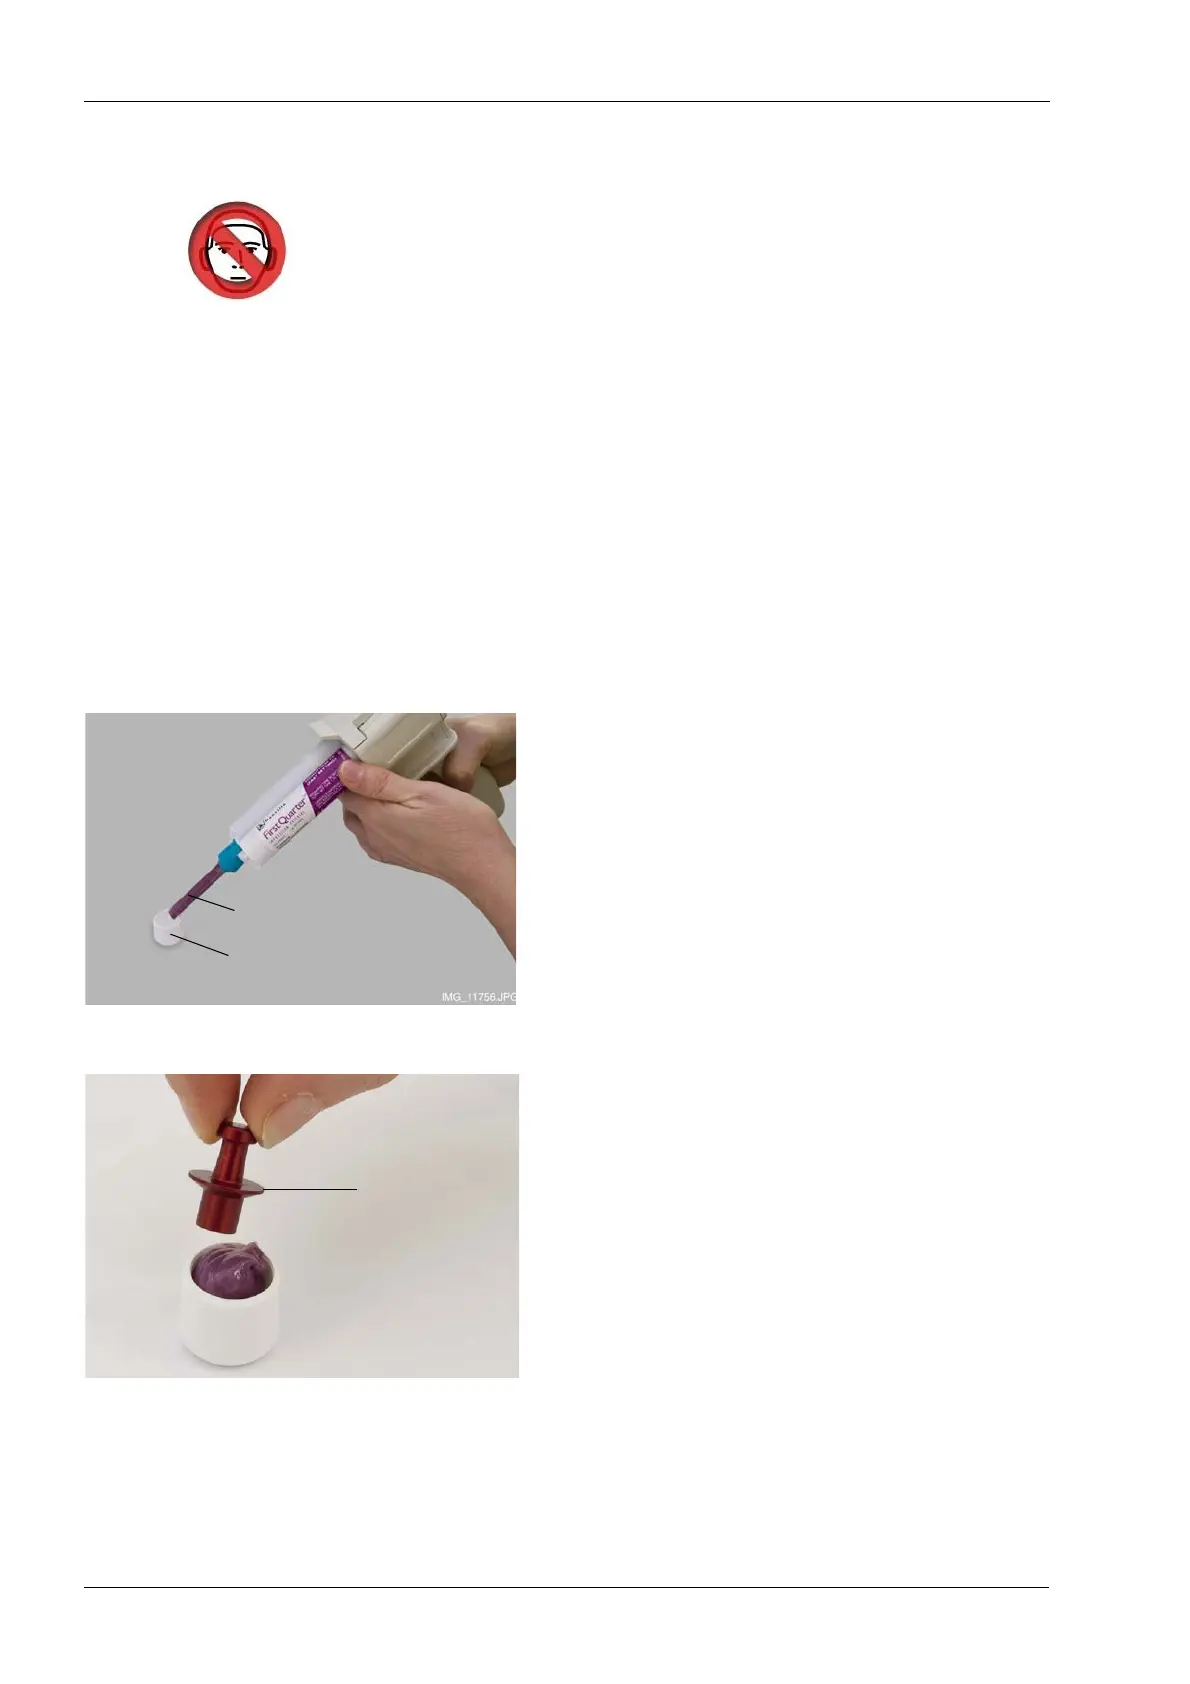
10.1.1 Preparing calibration material
1. Insert material into the calibration cup provided (part
number 10031325) until the calibration cup is full.
2. Place the calibration pin provided (part number
10031265) in the material. Note that the calibration pin
has to be pushed in thicker end first. The middle rim
has to be flush with the top edge of the calibration cup.
3. Let the material set. The setting time depends on the
material used. Wait slightly longer than recommended
in the instructions supplied by the manufacturer to
ensure proper hardening.
Calibration cup
(part number 10031325)
Impression material
Calibration pin
(part number
10031265)