Planmeca ProMax 3D Max with ProTouch 33
3D PATIENT EXPOSURE
User’s Manual
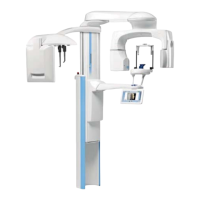
NOTE Take a scout image first if you wish to include the
patient’s nose in the skull image (Ø230 mm). Refer to
section 8.6 “Taking a scout image or 2D views (LAT, PA
or LAT-PA)” on page 33 for details. If needed, then
move the positioning joystick towards you to adjust
the side light (Y laser).
NOTE The incisor light indicates the front edge of the image
volume when a front position is selected.
NOTE Moving the positioning joystick switches the incisor
light off.
NOTE When you adjust the volume position the positioning
lights move on the patient’s face. The positioning
lights on the illustrations show the preset volume
position and they do not move according to your
adjustments.
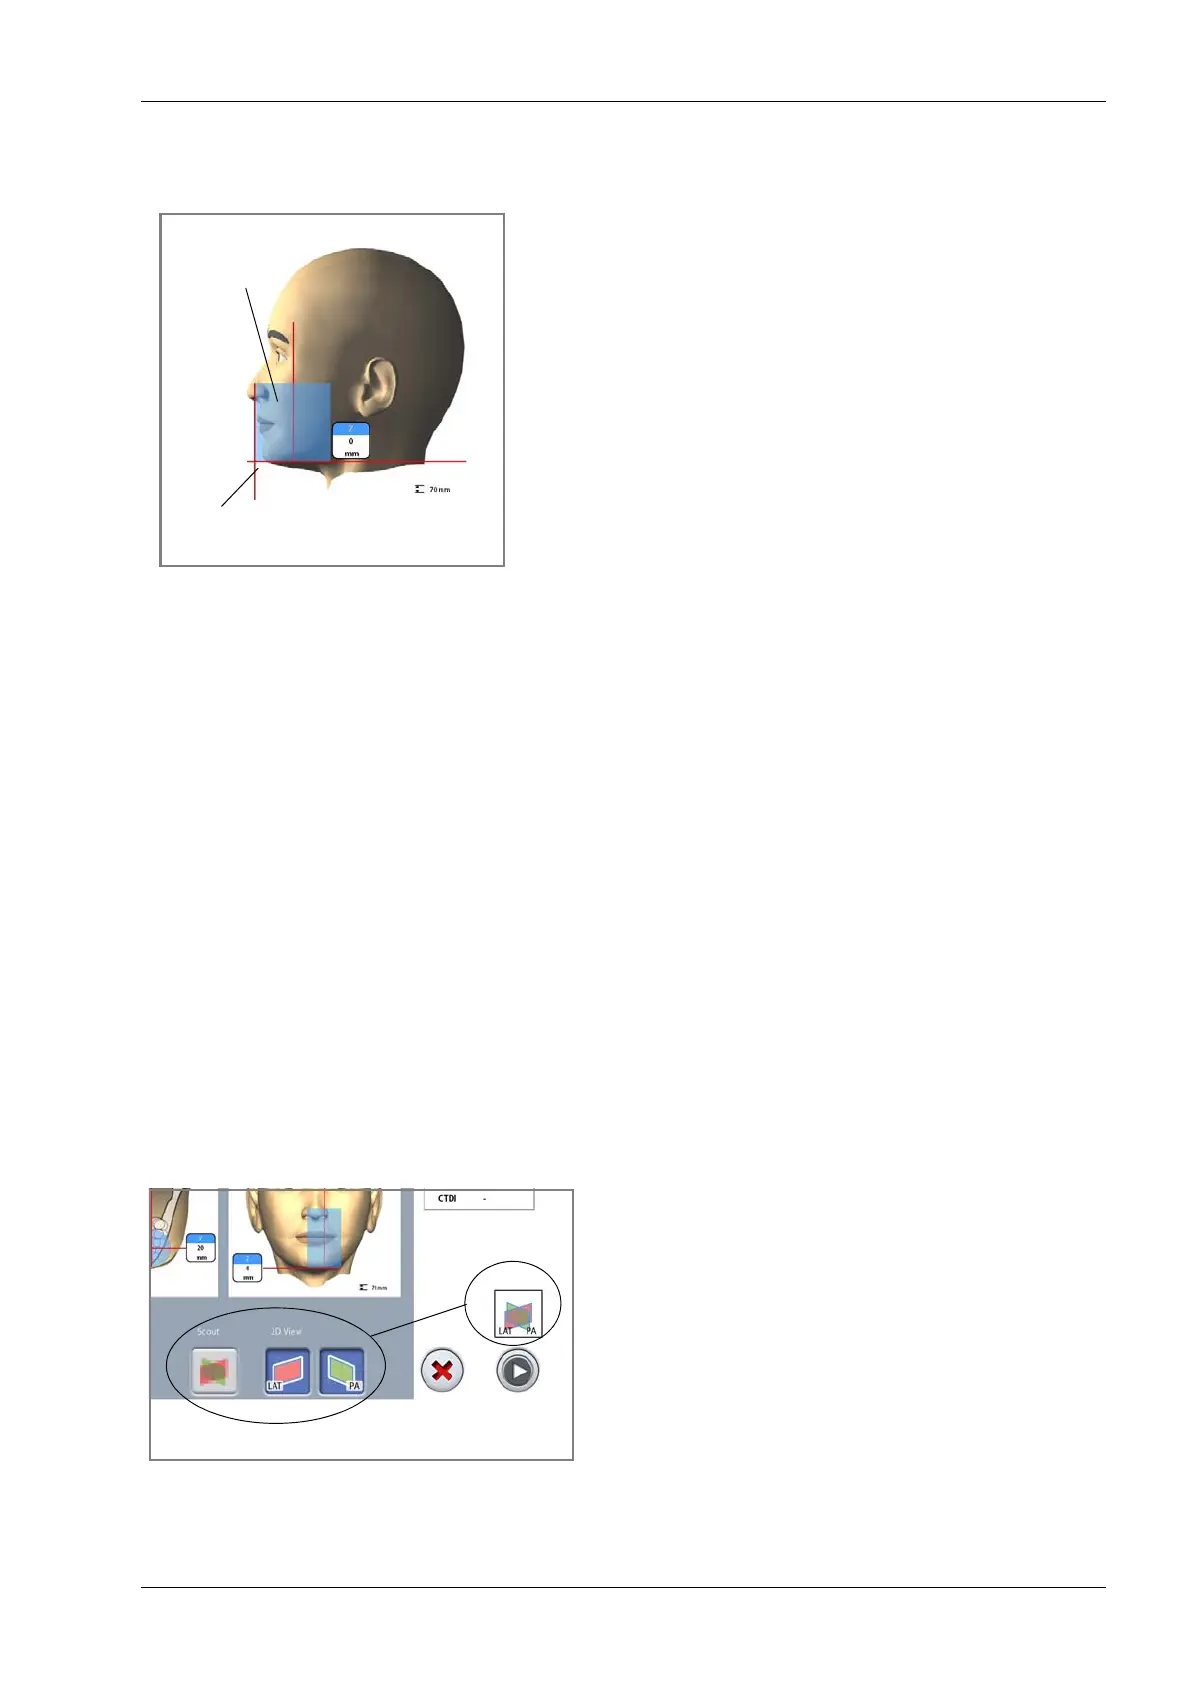
8.6 Taking a scout image or 2D views (LAT, PA or LAT-PA)
NOTE To switch the functions on, select Service spanner >
Program > 2200 Program Features > 3D Scout ON and
2D Views for 3D ON.
You can take a scout image or 2D views (LAT, PA or LAT-
PA) of the selected image volume before you take the
actual 3D image. This allows you to check the volume
position or, if necessary, confirm the need for a 3D
exposure.
NOTE If the image consists of several volumes, scout
imaging is available for the first image volume (1/2)
only.
NOTE 2D views are not available for all programs.
NOTE Make sure that you have selected the correct patient
and exposure mode in the Planmeca Romexis
program.
1. Select the view you wish to take. To take LAT-PA
views, select both buttons (LAT and PA). The selected
option is shown on the top of the forward button.
Incisor light
Image volume
(from patient support table)
at the front