4.30
Fuel Systems
Fuel Tank Pressure Test
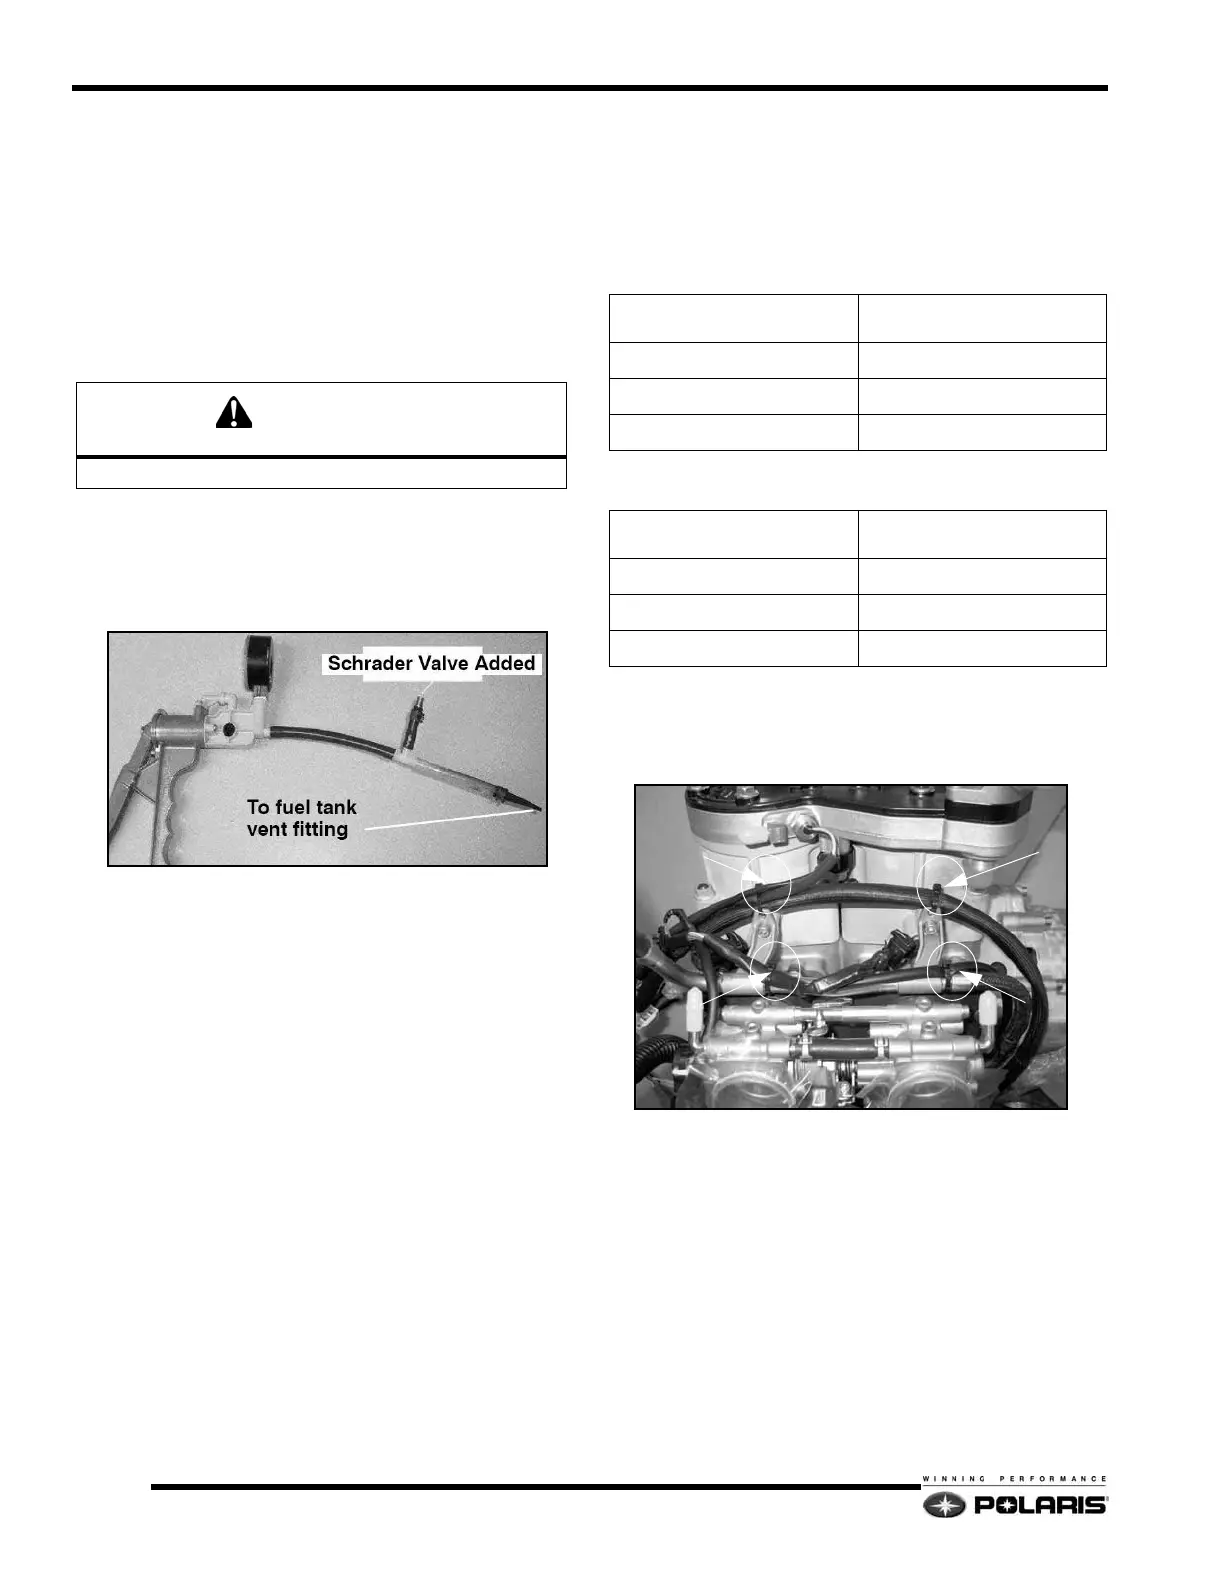
1. Connect a Mity Vac hand pump to the fuel tank vent
fitting.
2. Connect a eight-inch piece of 5/16
″ fuel hose and two gear
clamps across the fuel supply and return fittings at the fuel
pump flange.
3. Pressurize the tank to 5 PSI.
NOTE: Fuel tank deformation will occur when the
tank is pressurized.
NOTE: Using a hand pump to pressurize the fuel
tank may take a very long time. The installation of an
in-line Schrader Valve (PN: 2872602) and the use of a
low pressure pump (bicycle tire pump) is
recommended.
4. Once the tank is pressurized, saturate the area around the
PFA gasket with a mixture of water and mild detergent.
5. If any bubbles form, re-check the PFA nut torque. If bubble
formation continues, the PFA gasket will have to be
replaced, or tank replacement is required.
NOTE: There may be bubbles present from the initial
application of leak detector. Slightly blow on the
bubbles to pop them. Watch for new bubble
formation. New bubble formation may very small so
look closely. Apply additional water/detergent
solution if required.
CFI Fuel Rail/Injector(s) Removal/Installation
NOTE: Keep the red protective cap on the end of the
injector to prevent damage when installed. Follow
the steps and remove when instructed to do so.
1. Depressurize the fuel rail. See “Fuel Rail Bleeding /
Pressure Testing” on page 4.29.
2. Remove the panduit straps as shown.
NOTE: The engine must be removed from the engine
compartment to access the lower two fuel injectors.
WARNING
Do not over-pressurize the fuel tank past 6 PSI.
600 / 700 CFI INJECTOR KITS
INJECTOR KITS
COLOR
2203325-053 Yellow
2203325-027 Blue
2203325-015 Red
800 CFI INJECTOR KITS
INJECTOR KITS
COLOR
2203575-053 Yellow
2203575-027 Blue
2203575-015 Red
 Loading...