USER MANUAL
URM18PH392 Rev A. May 2020 Page 41 of 86
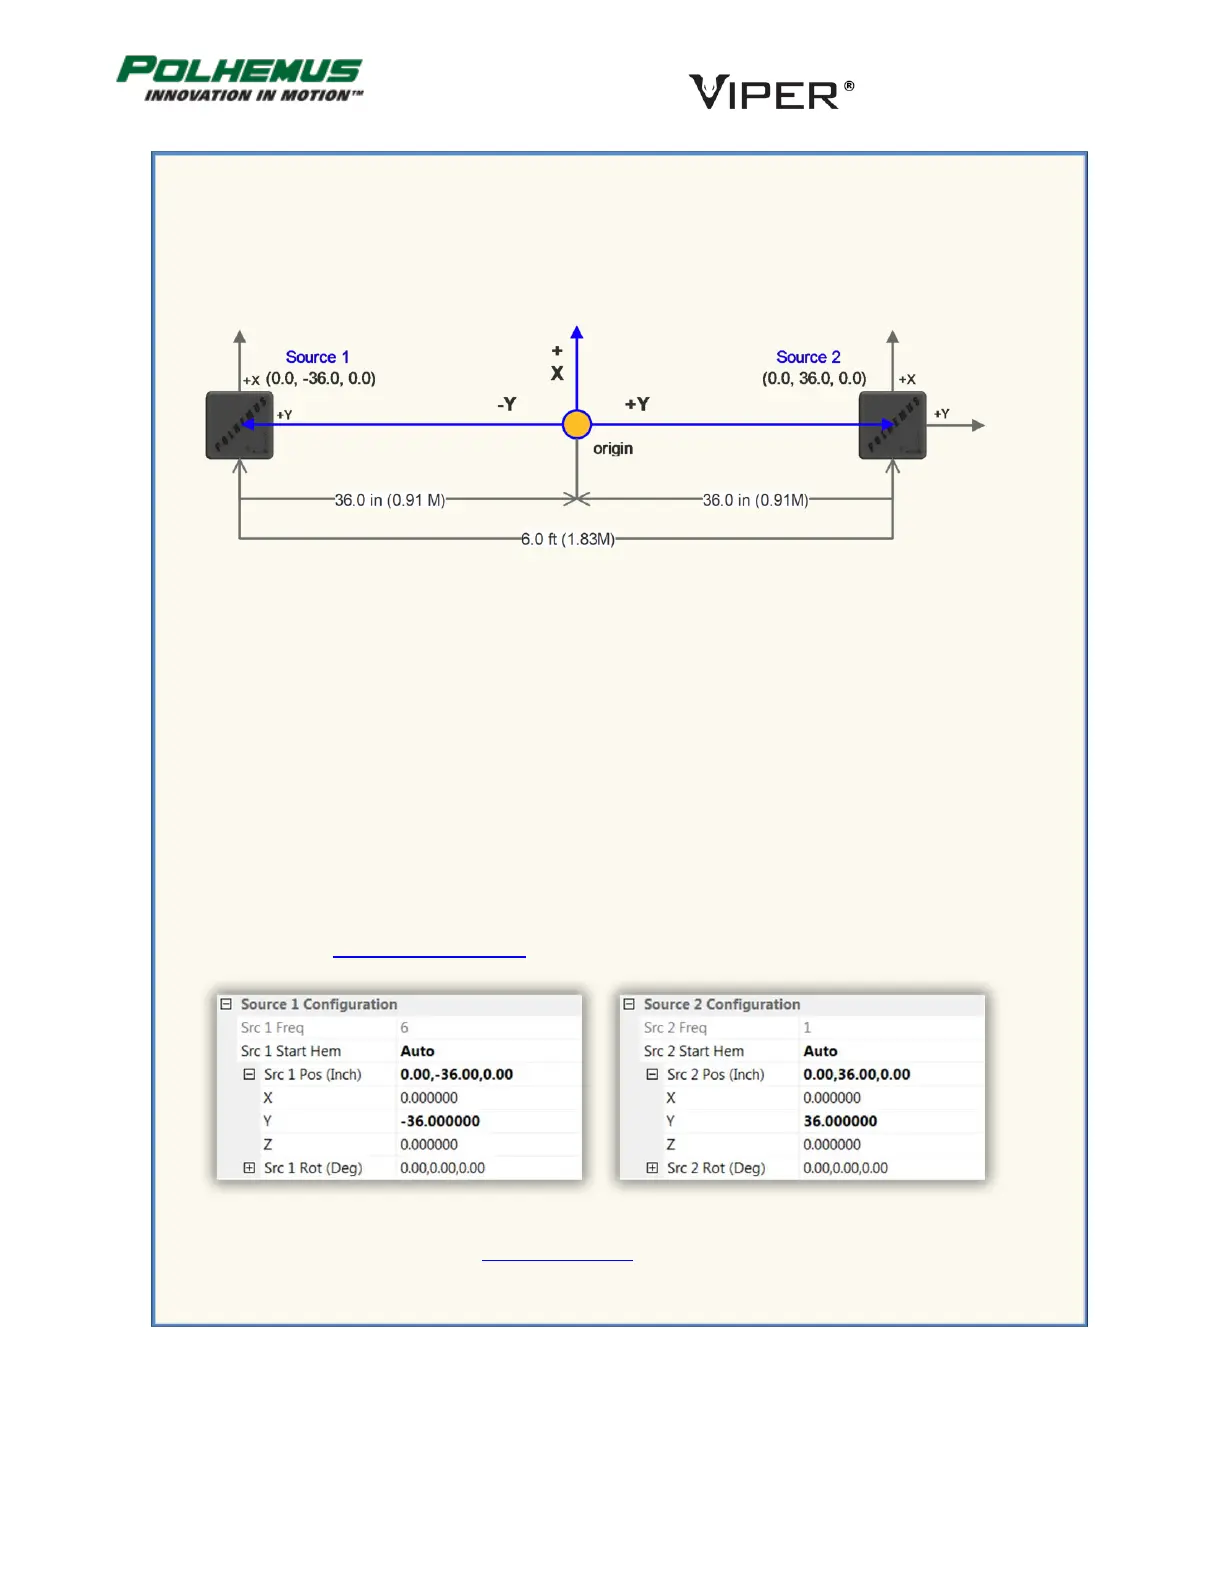
Example Scenario: SOURCE CONFIGURATION
Your project uses two TX4 Sources placed 6 feet apart. You are tracking a human subject wearing 6
sensors on arms and shoulders. The subject is moving freely between the two sources, which are
mounted on tripods 4 feet above the floor. Sources 1 and 2 are facing in the same direction.
You want the Sensors’ P&O reference (origin) to be at the point halfway between the Sources.
You will use the SOURCE CONFIGURATION command to tell VIPER™ the position and orientation of
each of the two Sources, also referenced to the origin.
Therefore, in our example Source 1 is positioned at (0.0, -36.0, 0.0) inches: It is 3 feet in the –Y
direction from the origin, and it is equal to the origin in X and Z. (Note, the +Z axis extends downward
toward the floor.)
Source 2 is likewise positioned at (0.0, +36.0, 0.0) inches.
Since both Sources’ positive X, Y, and Z axes are parallel to the reference axes, the orientation of both
is (0,0,0) degrees Azimuth, Elevation, Roll.
For Startup Hemisphere for each Source, you will choose AUTO. When the VIPER™ Sensors initially
detect the Sources, VIPER™ will automatically detect and track the Sensors’ hemisphere of operation.
(See Section 4.2.9 HEMISPHERE command for an explanation of the Auto-Hemisphere feature.)
Finally, you will want to execute the PERSIST command to save these settings to VIPER™ FLASH memory so
that when VIPER™ reboots, the settings will persist.