144
MBOX® USER MANUAL
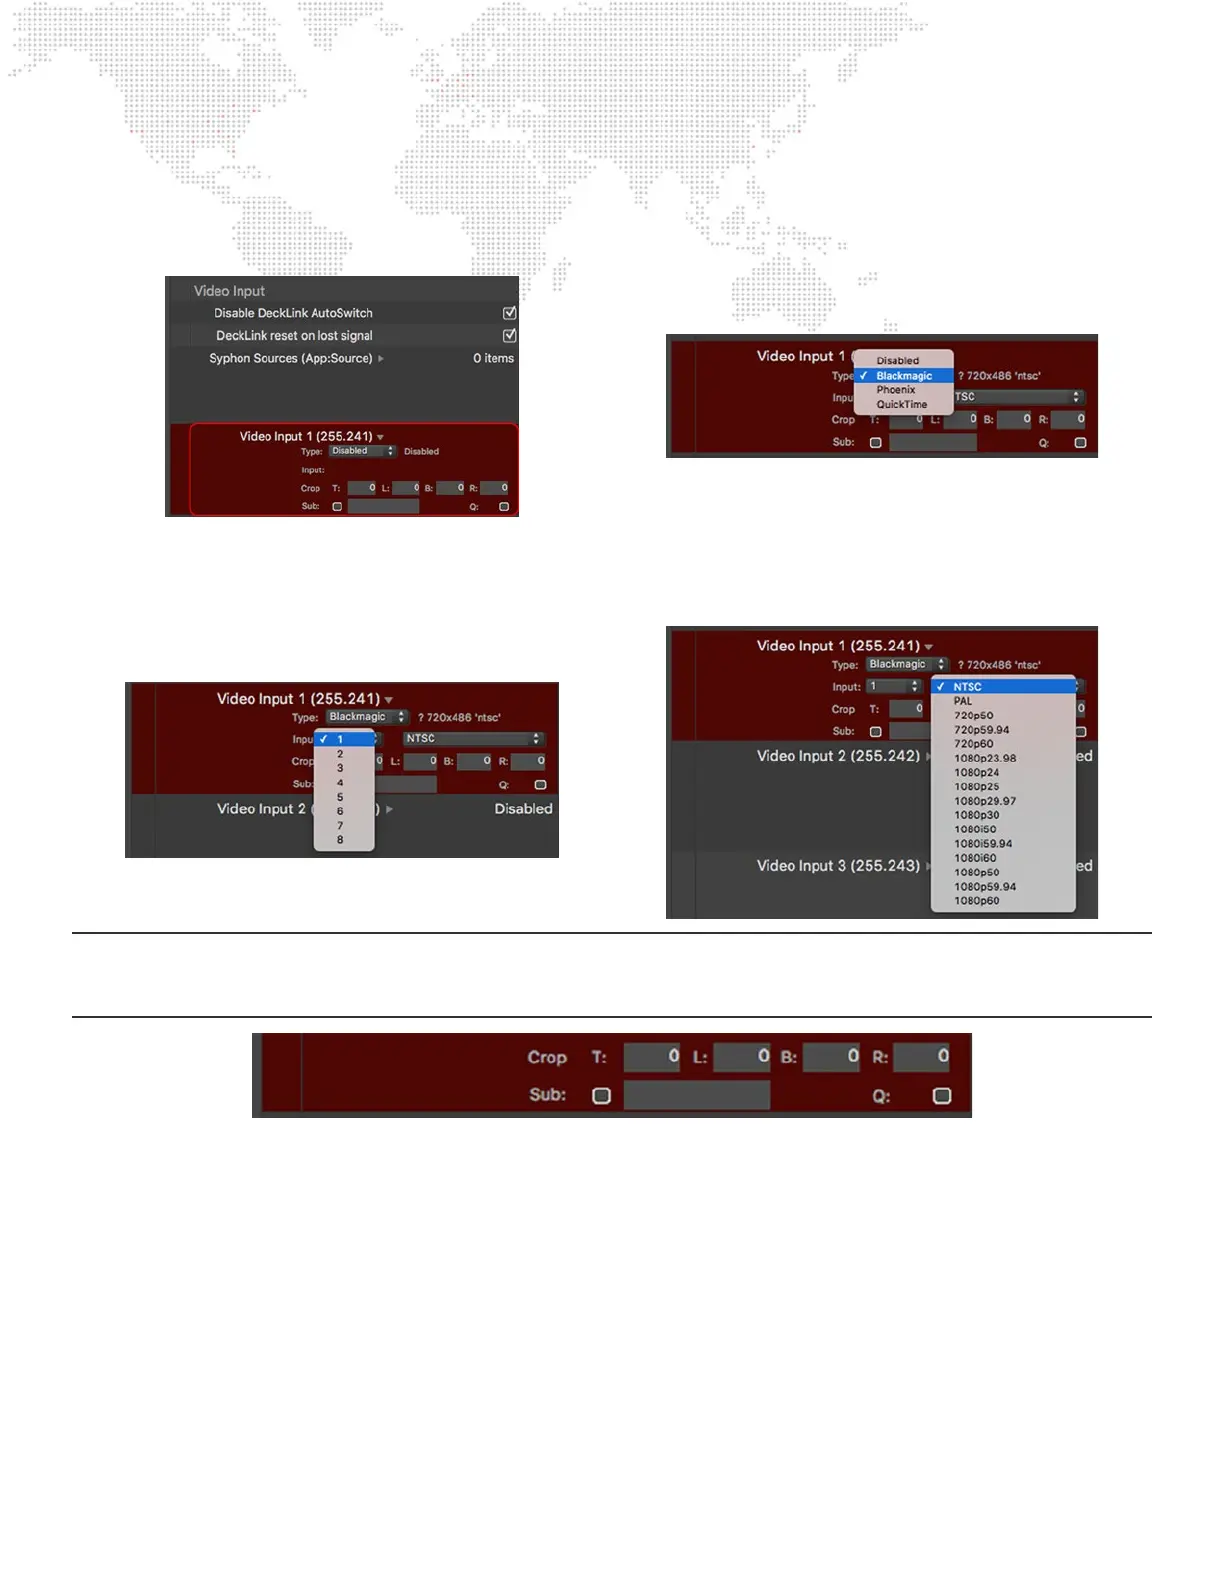
To congure Mbox video inputs for Blackmagic or Phoenix devices:
Step 1. Go to the Preferences tab in Mbox or Mbox Remote. In the Video Inputs section, nd the input (1 - 8) to be
congured. Click on the disclosure arrow to the right of the input’s name to reveal the conguration pane.
Step 2. Set the input type pop-up to “Blackmagic” or “Phoenix” as required. Next, click on the input number pop-
up menu to assign the correct input on the correct device to the input that is being congured. In general it
is best to assign inputs in sequential order, but it is possible to assign them non-sequentially. Finally, click
on the input format pop-up and select the format for the input.
CAUTION! The choices on the input format pop-up may include formats that may not work with the connected capture
hardware. Check the documentation for the capture device to determine what formats it can receive. Do not select a
format that the hardware does not support.
Step 3. The textelds labeled T, B, R, and L can be used to apply a crop (in pixels) to the incoming video signal. The
resulting image will be recentered.
Step 4. Clicking on the “Sub” checkbox will cause Mbox to display a substitute image if the video input has no
input signal. The default substitute image is a blue rectangle displaying the input type number and selected
format. The default image can be replaced with a custom substitute still image by typing the Folder.File
index (e.g. 004.001) or the full path for the le (e.g. /Users/username/Documents/Raster.jpg) into the texteld
next to the Sub checkbox.
Step 5. Clicking on the “Q” checkbox will cause Mbox to reduce the incoming video to one quarter its native size.
This can be useful to reduce processing overhead, but will of course result in a smaller image.
Step 6. Once everything is set up correctly, the input should start working immediately. It should not be necessary
to restart the Mbox software after changing the video input settings.