124
MBOX® USER MANUAL
Projected Mapping
The rst two steps are to set up the additional universe of control (via Art-Net or to sACN), and to edit the base
information in the conguration.
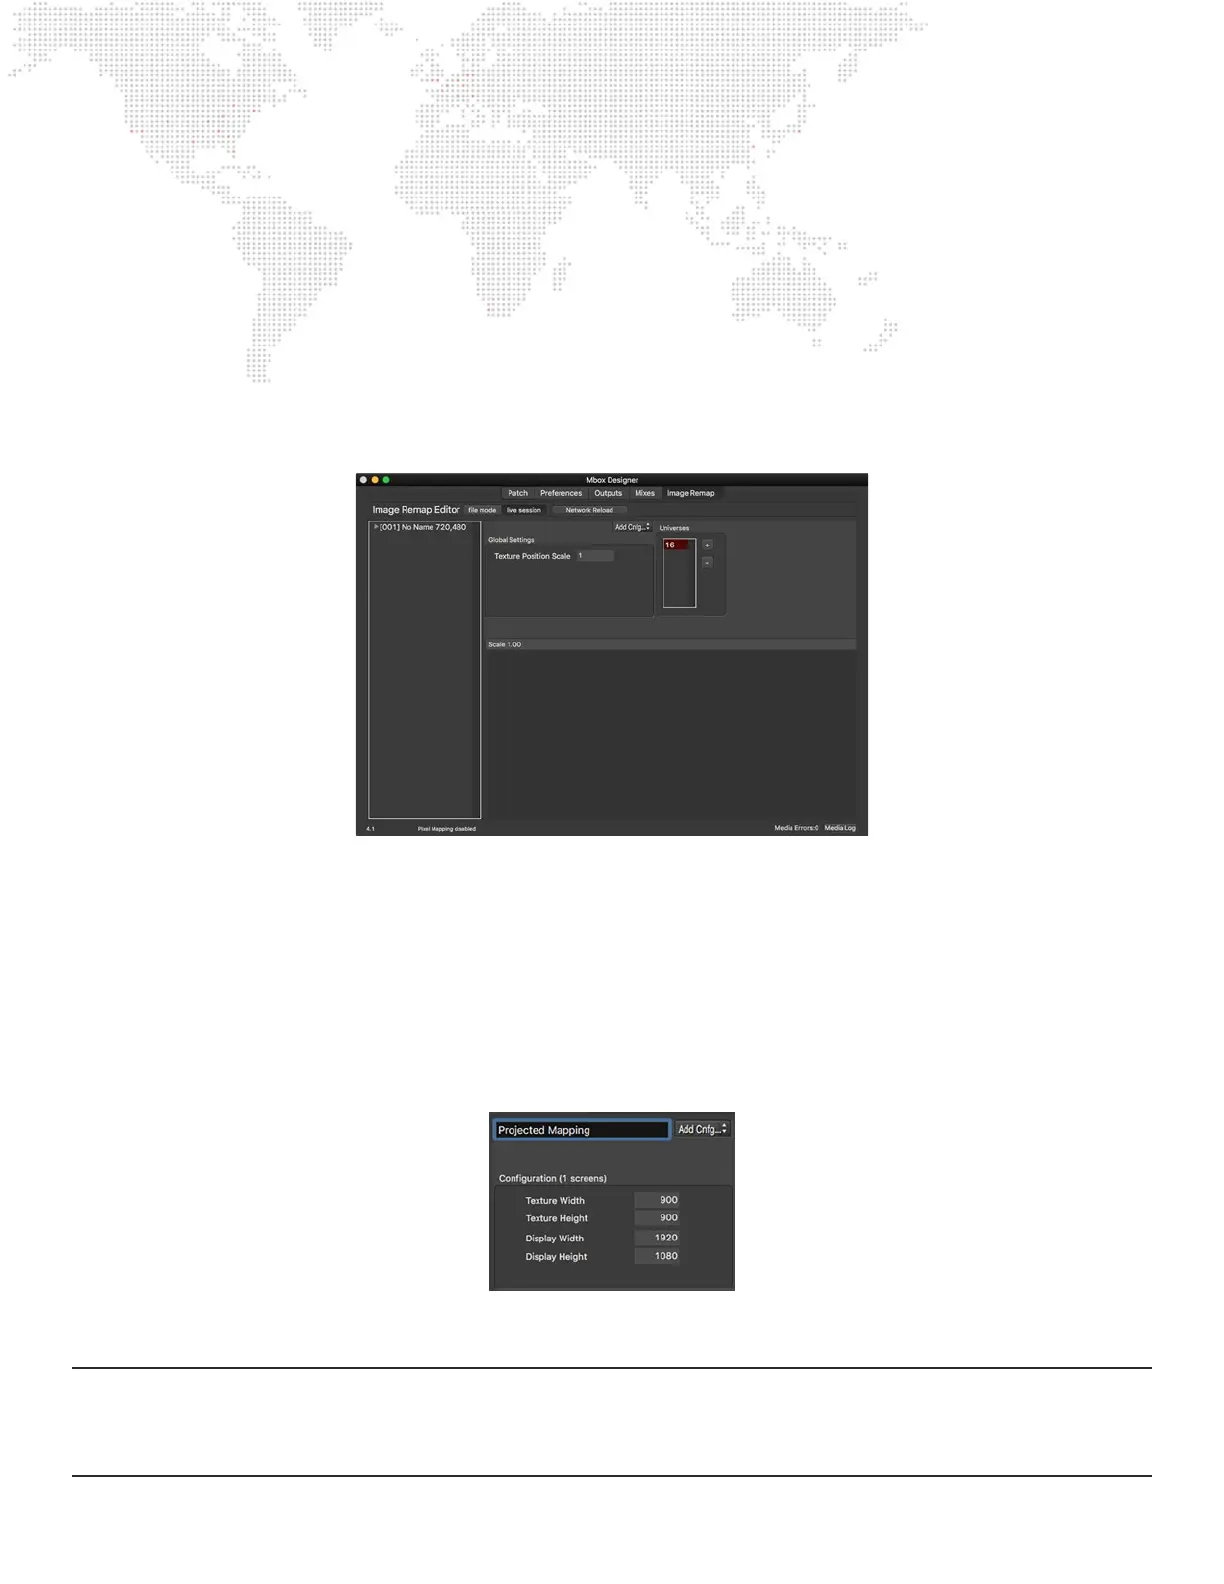
Step 1. Click on the Image Remapping tab, then double-click on the “0” in the Universes area - the default universe
0 - and type in a new number (this tutorial uses universe 16) that is not one of the current control universes
for the Mbox server. Press [return] to accept the change.
Step 2. Next, if there is no conguration already in the conguration list, click on the Add button at the top right of
the window and select Add Conguration from the menu. Don’t change the Global Texture Position Scale
setting.
There should be one entry in the conguration list “[001] No Name {720, 480}”): this is the rst conguration and has
an index of 001. Mbox Designer allows up to 255 congurations (though this tutorial will only have two), with each
having its own set of screen objects. Every conguration can be unique or can have the same screen objects but
with different image remapping positioning, image scaling, or controls. All congurations get saved into the same
MultiScreenData.plist le and a layer can use the Image Remap parameter to enable remapping for that layer and to
select a conguration by index value (between 1 and 255).
Step 3. Click on the conguration ([001]) in the list at the left of the window and notice that the window changes from
showing the Global Scale setting to showing the conguration’s settings: specically Texture Width & Height
and Display Width & Height. Edit those values to be 900 x 900 and 1920 x 1080 respectively, make sure to
press [tab] or [return] after each entry. Give the conguration a new name, “Projected Mapping”, as well.
The texture width and height dene the size of the content to be used with the conguration. This needs to be pre-set to
provide the correct pixel-accurate positioning relationships between the content and the remapping.
Note: Pre-setting a conguration’s texture size doesn’t mean that content of a different size cannot be used, however
its origin will be offset from the origin of the conguration. The layer’s X and Y position parameters can be used to affect
this, but that placement may not be pixel-accurate. Therefore in some cases it may be necessary to create more than
one nearly identical conguration, with only a different texture width and/or height.