1-6 Introduction & Installation
Connecting the label printer to power
Connecting to the power supply
The printer is equipped with a versatile power supply unit. The device may
be operated with a mains voltage of 230 V AC/ 50 Hz or 115 V AC/60 Hz
without any adjustments or modifications.
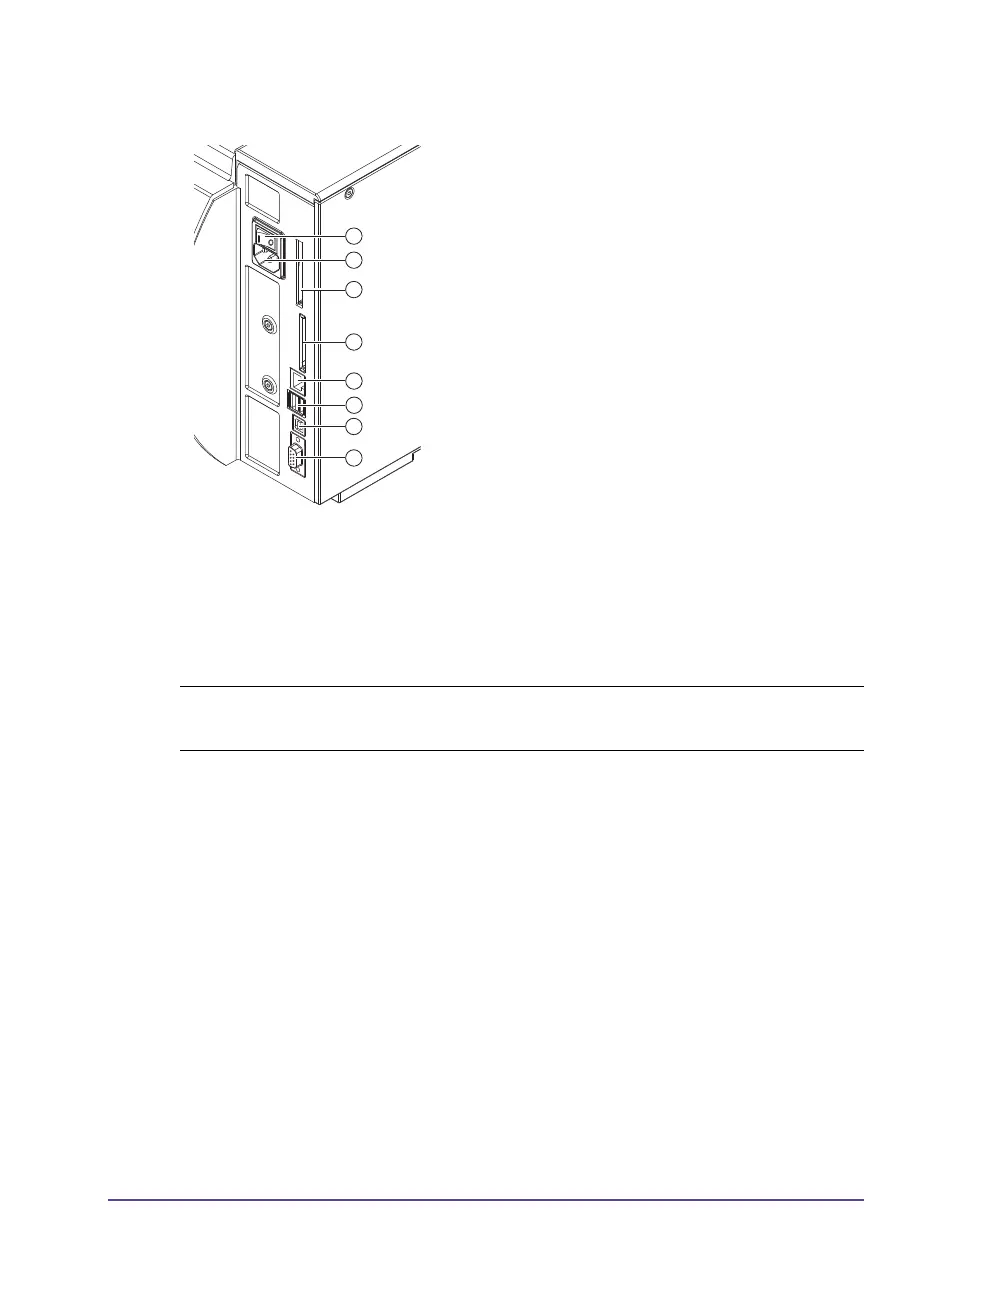
1 Insert power cable into power connection jack (6).
2 Insert plug of the power cable into a grounded electrical outlet.
1 Serial RS-232 interface
2 USB 2.0 high speed slave
interface
3 Two USB master interfaces for
keyboard, scanner, optional
interface adapters, or USB
flash drive
4 Ethernet 10/100 Base T
interface
5 Slot for CompactFlash
memory card
6 Power connection jack
7 Slot for type II PC card or
WLAN card
8 Power switch
Caution: The device can be damaged by undefined switch-on currents. Set
the power switch (8) to “O” before plugging in the device.