Do you have a question about the QuickLabel Systems QL-300 and is the answer not in the manual?
Verify the printer and its accessories after unpacking to ensure all components are present and undamaged.
Select a suitable location for the printer, considering safety, comfort, and environmental conditions.
Follow safety warnings and cautions to prevent damage to the equipment or injury during installation.
Consider environmental conditions such as temperature and humidity for optimal printer performance.
Ensure adequate space around the printer for proper ventilation and operation, considering machine weight.
Handle unpacking carefully to avoid injury, especially when lifting the equipment.
Step-by-step instructions on how to safely remove the printer from its packaging.
Instructions for safely removing the unwinder unit from its packaging.
Procedure for installing cable clamps to manage printer interface cables.
Steps to securely mount the unwinder unit onto the printer.
Information and precautions related to the printer's power connection and usage.
Essential safety guidelines for handling electrical power to prevent hazards.
Procedure for powering on the printer and confirming its startup.
Performing test prints to verify printer functionality and settings.
Procedure for adjusting print density and performing test prints for quality verification.
Aligning sensor positions based on the media type for accurate printing.
An overview of the steps required to connect the printer to a computer and install the driver.
Steps for connecting the printer to a computer via a network connection.
Steps for connecting the printer to a computer using a USB cable.
Information on supported operating systems for printer driver compatibility.
Instructions for connecting the printer to a network using a LAN cable.
Instructions for connecting the printer to a computer using a USB cable.
Step-by-step guide for configuring network settings for printer connectivity.
Procedure to set the printer's IP address via the control panel for network setup.
Guide for installing the printer driver for network connectivity.
Details and procedures for establishing a USB connection to the printer.
Guide for installing the printer driver for USB connectivity.
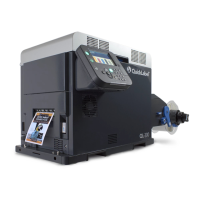
Identification and description of major parts of the printer, including exterior and interior components.
Identification and description of the parts and functions of the unwinder unit.
Introduction to the printer's control panel, its buttons, and display.
Instructions on how to navigate and operate the printer using the control panel menus.
Information on understanding and responding to error messages displayed on the control panel.
How to access and use the built-in help function for troubleshooting on the control panel.
Information on recommended paper types and conditions for high-quality printing.
Detailed specifications for various paper types, sizes, and thicknesses supported by the printer.
Procedure to register custom paper sizes and settings within the printer driver.
Adjusting the print start position vertically and horizontally using the printer driver.
Adjusting the paper cut position using the printer driver settings.
Instructions on how to prepare and load paper onto the unwinder for printing.
Step-by-step guide for loading different types of paper onto the unwinder.
Procedure for calibrating sensors to ensure accurate paper detection and alignment.
Detailed steps for performing sensor calibration to optimize print quality.
Procedure to detect and register paper gap and black mark intervals for better print results.
Instructions on how to print documents from a Windows PC using the PCL printer driver.
Explanation of the convenient functions available in the Windows PCL printer driver.
Configuration options for color printing, including color mode and toner saving.
Settings for overlaying forms or watermarks on printed documents.
Checking the service life and remaining amounts of printer consumables.
Accessing and printing various printer information and status reports.
Manually correcting color drift and adjusting color settings using the printer's control panel.
Procedure for manually adjusting color densities for cyan, magenta, yellow, black, and white.
Finely adjusting color densities to optimize print results.
Adjusting the gray balance of halftones for improved color balance.
Adjusting printer color settings through the Windows printer driver interface.
Explains different color matching methods like Automatic, Perceptual, Vivid, and Graphic Pro.
Procedure to reset all network settings to their factory defaults.
Configuring the printer to obtain an IP address automatically from a DHCP server.
Configuring the printer to use BOOTP for IP address assignment.
Information on the printer's IPv6 compatibility and automatic address acquisition.
Printing a report of all menu category items and current printer settings.
Viewing and printing the history of errors that have occurred in the device.
Printing a report of the total print results and usage statistics.
Procedure to change the administrator password for printer login.
General procedures for resolving problems encountered while using the printer.
Detailed steps for identifying and resolving paper jams within the printer.
Instructions on how to safely remove jammed paper from the printer.
Troubleshooting steps for recurring paper jam issues.
Explanation of messages related to paper handling and error codes.
Information on messages indicating wear item replacement is needed.
Troubleshooting guidance for various other error messages and issues.
Common issues encountered during printing and their solutions.
Troubleshooting steps for addressing poor print quality issues.
Resolving issues encountered during sensor calibration.
Troubleshooting steps for problems related to the printer driver.
How to check the service life and remaining amounts of printer consumables.
Step-by-step guide for replacing the printer's print cartridges.
Procedure for replacing the belt unit and the 2nd transfer roller.
Instructions on how to replace the waste toner box.
Procedure for replacing the fuser and exit unit.
List of necessary tools and materials for cleaning printer components.
Guidelines for regular cleaning of the printer and unwinder parts.
Instructions for cleaning the surfaces and interior of the unwinder unit.
Procedures for cleaning the surfaces and interior of the printer.
Steps for cleaning the LED heads to resolve print quality issues.
Instructions for cleaning the fuser unit using special cleaning paper.
Procedures for cleaning the cutter unit and its blades.
Instructions for accessing the printer's web interface.
Steps to log in to the web utility using administrator credentials.
Accessing and viewing printer status, network services, and configuration details.
Overview of administrative settings for configuring printer functions.
Accessing calibration settings for density and registration adjustments.
Procedure to change the administrator password for the web utility.
Configuring SSL/TLS for secure communication between computer and printer.
Configuring IPsec for encrypting network communication with the printer.
Managing printer access by configuring IP address filtering rules.
Managing printer access by configuring MAC address filtering rules.
Configuring the printer to send email notifications for errors.
Configuring IEEE802.1X authentication for network security.
Steps to configure PEAP authentication for IEEE802.1X.
Steps to configure EAP-TLS authentication for IEEE802.1X.
Procedure for connecting the printer to an authentication switch.
General safety warnings and precautions for using the machine.
Diagrams indicating locations of residual risks associated with the product.
Detailed list of potential hazards and required protective measures.
Important general warnings and cautions for safe operation and maintenance.
First aid measures to take in case of exposure to toner powder.
Key technical specifications of the printer, including model, power, and environment requirements.
Detailed specifications for roll paper, including weight, core, and outer diameter.
Specifications for die-cut label paper, including dimensions and margins.
Specifications for full sheet labels, including dimensions and margins.
| Brand | QuickLabel Systems |
|---|---|
| Model | QL-300 |
| Category | Label Maker |
| Language | English |