10A-114
ENGINE AND CYLINDER BLOCK ASSEMBLY
Engine/gearbox assembly: Removal - Refitting
K9K, and 830 or 832
10A
REMOVAL
I - REMOVAL PREPARATION OPERATION
a Position the vehicle on a two-post lift (see Vehicle:
Towing and lifting) (02A, Lifting equipment).
a Remove:
-the engine cover,
-the battery (see Battery : Removal - Refitting)
(80A, Battery),
-the front wheels (see Wheel: Removal - Refitting)
(35A, Wheels and tyres),
-the front section of the front wheel arch liners (see
Front wheel arch liner: Removal - Refitting)
(55A, Exterior protection),
-the front bumper (see Front bumper: Removal -
Refitting) (55A, Exterior protection),
-the engine undertray bolts,
-the engine undertray.
a Drain:
-the refrigerant circuit using a refrigerant charging
station (see Coolant circuit Draining - Refilling)
(62A, Air conditioning),
-the manual gearbox (see Manual gearbox oil:
Draining - Refilling) (21A, Manual gearbox).
-the cooling system (see 19A, Cooling, Cooling
circuit: Draining - Refilling, page 19A-17) ,
-the engine oil (if necessary) (see 10A, Engine and
cylinder block assembly, Engine oil: Draining -
Refilling, page 10A-40) .
a Remove:
-the front right-hand wheel driveshaft (see Front ri-
ght-hand wheel driveshaft: Removal - Refitting)
(29A, Driveshafts),
- the front left-hand wheel driveshaft (see Front left-
hand wheel driveshaft: Removal - Refitting)
(29A, Driveshafts),
- the differential output seals (see Differential out-
put seal: Removal - Refitting) (21A, Manual gear-
box).
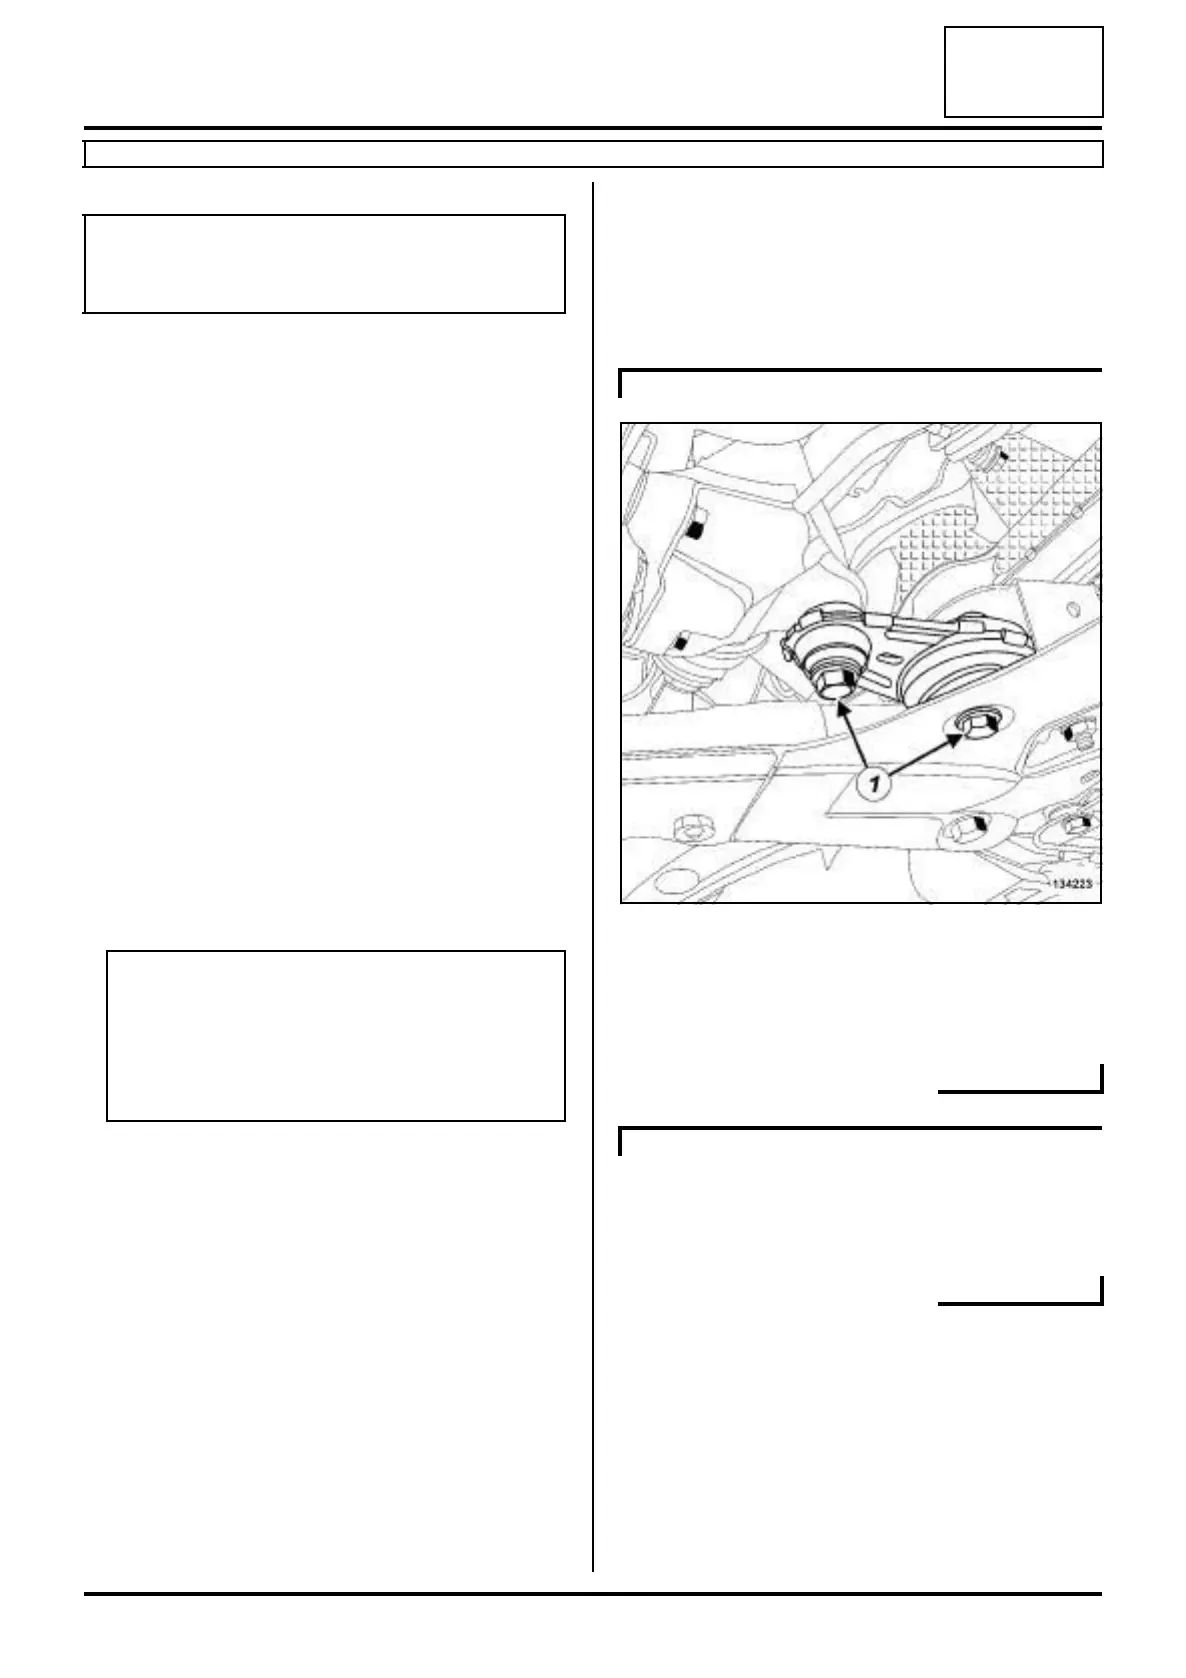
a Remove:
- the bolts (1) from the lower engine tie-bar,
- the lower engine tie-bar.
a Remove the lower engine tie-bar (see 19D, Engine
mounting, Lower engine tie-bar: Removal - Refit-
ting, page 19D-33) .
WARNING
In order to avoid any refrigerant leaks, do not
damage (deform, twist, etc.) the pipe.
IMPORTANT
To avoid all risk of damage to the systems, apply
the safety and cleanliness instructions and ope-
ration recommendations before carrying out any
repair (see Air conditioning: Precautions for
repair) .
K9K, and 832
134223
K9K, and 830