19A-67
COOLING
Plenum chamber: Removal - Refitting
F9Q
19A
REMOVAL
I - REMOVAL PREPARATION OPERATION
a Position the vehicle on a two-post lift (see Vehicle:
Towing and lifting) (02A, Lifting equipment).
a Remove:
-the engine undertray bolts,
-the engine undertray.
a Drain the cooling system (see 19A, Cooling, Coo-
ling circuit: Draining - Refilling, page 19A-17) .
a Remove:
-the engine cover,
-the windscreen wiper arms (see Windscreen wi-
per arm: Removal - Refitting) (85A, Wiping -
Washing),
-the scuttle panel grille (see Scuttle panel grille:
Removal - Refitting) (56A, Exterior equipment),
-the scoop under the scuttle panel grille (see Scoop
under scuttle panel grille: Removal - Refitting)
(56A, Exterior equipment),
-the battery (see Battery : Removal - Refitting)
(80A, Battery),
-the battery tray (see Battery tray: Removal - Re-
fitting) (80A, Battery),
-the intercooler air inlet pipe (see 12B, Turbochar-
ging, Intercooler air inlet pipe: Removal - Refit-
ting, page 12B-41) .
II - OPERATION FOR REMOVAL OF PART
CONCERNED
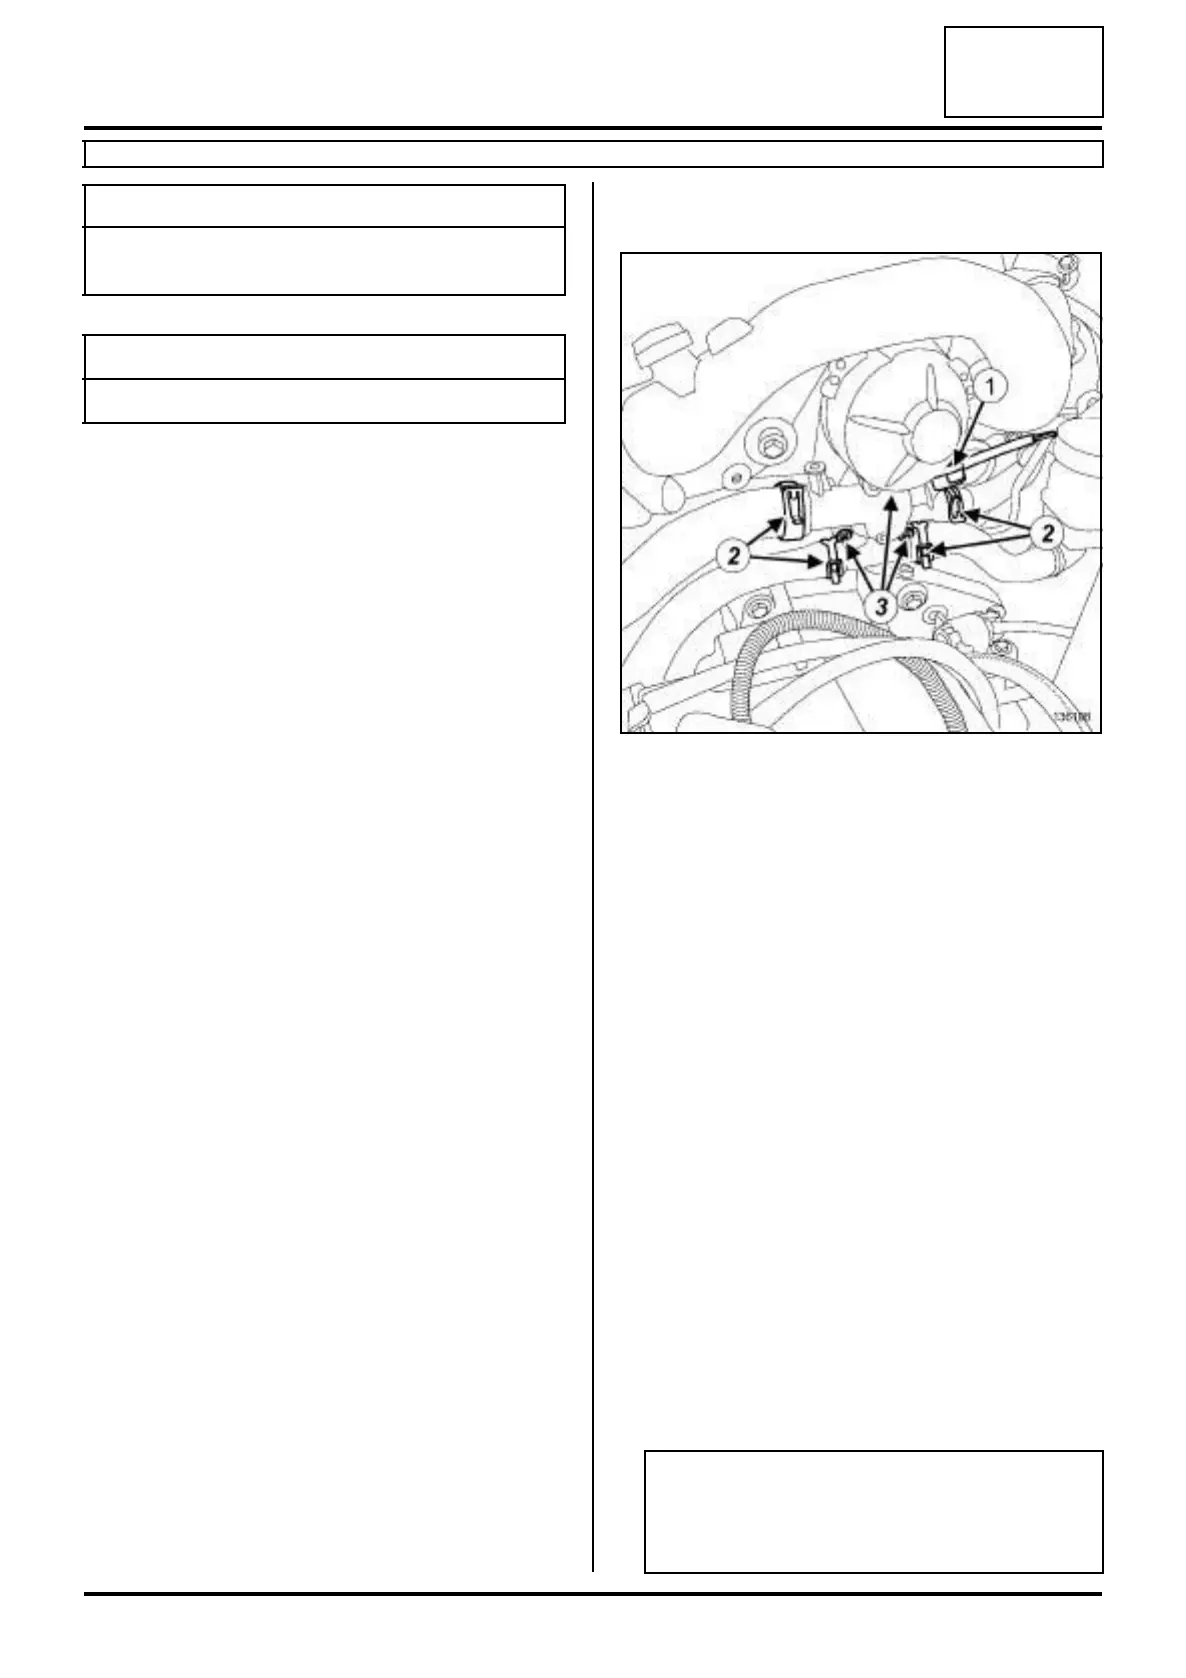
a Disconnect the coolant temperature sensor connec-
tor (1) .
a Separate the coolant outlet unit clips (2) using the
tool (Mot. 1448).
a Disconnect the coolant outlet unit hoses.
a Remove:
- the coolant outlet unit bolts (3) ,
- the coolant outlet unit,
- the coolant outlet unit seal.
REFITTING
I - REFITTING PREPARATION OPERATION
a parts always to be replaced: Cylinder head coo-
lant outlet unit seal (10,06,01,19).
a Use SURFACE CLEANER (see Vehicle: Parts
and ingredients for the repairwork) (04B, Consu-
mables - Products) to clean and degrease:
- the coolant outlet unit gasket face if needed to be
reused,
- the cylinder head joint face.
Essential special tooling
Mot. 1448 Long nose pliers for hose
clips.
Tightening torquesm
coolant outlet unit bolts 10 N.m
136198
WARNING
To ensure proper sealing, the gasket surfaces
must be clean, dry and not greasy (avoid any fin-
ger marks).