EasyManuals Logo

Renkforce RF2000 v2 Series User Manual

Renkforce RF2000 v2 Series
110 pages
To Next Page IconTo Next Page
To Previous Page IconTo Previous Page
Page #16 background imageLoading...
Page #16 background image
16
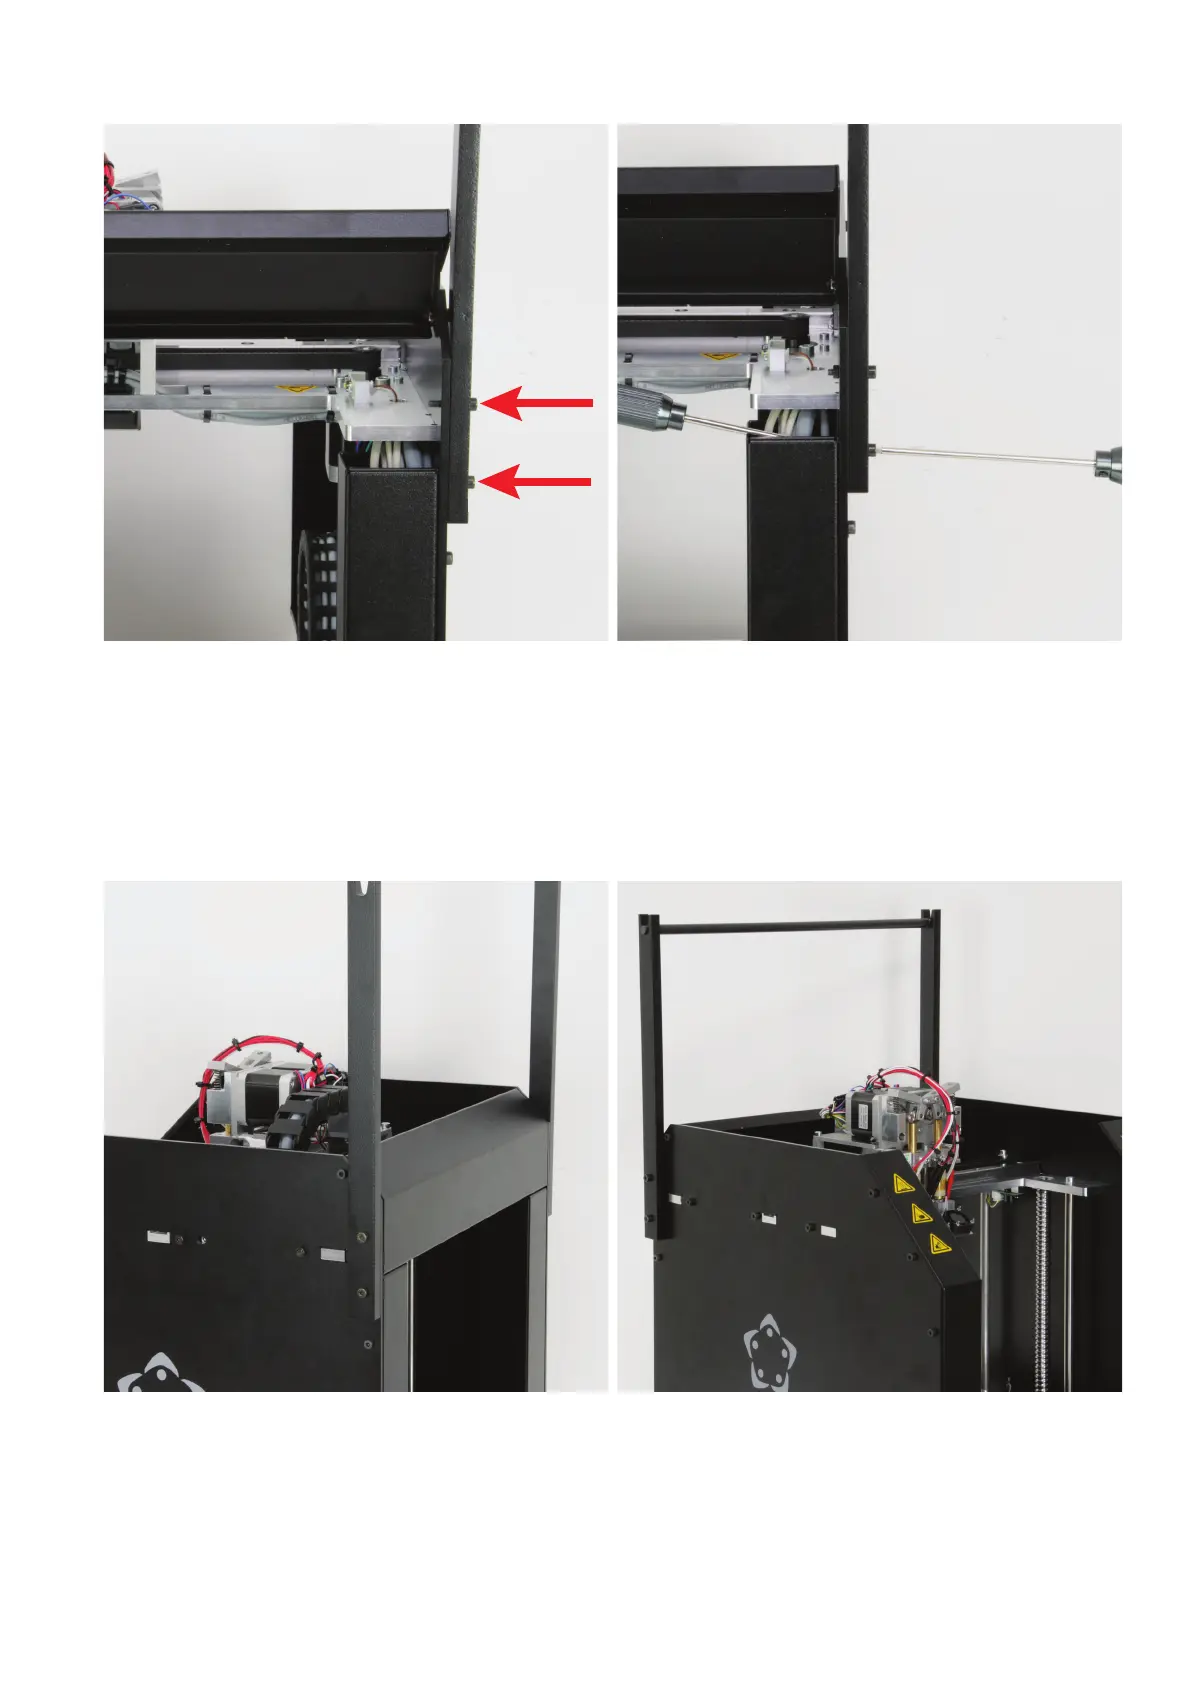
Fold the rear head cover up so that you can have access to the lower
attachmentscrewoftherightlamentholder(fromtherearview).
Insert one cylinder-head screw each into the two mounting holes.
Attach the upper screw hand-tight with a nut M4. It currently only
serves to secure.
Attachthelowerholdingscrewofthelamentholderandtightenit
at once.
Itiseasiesttoinstallthenutwithonengerandthentightenitwitha
hexagon socket wrench.
Remove the safety screw and fold down the rear head cover again.
Then install the safety screw you previously removed in the mount-
ingholeagainandthenthelamentholderontheleft(fromtherear
view).
Finally,inserttheshaftforthelamentholderatthetopoftheguides.

Table of Contents

Questions and Answers:

Question and Answer IconNeed help?

Do you have a question about the Renkforce RF2000 v2 Series and is the answer not in the manual?

Renkforce RF2000 v2 Series Specifications

General IconGeneral
BrandRenkforce
ModelRF2000 v2 Series
Category3D Printers
LanguageEnglish

Related product manuals