51
b) Manual operation via the software
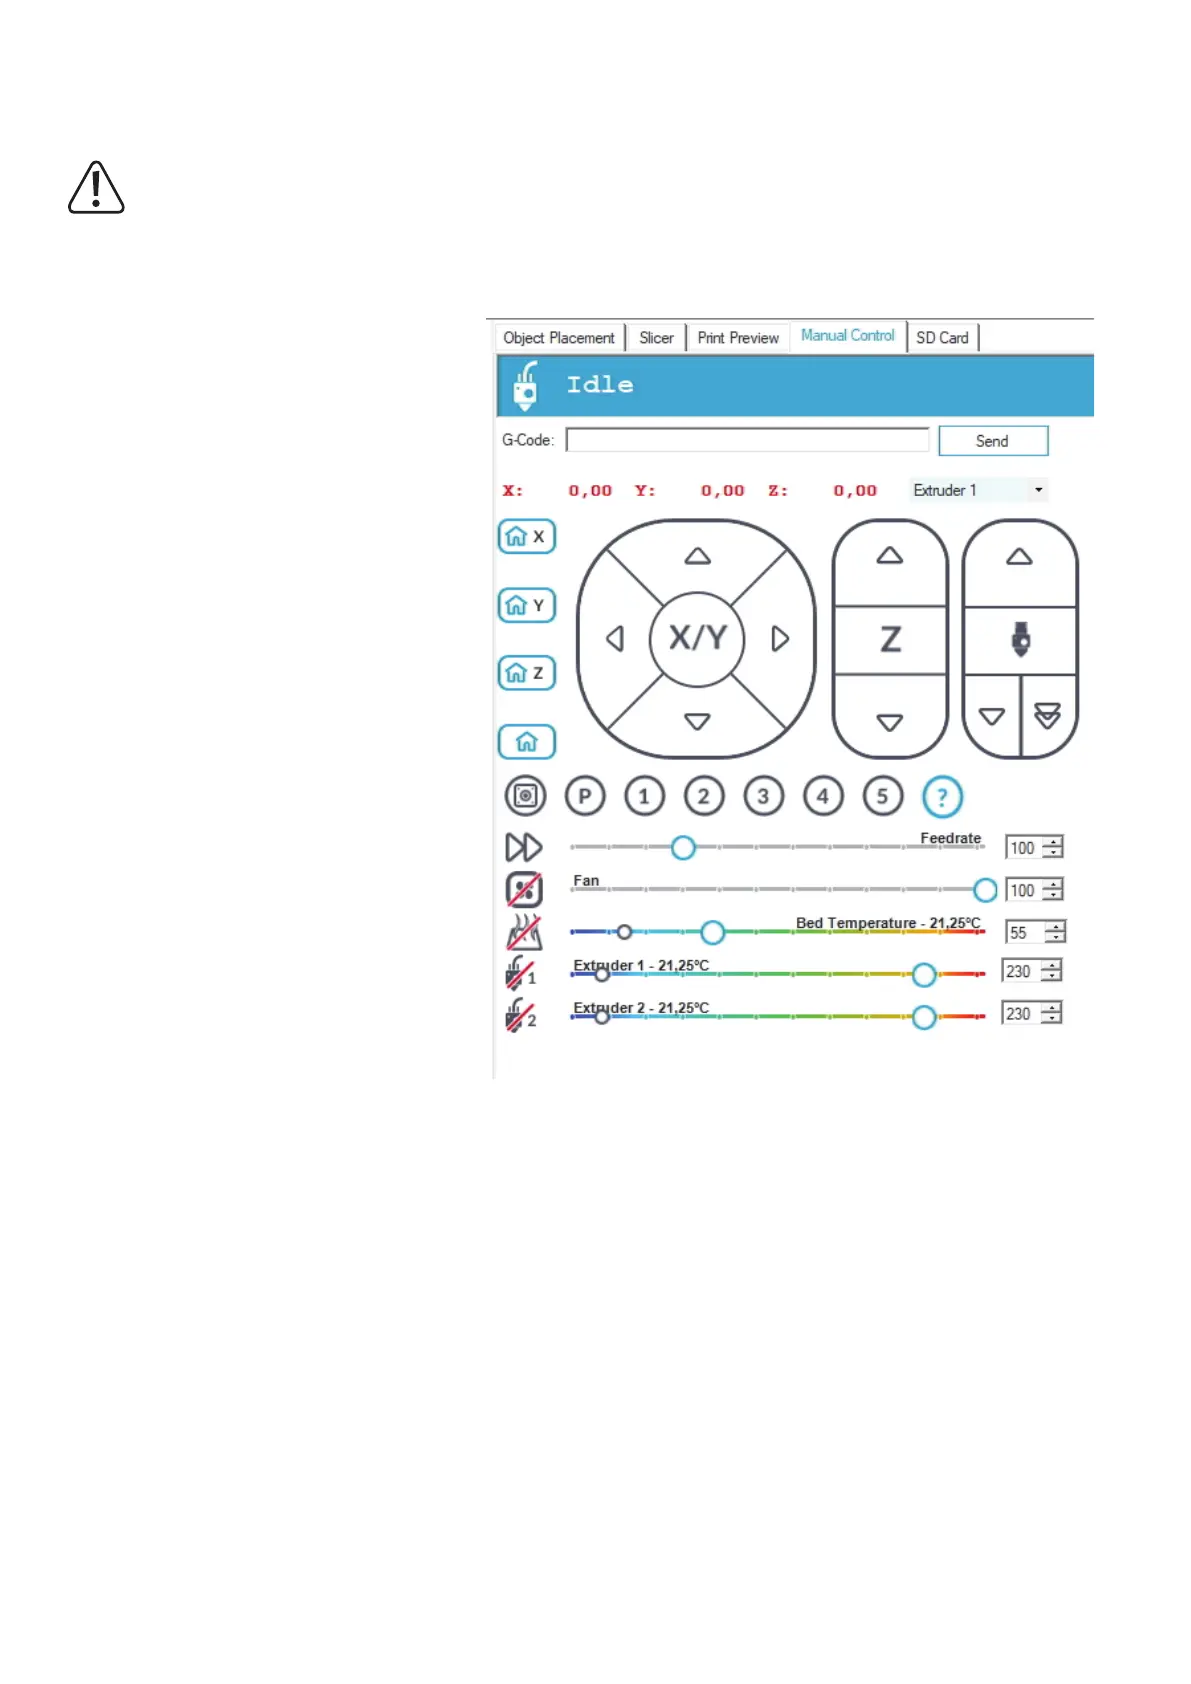
Click the tab "Manual Control" (1) on the main screen of the software.
Before trying out manual printer control, the settings for the limit switches for the Z and Y axes must have been performed.
Inthenisheddevice,thebasicsettingshavealreadybeenperformedatproductionbutshouldbeinspectedagainfor
reasons of safety.
If this is not observed, there may be damage to the 3D printer (loss of warranty/guarantee).
(2) Here,acommandcanbesenttotheprinter;
enterthecommand(e.g.G1X50)andclick
"Send".
(3) This shows the current positions of the axes.
While the text is red, the home position was
not targeted yet.
(4) Selecting the extruder
(5) All axes move into the home position
(6) X-axismovesintothehomeposition
(7) Y-axismovesintothehomeposition
(8) Z-axis moves into the home position
(9) The arrow icons can be used to operate the
X-axisoftheprintermanually.
(10) The arrow icons can be used to operate the
Y-axisoftheprintermanually.
(11) The arrow icons can be used to operate the
Z-axis of the printer manually.
(12) The arrow symbols can be used to manu-
ally operate the extruder infeed of the printer
for the selected extruder; the double arrow
conrms the infeed for both extruders; the
extruder or extruders must be heated up!
(9-12) Depending on where the arrow is clicked,
differentlylongroutes will berun;theroute
length is displayed when the mouse pointer
leads across the corresponding button of the
arrow;steps0,1mm,1mm,10mm,50mm
(13) Setting of the printing speed
(14)Switchingthefanon/off;Totherightofthis,thespeedcanbeset
(15)Switchingtheheatingfortheprintingplateon/off;Totherightofthis,thetemperaturecanbeset.
(16)Switchingtheextruderheaterforthe1stextruder(theleftoneattheprinter)on/off;Totherightofthis,thetemperaturecanbeset.
(17)Switchingtheextruderheaterforthe2ndextruder(therightoneattheprinter)on/off;Totherightofthis,thetemperaturecanbeset.
1
3 4
2
14
8
7
6
5
13
10
9 1211
16
9
10
17
15