56
d) Preparation for print
Tobeabletoprinttheobject,itrstneedstobeslicedintoindividualprintinglayersordisassembled.Thisprocessisreferredtoas"slicing".
Slicing the placed object to be printed for 1-coloured print
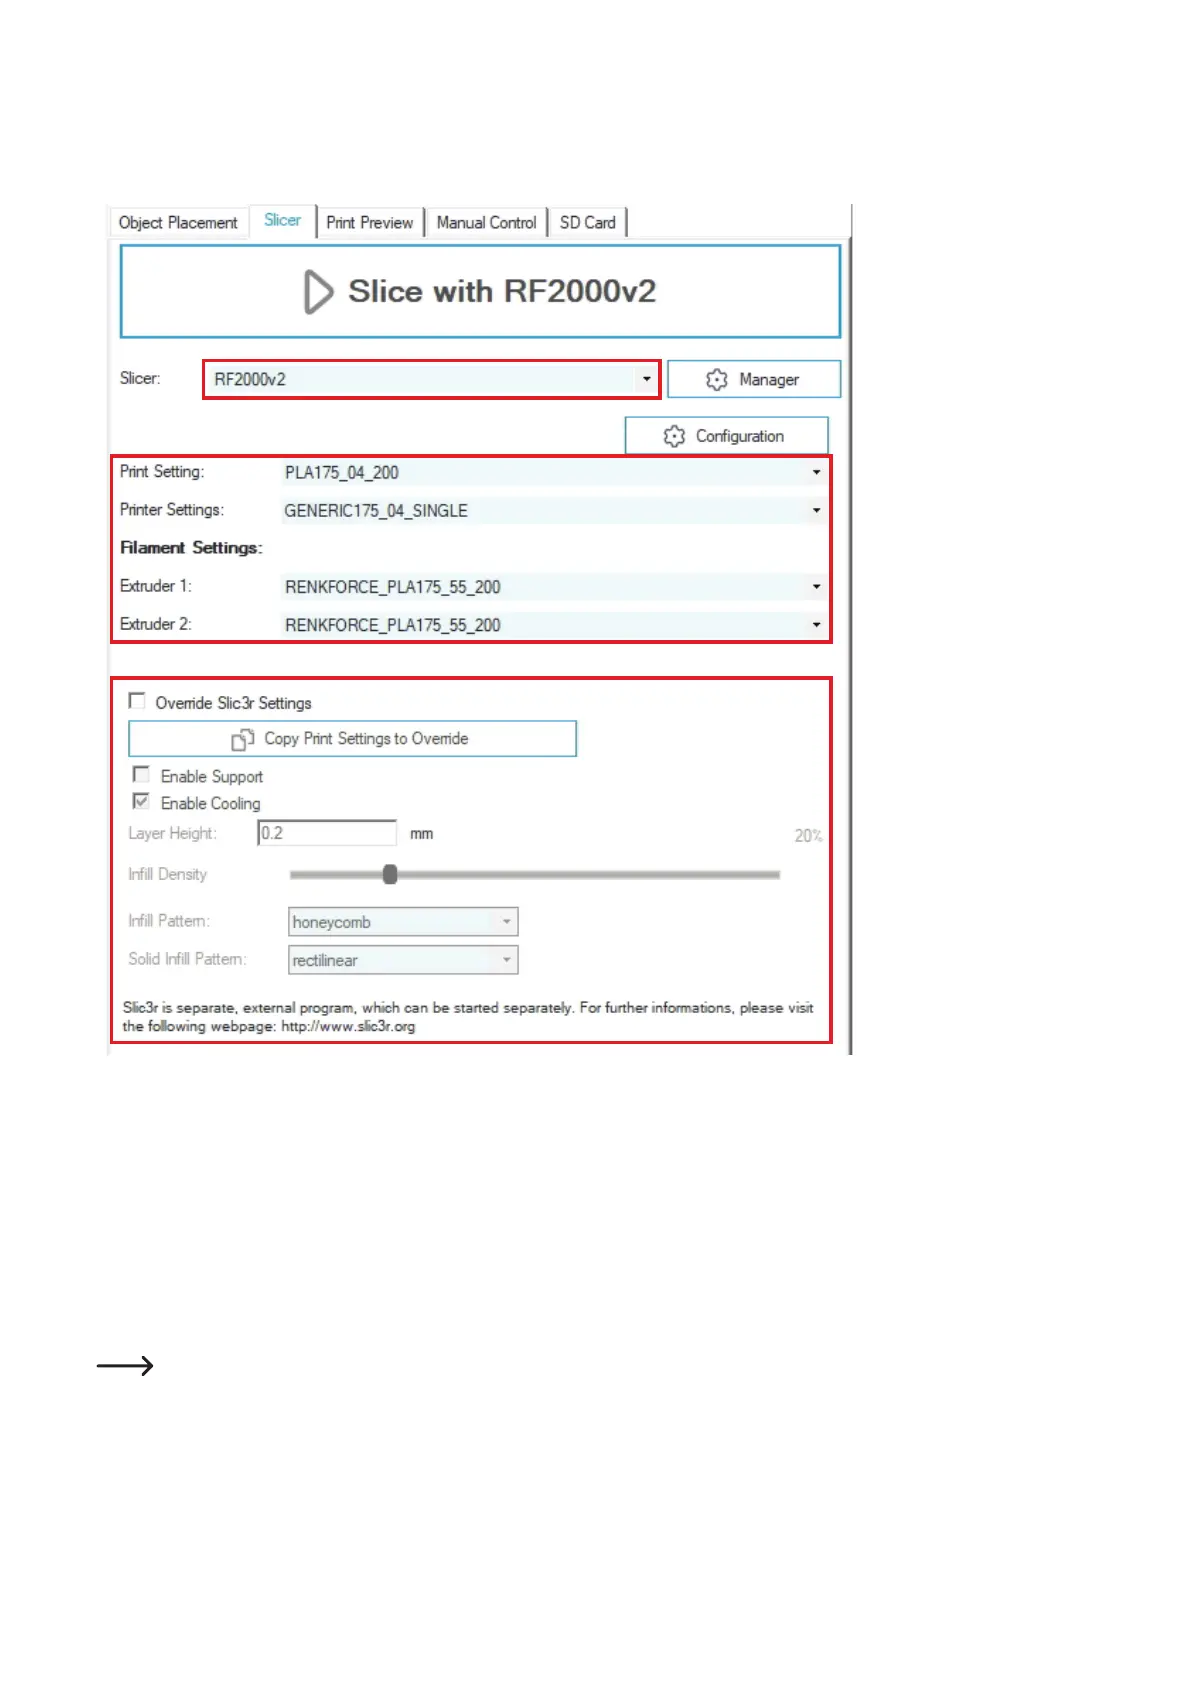
(1) Switch to the tab "Slicer" and select the slicer for your printer in the drop down menu "Slicer:". In our example, this would be the slicer
"RF2000v2". It does not matter whether you use the RF2000 v2 with single or dual extruder. It is always the same slicer, even if you want
to cut a single object with the dual extruder.
(2) Select suitable slicer settings for your print. Only such settings that are compatible with the printer chosen above appear here.
The settings are always marked with the following routine:
Print Setting (in the slicer settings "Print Settings")
Filament material_nozzle diameter_layer thickness_XXX
Example: PLA175_04_200 =
1.75 mm PLA_nozzle diameter 0.4 mm_layer thickness 200 µm (= 0.2 mm)
If something else is attached to the setting after the layer thickness (XXX), this is an additional feature. There are, e.g., the following
options for this:
"VASE"(iftheprintedobjectistobeopenontopandhollowinside);"FAST"(thisprintstheobjectmorequicklybutatlesserquality);
etc.
Yourselectioninthissettingdependsonthelamentmaterialused,thenozzlediameterofyourextruderandthedesiredlayerthick-
ness.
1
3
2
4