86
d) Correction of the printing plate temperature
Thermwaremakesitpossibletoadjustthetemperatureoftheprintingplate.Forthis,theactualtemperatureonthesurfacemustbemeasured
atdifferenttemperaturesettings.Themeasuredvaluesthenmustbeenteredinthermware.Thisway,theprintercanadjustthetemperature
automatically.
Beforestarting,checkifanewrmwareversionisavailable.Ifthisisthecase,downloadit,unpacktheZIParchiveandinstallthe
rmwareonyourprinter.Observechapter"20.FirmwareupdatewiththeArduino
TM
IDE".
• Thermwarehas6temperaturesdened:60,80,100,120,140,160°C.
• Firstset60°Cattheprinter.
When the temperature is reached, wait for at least another 10 minutes for the printing plate to be heated through entirely and the
temperature to stabilise.
• Thenmeasuretheprintingplatetemperatureindifferentlocations.
Do not touch the hot printing plate when measuring! Danger of burns!
Use a suitable meter. We recommend, e.g., a thermal imaging camera or a thermometer with surface sensor (NiCr-Ni or K-bead).
• Determinetheaverageofthedifferentmeasurements.
• Thenheatupto80°Candrepeatthis.Proceedinthesamemannerwiththeothertemperatures100,120,140and160°C.
• Whenyouhavedeterminedalltemperatures,openthermwareonyourcomputerasdescribedinchapter"20.Firmwareupdatewiththe
Arduino
TM
IDE".
• EnlargetheArduino
TM
program window on the entire screen.
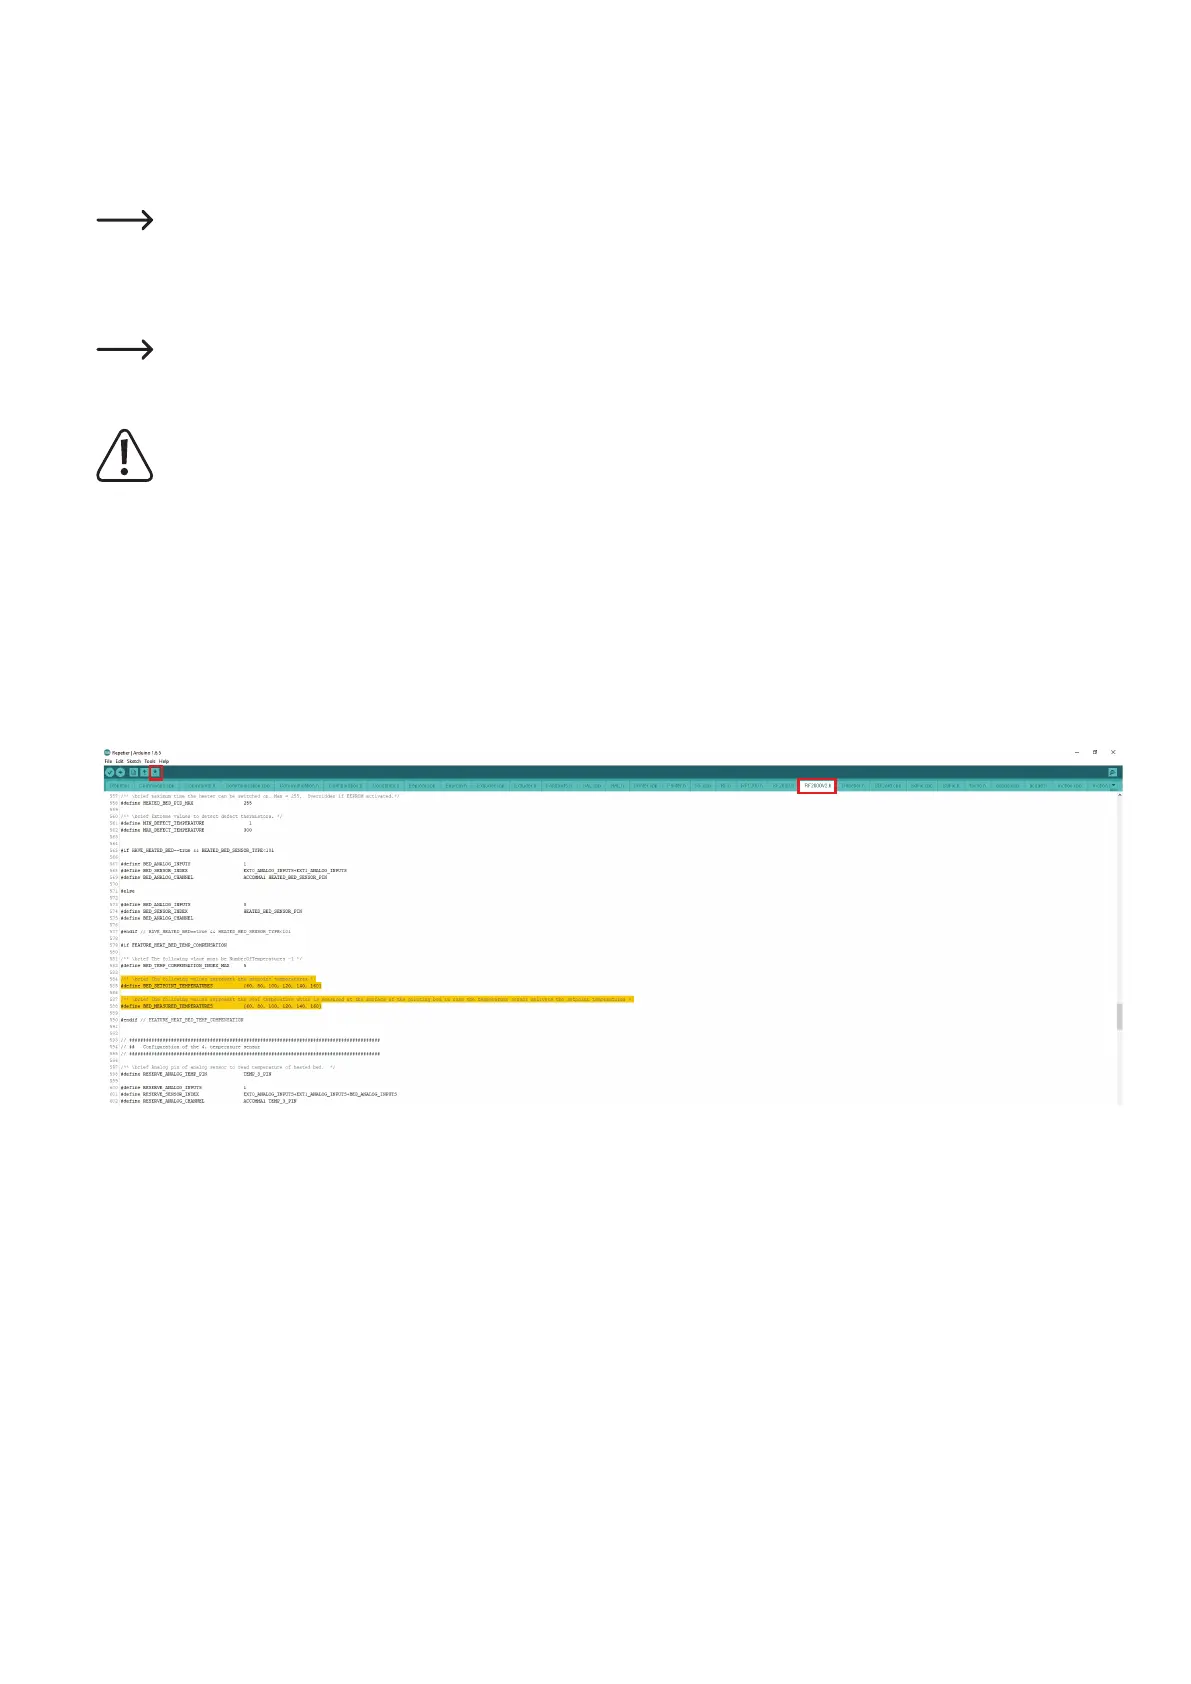
• Navigatetothetab"RF2000V2.h"(1inthegurebelow)andinitapproximatelytoline584(mayvaryslightlydependingonthermware).
• Theline"#deneBED_SETPOINT_TEMPERATURES {60,80,100,120,140,160}"(2)denesthetargettemperatures.
These are the temperatures that are set at printer. If everything is going optimally, they will also apply at the surface of the heating plate.
• Theline"#deneBED_MEASURED_TEMPERATURES{60,80,100,120,140,160}"(3)denesthemeasuredvalues.
• Enteryourmeasuredvaluesinthisline(3)orreplacetheexistingonesbytheonesyoumeasured.Thisway,theprinterknowsthat,e.g.,only
112 °C are present at the surface of the heating plate in spite of 120 °C being set, and can adjust the temperature accordingly.
The measured values can, of course, also be lower or higher.
• Whenyouhavechangedallvalues,clickthebuttonwiththearrowdowntosavethechanges(4).
• Thenyoumustuploadthechangedrmwaretotheprinter.Forthis,observeagainchapter"20.FirmwareupdatewiththeArduino
TM
IDE".
1
2
3
4