46
16. First print of an example object from the SD card
When heating, there may be slight development of smoke or steam. This is normal. Please ensure the corresponding ven-
tilation.
WhenprintingwithPLAlamentandanyproblemsoccurwithadhesionoftheprintedobjects,gluemaskingtapeora
slightly structured crepe tape to the printing plate. You can purchase a special adhesive tape that has been developed for
precisely this purpose. Alternatively, you can also use hair spray or a special glue stick.
YoucanndthenishedprintlesontheenclosedSDcardinthefolderPLA-GCODE.
Important!IfyouhavenoexperiencewithABSyet,weurgentlyrecommendprintingwithPLArstandtofamiliariseyour-
self with the settings that may lead to different results.
Before starting, update the enclosed memory card if you have not done so yet. On this, note the chapter "12. a) Download
andunpackingofthesoftware/rmwarepackage".
In our example, we print a single-coloured object in single extruder mode. This means that only the active extruder, which is usually the left one
(extruder 0), is used. If you want to print with the right extruder instead, select the item "Active Extruder" with the button OK in menu "Extruder"
toswitchtheactiveextruderfrom0to1.Accordingtoyourselection,alament,preferablyPLA,mustbeinsertedintheactiveextruder.
For owners of the single extruder printer, however, this selection is not needed.
Push the enclosed SD card into the SD card reader at the right of the 3D printer.
Important! The contacts of the memory card must point to the printer and upwards when inserting! When the cart is pushed
entirely into the slot, it will latch. Just push the card again for removal!
The card is detected automatically after plugging in. Before removal, switch to the main menu. Of course, you must not print from the
memory card right then.
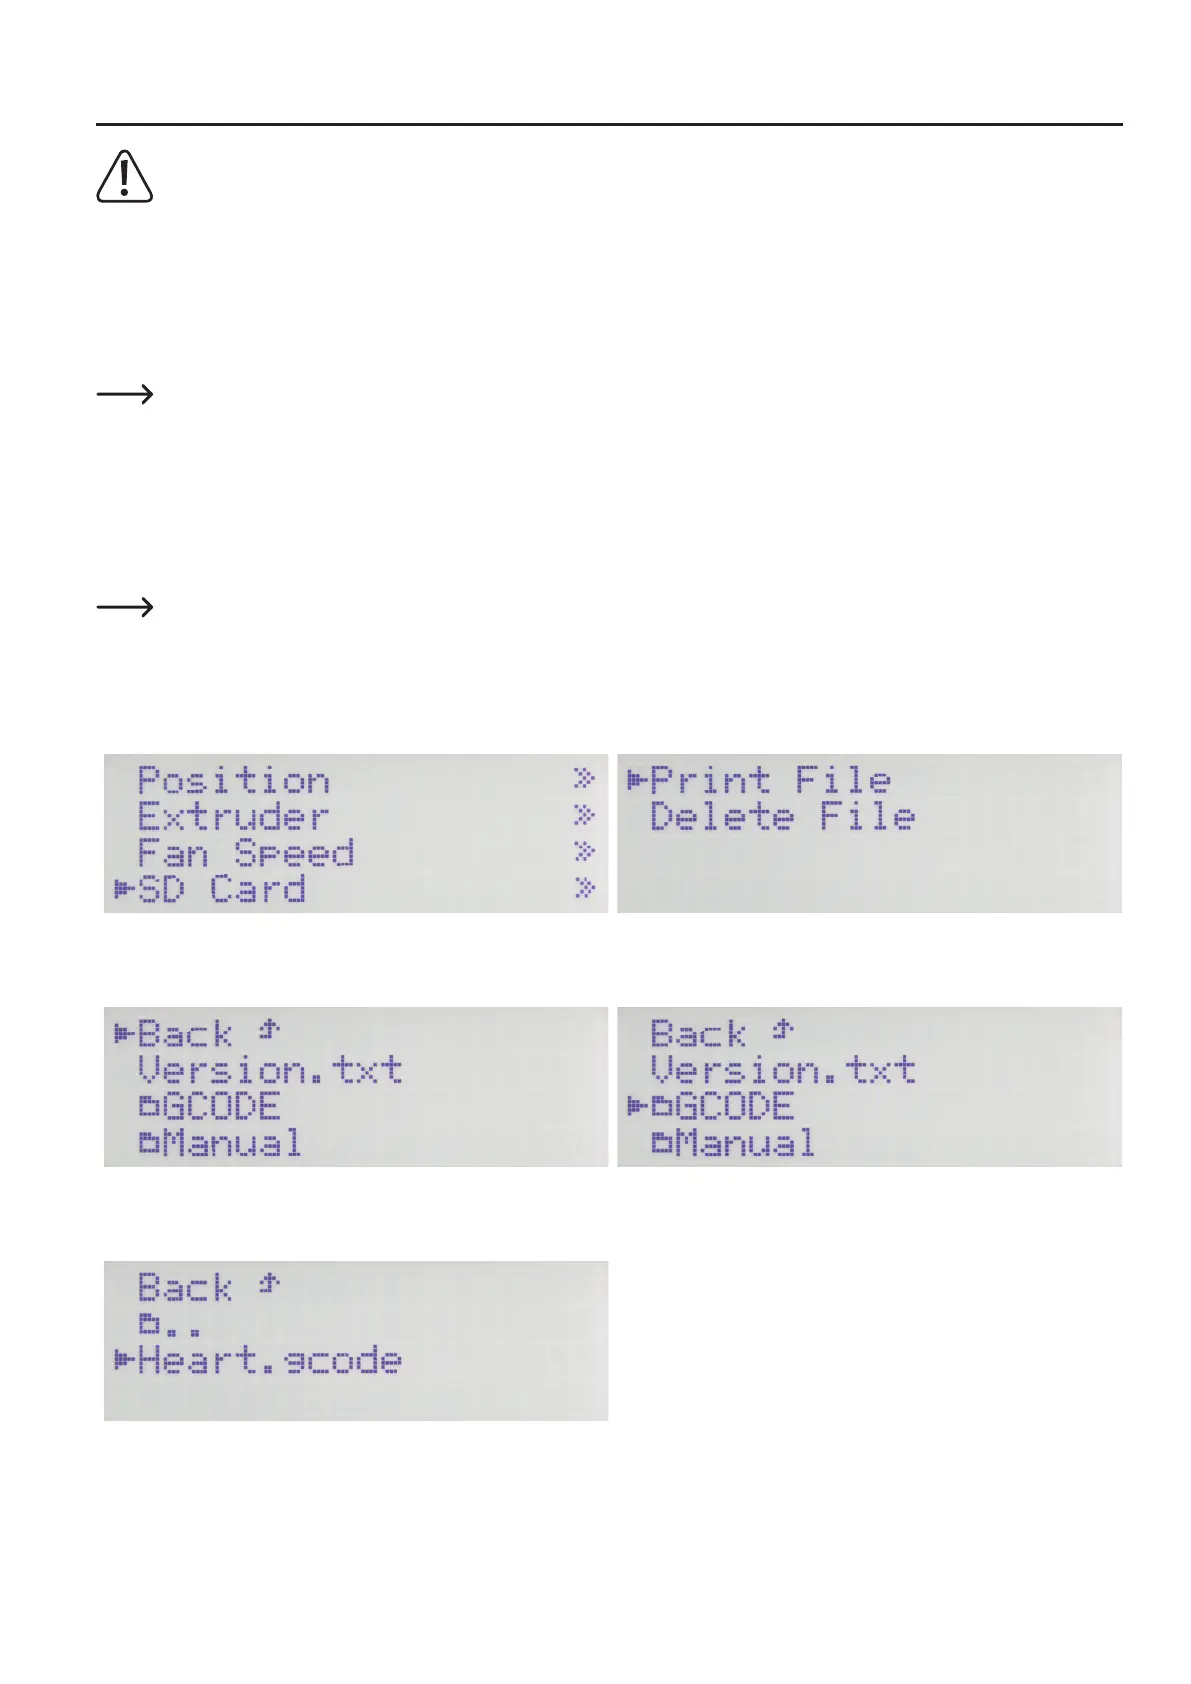
In the main display, push OK (2) and select "SD Card" with the direc-
tion buttons (1). Push OK again.
Select "Print File"andconrmwithOK.
Navigate to the folder "PLA-GCODE" in the folder structure of the SD
card with the direction buttons.
Push OK again.
Movetothele"Heart.gcode" with the direction buttons.
Push OK to start printing. The display switches back to the main
menu.