95
e) Nozzle change
Caution: Danger of burns. Do not directly touch the hot nozzle or the extruder.
• Toreplacetheextrudernozzle,theextrudermustrstbeheatedtoatemperaturesuitablefortheinsertedlamentmaterial.
• Whenthetemperatureisreached,removetheinsertedlamentmaterialasdescribedinchapter"15.c)Removingandchangingthela-
ment".
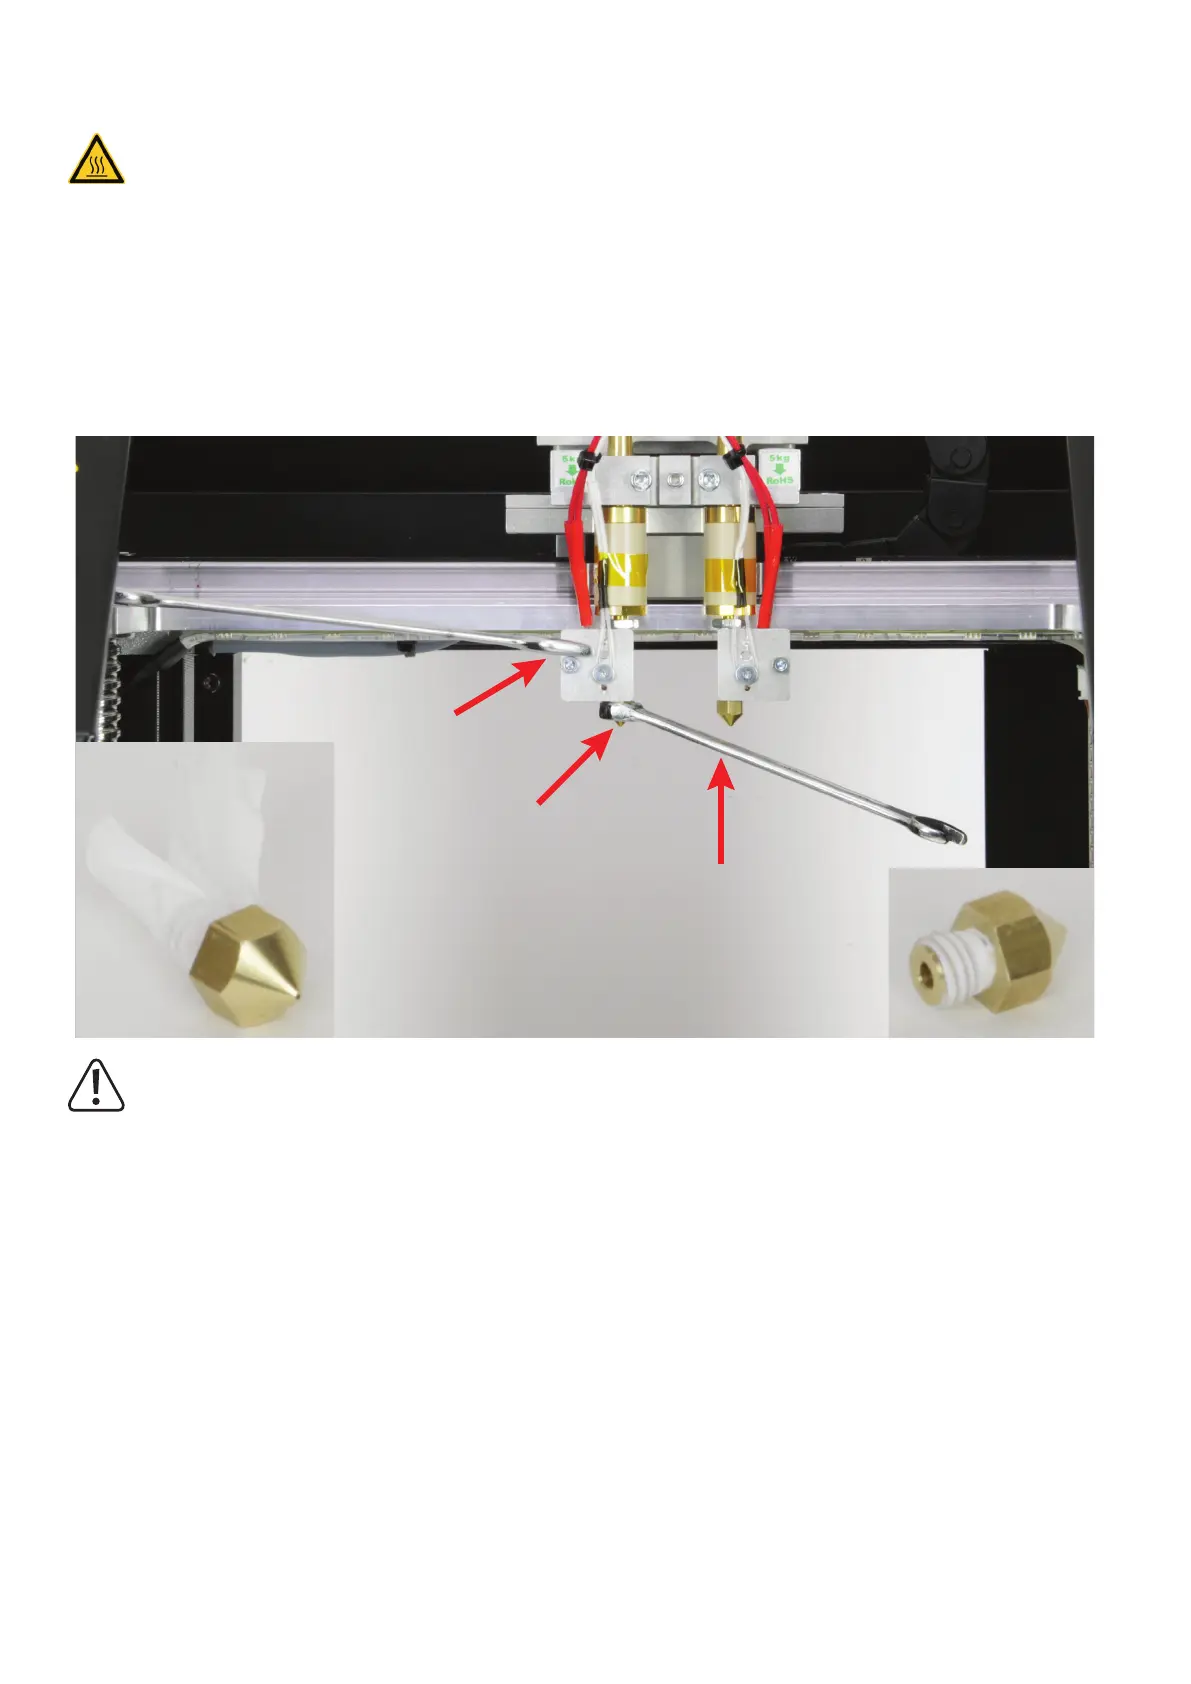
• Screwofftheextrudernozzle(1)fromtheextruderwithan8mmhexagonwrenchorringspanner(2).Alternatively,youcanalsousean8
mm hexagon socket wrench for this. This way, the nozzle cannot fall off.
When unscrewing the nozzle, always secure the extruder against twisting at the heating block with an 11 mm hexagon socket wrench (3).
Never damage the line for the temperature sensor. This may lead to short circuit otherwise. Loss of guarantee/warranty!
The extruder must not twist during nozzle change and the nozzle must never be turned when cold since the extruder may
otherwise be damaged and rendered useless.
• Ifnecessary,cleanthethreadoftheheatingblockcarefullywithtweezersoratpliers.
• ApplyPTFEsealingtapetothenewnozzle.Observethewindingdirectioninanycase!Thesealingtapemustrunwiththethread!Thismeans
that the end of the sealing tape on the outside must not oppose the turn-in direction. Otherwise, it may happen that the sealing tape is moved
when turning in and will not seal properly (see small picture on the left).
The sealing tape must never protrude beyond the thread. The sealing tape that protrudes beyond the thread, cut it off with a sharp knife.
Smooththesealingtapewellwithyourngers.Theridgesofthethreadmaybeslightlyvisible.Thisway,thenozzlecanbeturnedinmore
easily without the sealing tape becoming bunched up in the thread (see small picture on the right).
For this, observe chapter "13. b) Assembly of the extruder " in the assembly instructions of the RF2000 v2 construction kit.
• Screwthenewextrudernozzlecarefullyintotheheatingblockandtightenitagain(donotforgettosecuretheheatingblock!).Neverapply
any strong forces for this.
• Thenputinthelamentagainasdescribedinchapter"15.Inserting,removingandchangingthelament".
• Switchofftheextruderheatingagainandhavetheextrudercooloff.
1
2
3